Did you know that aura nails are one of the most viral trends in 2025 on Pinterest and TikTok nail trends? With their ethereal glow and dreamy color transitions, they have captured the imagination of beauty enthusiasts all over the globe.
Countless beauty-enthusiast are curious about aura nails – that dreamy, luminous treatment for nails that resembles something out of a fairytale. However, not many people who are passionate about beauty exceed the difficulty of obtaining mesmerising aura nails without running to the salon. The good news? You do not require professional equipment or long-standing nail art experience to come up with such an amazing effect.
Let’s find out a full guide of aura nails in this article, to give various methods applied i.e. airbrush method, sponge method, eyeshadow method, and so on. Do you want to try your hand at DIY projects or already have some experience in home repair? Here you will find tips, tools, and master tricks for perfect results. At the end, you will be ready to make your own nail art that is as good as those in salons.
Who will benefit from this article:
- Novice who are searching for an easy aura nail tutorial
- DIY beauty fans
- Nail artists seeking trend insights for 2025
This Is Why Aura Nails Are the Looking for 2025 Must Try!
Aura Nails first made sense in late 2023 after production of the mystical aura photography that captures the energy field that surrounds a person. Nail version imitates this other-worldly halo effect with soft, layered colors spreading from a central point. What started as a trend for niche-users has become a general trend thing, with the results of the “aura nails” searches having risen by 340% over the course of a year, since January 2025.
The trend has experienced an exponential growth on such social media as TikTok and Pinterest due to its versatility and photogeneity. Unlike with some nail trends for which you need to be a skilled professional, with the aura nails, you are afforded with a technique that is forgiving enough and easy to learn even for a beginner after some practice. The dreamy, cosmic effect looks good in pictures, hence ideal for sharing on social media.
What is most interesting is how this trend has closed gaps of generations. Though the millennials use them for their spiritual connections and Gen Z utilized aura nails for the Y2K aesthetic revival, even older generations enjoy the soft and beautiful looks of the nails. The trend ranges from unobtrusive, professional friendly to loud, interesting versions.
Have you used aura nails before, or this is the first time that you hear about it?
Here’s what you’ll have to do to do Aura Nails at home:
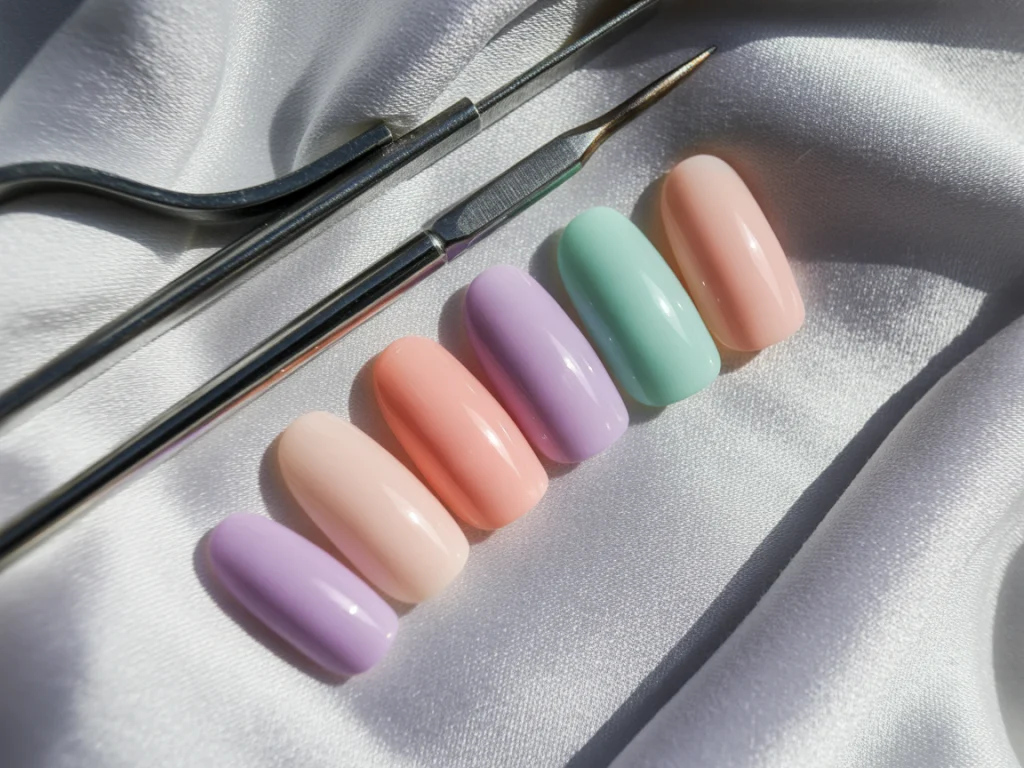
Basic Tools and Products
Before we move on to the methods, let’s collect all the tools we are going to use. The strength of aura nails lies in their pliability – you can make them with gel or normal polish, whichever one you desire and whatever is there to work with.
For starters, I would suggest you to begin with sponge method using normal nail polish because it is the easiest one to master. The route of the gel polish will give you more mileage and a shinier effect if you’re more experienced or if you prefer the longer lasting outcome.
The basic necessities for a perfect aura nail looks begs to comprise a high quality base coat for the natural nails and a top coat to seal and make them shiny. If gel polish is what you are using, you will also need a UV/LED lamp for the curing of each layer.
The main show-stopper is the “blooming gel” -special formula that will make colors blend effortlessly for that authentic aura look. No need to panic if you don’t have the blooming gel available. You can obtain similar results with other methods that we’re going to discuss.
Optional Creative Add-ons
After you have mastered the basic aura effect, you can take your nail art to a higher level using personalized additions. Chrome dust can give metallic effect to your aura nails to produce an ethereal shimmer. Little rhinestones that are carefully positioned into the middle of the aura form a focus and a sprinkle of fine glitter can be used to form stardust for a cosmic look.
For more intricate designs, using nail stencils will allow you to outline shape within your aura, small brush will help you draw dainty lines or patterns. These extras don’t necessarily need to be used to accomplish a beautiful aura effect, but they are interesting variations in the skills that you could experiment on.
Tools Checklist:
- Nail base & top coat
- Gel polish in 2–3 colors
- Makeup sponge
- Dotting tool or eyeshadow applicator
- UV/LED lamp (if using gel)
- Blooming gel or pigment powder
Step-by-Step Guide: How to Do Aura Nails at Home
Option 1 of using a makeup sponge.
The sponge technique is ideal for a new comer and people who are using regular polish. The spongey feel of the makeup sponge is responsible for that soft diffused look which is trademark of aura nails.
Begin by preparing your nails by using a base coat to create an even surface and safeguard your own nails. Then you will dry that, and then you’ll use a tiny piece of makeup sponge to dot on your choice of center color – this will be the centre of your aura. Focusing the color in the middle of the nail and using less product working towards the sides is the idea here.
Then blend the edges and edges met with the lighter shade, doing it in a circular motion to achieve that radiance look. There should be no sharp lines in the transition of the colors one to another. Finally, provide the cover of top coat to your creation adding shine and to protect your work.
Option 2 – Airbrush Method
In case you have access to a nail airbrush gun, this approach provides one with the most realistic aura effect with minimum effort. The fine mist creates an almost ethereal cloud-like result that is hard to get with other approaches.
In this method you will have to thin your polish a little bit so as to make it flow freely through the airbrush. Apply your base color and cure if using gel. Then, with your airbrush gun, add your aura color in a circular motion focussed on the center of the nail. As this is to create that soft diffused look, the pressure should be light.
Work in layers giving the color gradually than applying too much color at once. Once you get your desired effect, cure under your lamp (if using gel) and apply a top coat for long life and shine.
Option 3 – Eyeshadow Aura Effect
Don’t have specialized nail products? No problem! Using the make-up that you probably have at home, this method will make your nails gorgeous aura nails.
Apply a tiny bit of a light gel base or clear polish that still has it tackiness. Pack a little dab of the eyeshadow pigment while it is still wet, applying it with a small eyeliner brush or a sponge tip, into the center of the nail. The pigment will stick to the tacky base resulting in a color point that is concentrated.
With a clean brush or sponge, but softly, blend the pigment outward in circular movements. It’s all about low pressure thus producing a gradual fade. Various eyeshadow finishes have their own effects, shimmer shadows also have a sparkly trait while matte spectrum ones are less subtle.
Lock everything in by doing a top coat (apply carefully without messing up with your design). With gel, cure before applying the top coat; seal after making sure the eyeshadow is set with regular polish.
Steps for Sponge Method:
- Apply base coat and cure
- Choose a central “aura” color
- Dab with sponge at nail center
- Soften edges using circular motion
- Cure and apply top coat
These techniques include sponge, airbrush, and eyeshadow, which of these would you try first?
Tips and Tricks on How you Can Achieve Perfect Aura Nails.
In order to achieve the amazing nails with aura, it is essential to pay attention to the smallest details. First, pay attention to the way the colors you have chosen interact with your tone of skin. Warm skin tones are often match made in heaven with peach, coral or gold-based auras, whereas cooler skin tones could pull off lavender, blue or silver tones like a pro. Of course, these are just guidelines – the best aura colours are the ones that you are happy with!
When applying the aura effect, less is more. Just a little pressure to get that softly diffused glow when blending. If you press too deep, particularly with the use of sponge method, you are bound to end up with ungentle lines rather than the beautiful fade characteristic of aura nails.
Not confident in your skills yet? Practice on press on nails, or nail tips, before you do your actual nails. This adds a certain degree of freedom to experiment and not worry about getting it right the first time for your own nails.
Clean your sponge or brush after every use – or even better, use disposable ones. This stops color contamination and guarantees that your aura has clear color transitions and not blurry blends.
Curious about the amount of time aura nails actually last?
How long do aura nails last? Rayed Nail types that are not situated too far on the fingertips remain the most favored ones in the aura variety of nails, either because of their durability or discerning clients. (And How to Make Them Last Longer)
Your aura nail durability is majorly dependent on the nails products and maintenance done on them. With proper polish, you can expect your aura nails to last for 5-7 days on average before you will start seeing signs of wear, especially at the tips where chipping most often starts.
Gel polish also greatly protects your aura nails by providing 10-14 days of chips-free wearing for most people. UV curing makes the polish adhere better on your nail giving it long lasting durability.
In order to increase the time you will enjoy wearing your aura nails, you should wrap the free edge of your nail with the top coat to ensure the design does not allow water to infiltrate underneath. Don’t use your nails to open soda cans and other stuff and apply cuticle oil daily to keep the surrounding skin healthy and prevent the nail from lifting.
The exposure of harsh chemicals seriously reduces any nail arts wear time such as aura nails. Use gloves while cleaning or washing dishes and whenever it is possible try not to use high alcohol content hand sanitizers.
For ultimate protection, if you are looking for longevity, use a top coat with quality and for longevity purposes. Such brands as Seche Vite, Essie Gel Setter, CND Super Shiney guarantee fantastic shine and protection for regular polish and Gelish Top It off and Young Nails Caption top coat are perfect for gel systems.
Latest News: Aura Nails Trends in 2025
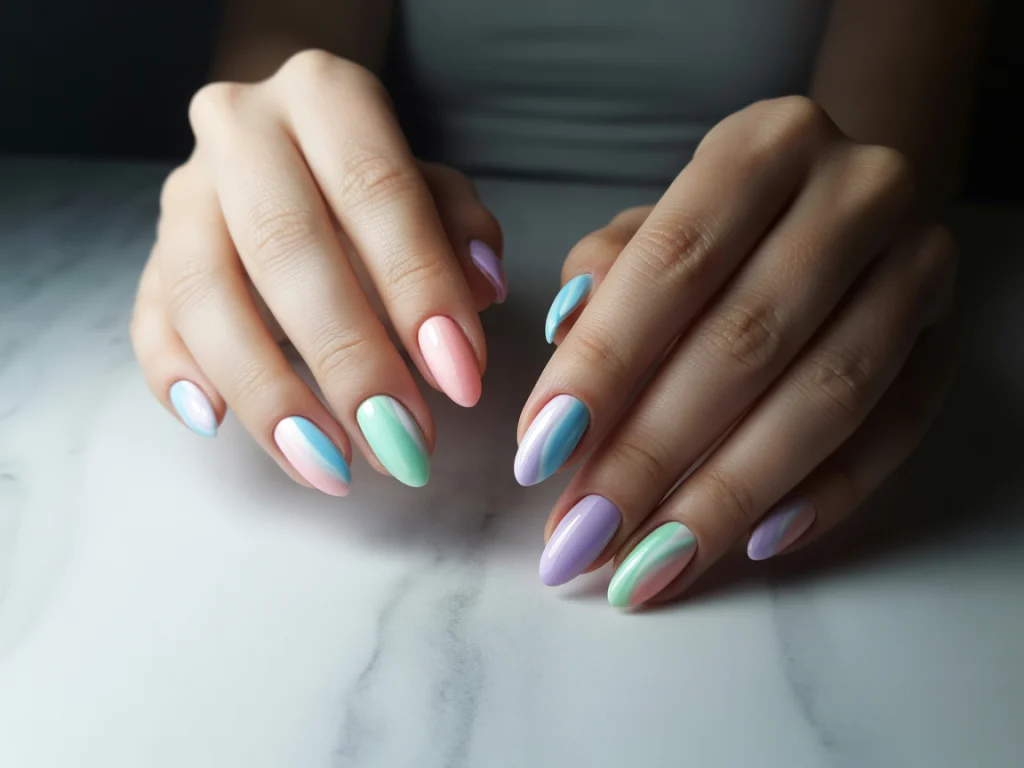
Throughout 2025, the trends of aura nails have changed with a bang in color combinations and procedures. This season’s most popular pairings are “Cosmic Lavender” (a purple color that fades to blue), “Sunset Glow” (reddish hue that blends into pink), and “Ocean Aura” (teal in the center with a white finish).
The celebrities have adopted the trend in their own ways. Deep purple aura nails that turn black are a new style watched on pop sensation Olivia Rodrigo. At the same time, actress Zendaya caused a deserved buzz with her “Golden Hour” aura nails, yellow at the center and reaching soft, peachy ends.
Seasonal variations have become a refreshing version of the aura effect. Spring has embraced soft pink and mint combinations as pastel auras, while summer offers extreme vivacious hues such as electric blue that fades to neon yellow. Looking into this fall, richer jewel tones such as burgundy centers fading to gold should be expected.
Common Mistakes to Avoid
-
- Skipping base coat: This is an important step when it comes to ensuring there is no staining of the surface and smoothening the canvas for your aura effect. In its absence, colors may not be evenly applied and peel quickly.
- Over blending the color of aura – if you blend too much, you do not achieve that distinctness of the center glow that is characteristic to aura nails. The center should remain more concentrated than the edges.
- Failure to cure correctly under the lamp – Poor curing time creates sticky surfaces and early peeling off. Follow the manufacturer’s recommendations for your specific gel polish.
Using too many pigments – Aura effects do not require much pigment. Product that is overdone gives a bumpy texture and might be difficult to blend.
- Using top coat prior to pigment setting – this is a common error that will result in the colors running and blurring. Be patient and your design should be set before sealing.
- A single adjustment – either choosing to cure longer or change your brushes – will give you an aura times stronger.
Summary – Things To Remember Before Trying Aura Nails
Before you go ahead and make your own aura nails, here are the key takeaways to be mindful of. First, select the technique that corresponds to your level of skills. Newcomers should use the sponge method, while experienced players could enjoy the airbrush precision or the potential of eyeshadow pigments.
Enjoy the blending process; this nail art style is not one to be rushed. Creating the ethereal diffused effect that is characteristic for aura nails takes time and a light touch. To produce the most beautiful, work in thin layers and build up.
Quality tools significantly impact on your result. Purchase a good quality sponge that has small perforation on it for more accurate application and select creamy polish that comes together easily. It is the same with pigments – finely grounded eyeshadows perform the function better than the chunky ones.
Always seal your creation using a heavy breathing top coat and ensure you do that with maximum care without spoiling your design. This last step not only gives your aura nails beautiful shine, but they also last much longer.
Remember that practice leads to perfection. The first try may hardly look salon-quality and that is absolutely normal. With every attempt, you will acquire more control and cultivate your own trademark approach.
What’s Your Favorite Aura Style?
Which aura nail method would you try first?
- Sponge
- Airbrush
- Eyeshadow
- I want to learn all!
Show us your results via Instagram and don’t forget to tag us in your aura nails!
The aura nails deserve the place among the trendiest DIYs in 2025, where they should be. With their dreamy ethereal quality, the aura gives magic to your everyday appearance, and the variety of styles ensures that everyone will find the one that suits them. Whatever your taste whether sober, workplace fashionable or wild and colourful, the aura can be altered to fit your personal look.
The best part? At home, you can build up beautiful aura nails with common household equipment such as makeup sponge, airbrush, etc., or even eyeshadow. Every technique has its merits, so you are free to opt for the approach that will be most suitable for your skill level and supplies available.
Keep in mind that the secret of achieving perfect aura nails is the blending technique and choosing the best top coat for your design. It requires a little practice and a lot of patience but in no time you will be doing aura nails that look like they belong in a salon and get compliments everywhere you go.
Therefore, which nail technique with aura are you interested to try first? Drop your thoughts in the comments below!