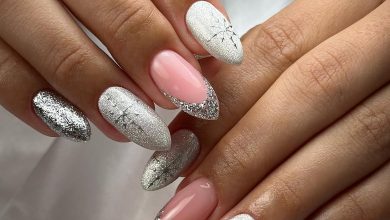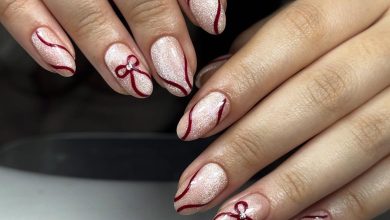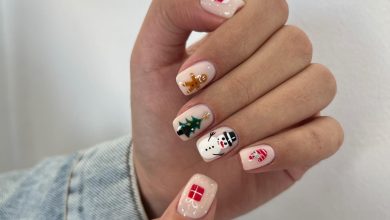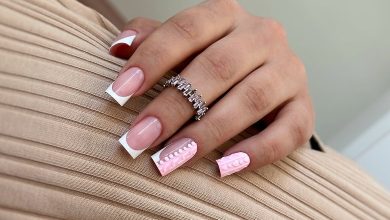
The holiday season is just around the corner, and what better way to get into the festive spirit than with stunning nail art? Christmas lights nail art for 2026 is all about playful designs, intricate details, and a touch of sparkle that’ll make your fingertips shine brighter than any star. From classic twinkling bulbs to unique, themed interpretations, we’ve gathered 23 fabulous ideas to inspire your next manicure. Get ready to embrace the cheer and show off your holiday style right down to your nails!
1. Sparkly Christmas Lights French Tip Nails
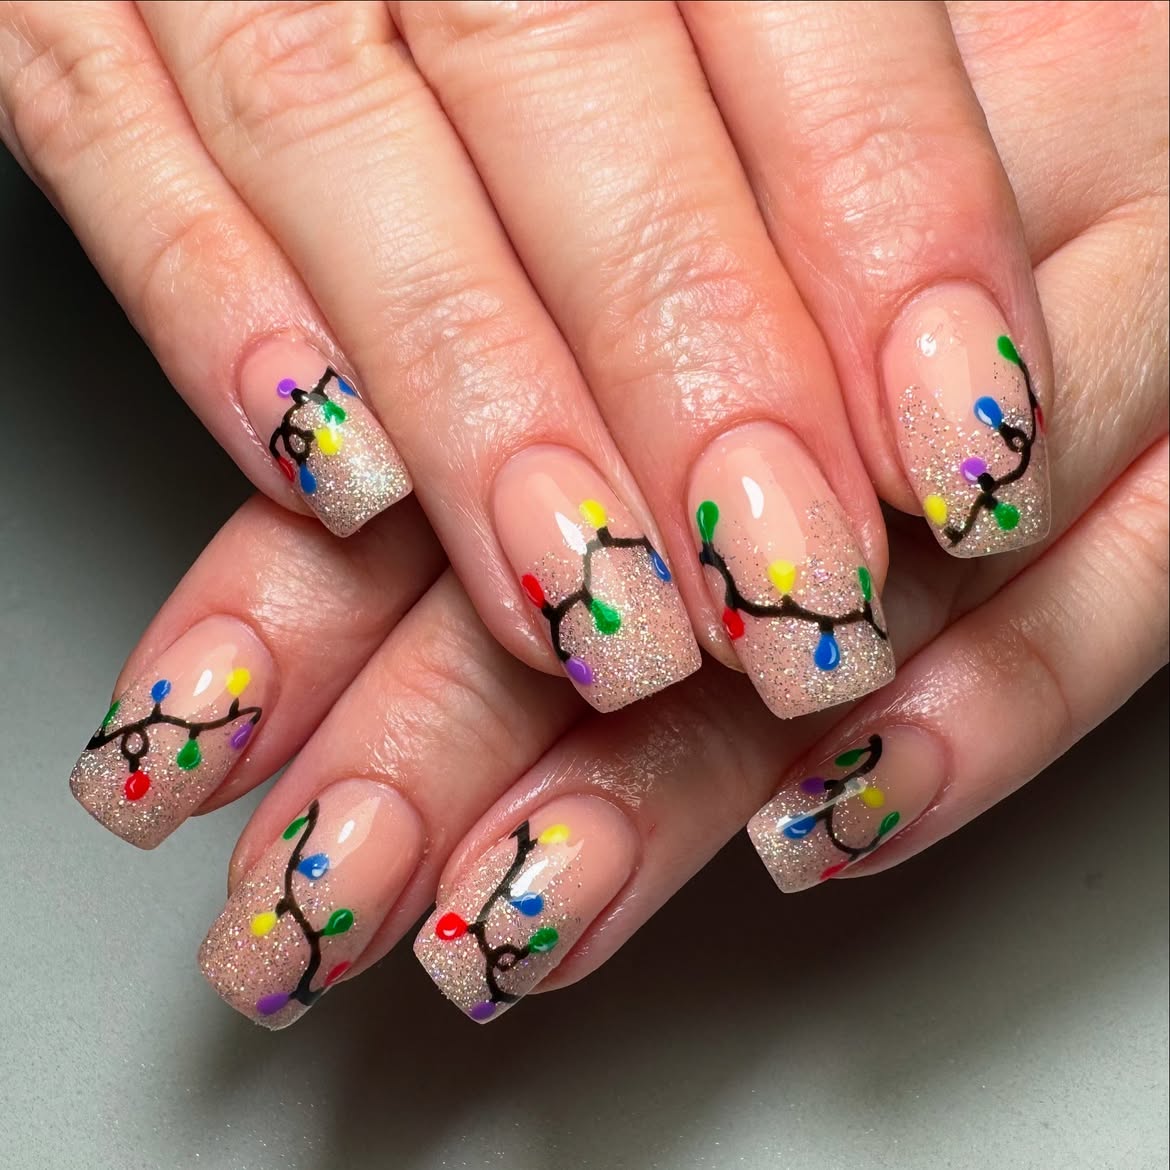
Embrace the season’s sparkle with these dazzling French tip nails, featuring miniature, colorful light bulbs. This sophisticated yet playful look reimagines the classic French manicure by swapping the traditional white tip for a vibrant string of hand-painted lights, making your fingertips twinkle. The beauty of this Christmas lights nail look lies in its ability to blend elegance with festive cheer, offering a refreshing design that’s perfect for holiday parties or cozy nights by the fire. It’s truly a sparkling piece of art that will turn heads.
⚠️ Common Concerns
To achieve this festive glam, start with a neutral or sheer base coat to create a clean canvas. For the French tips, apply a thin line of glitter polish, either silver or gold, to define the tip. Next, carefully use a fine-tipped nail art brush to paint tiny, colorful dots along the glitter line, representing the light bulbs. For extra dimension, you can add a small white dot on top of each colored bulb to mimic a reflection. Finish with a high-shine top coat to seal in your masterpiece and ensure longevity. If you prefer a longer nail, check out our stiletto version in Idea 8!
2. Vintage Christmas Light Bulb Almond Nails
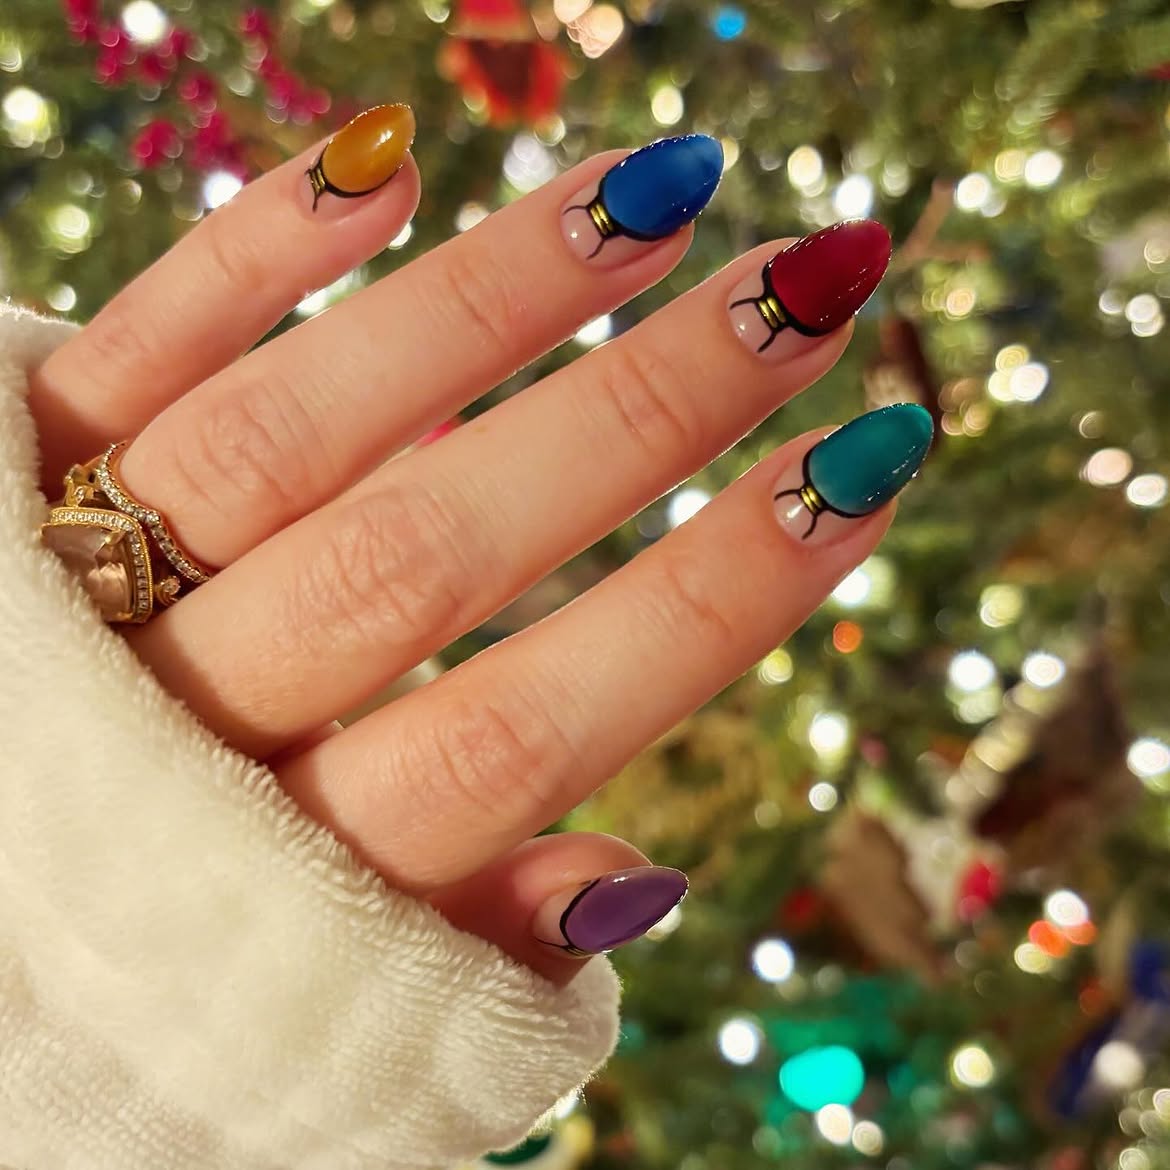
Step back in time with a manicure that pays homage to classic holiday decorations. These almond-shaped nails feature an array of vintage-inspired light bulbs, complete with their distinct retro shapes and soft, glowing effect. It’s one of those beautiful ideas that perfectly captures nostalgic holiday charm without being overtly childish. The jelly finish over the bulbs gives them a unique, almost glass-like quality, adding depth and a touch of old-school glamour to your festive look. This style is an excellent choice for those who appreciate unique art designs with a story.
📐 Color Math
For this vintage aesthetic, begin with a sheer, milky white or nude base on your almond-shaped nails. Using opaque, richly colored polishes (think deep reds, forest greens, golden yellows, and true blues), paint various light bulb shapes. You can add a thin black line for the ‘filament’ connection. For the jelly effect, mix a tiny drop of your chosen color with clear polish before applying over the painted bulbs. Seal everything with a high-gloss top coat. To make your nail art pop, here are some vintage-inspired color combos:
- Deep Cranberry & Forest Green
- Burnt Orange & Mustard Yellow
- Teal & Rose Gold
If you’re looking for something more overtly playful, jump to Idea 6 for some whimsical options!
3. Festive Christmas Lights Oval Nails
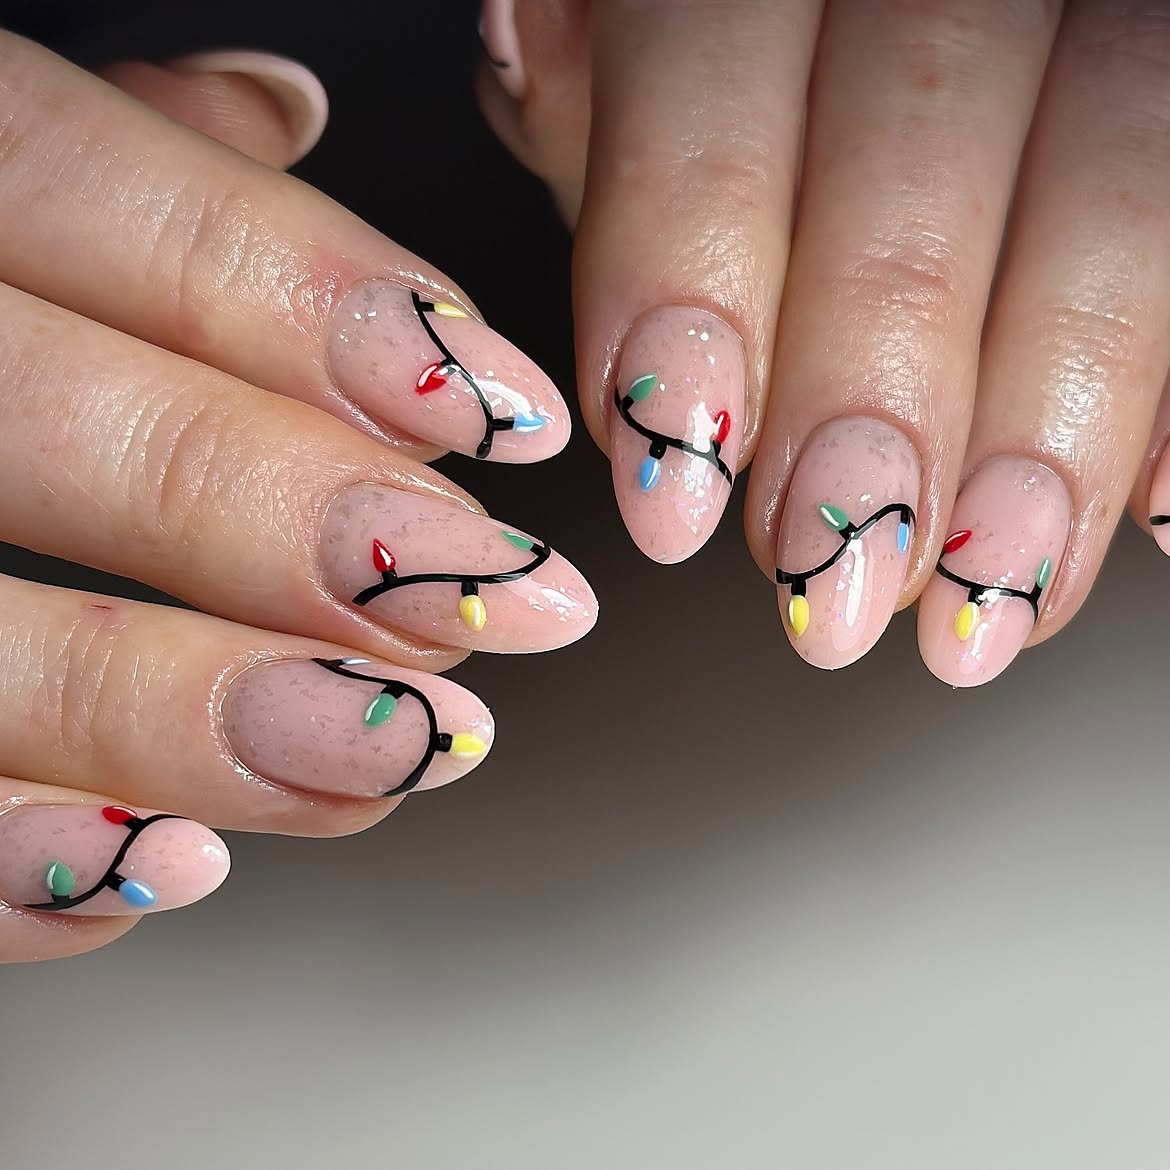
Sometimes, less is more, especially when it comes to holiday nail art. This elegant oval nail look embraces a minimalist approach, featuring delicate strings of lights gracefully adorning a sheer pink base. The subtle placement of miniature light bulbs adds a touch of festive cheer without overwhelming the natural beauty of your nails. It’s a truly simple yet stunning design that proves you don’t need elaborate details to make a statement during the holidays. This style is perfect for those who love understated sophistication with a hint of seasonal magic.
✅ Before You Start
To achieve this effortlessly chic look, start with well-prepped oval nails and apply a sheer, barely-there pink polish as your base. Once dry, use a very fine detail brush and black or dark gray polish to create delicate, winding lines across a few nails—these will be your light strings. Then, with a different fine brush, dot small, brightly colored polishes along the lines to represent the bulbs. Remember to keep the dots tiny and evenly spaced for a refined finish. A high-gloss top coat will enhance the subtle sparkle and protect your beautiful, understated holiday manicure. For more straightforward styles, also check out Idea 6!
4. Gingerbread Christmas French Tip Almond Nails
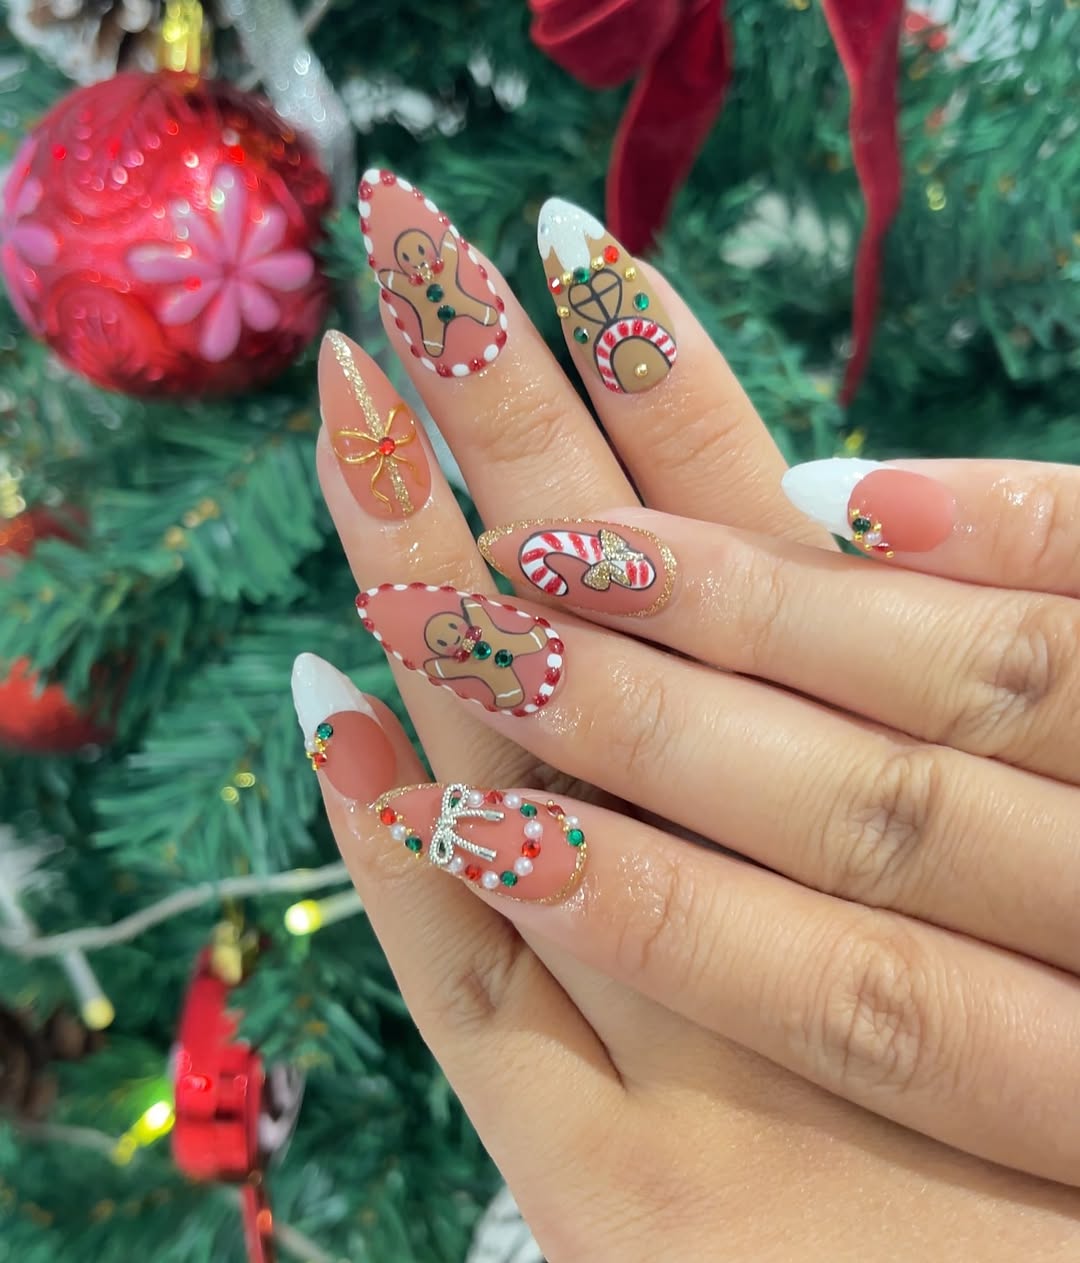
Infuse your holiday manicure with the sweet charm of gingerbread and candy canes, giving your French tips a deliciously festive upgrade. This unique almond-shaped design combines the classic elegance of French tips with whimsical elements, creating a truly enchanting holiday look. Imagine tiny gingerbread men peeking over your tips, alongside candy cane stripes, all perfectly complementing a warm, cozy palette. This creative art style adds a playful yet chic touch, making your nails a conversation starter at any holiday gathering, perfect even for short nails that still want to make a big impact.
🔧 How-To Brief
To create this delectable design, prepare your almond-shaped nails with a clear or nude base. For the French tip, you can use a warm, opaque white or a light brown to mimic gingerbread. On accent nails, meticulously paint gingerbread men or candy cane stripes using a thin brush. For an extra festive touch, consider adding small nail charms, like tiny bows or snowflakes, with nail glue before sealing everything with a durable top coat. If you love unique French tip variations, don’t miss Idea 7 for some rhinestone glam!
5. Festive Christmas Light Bulb Almond Nails
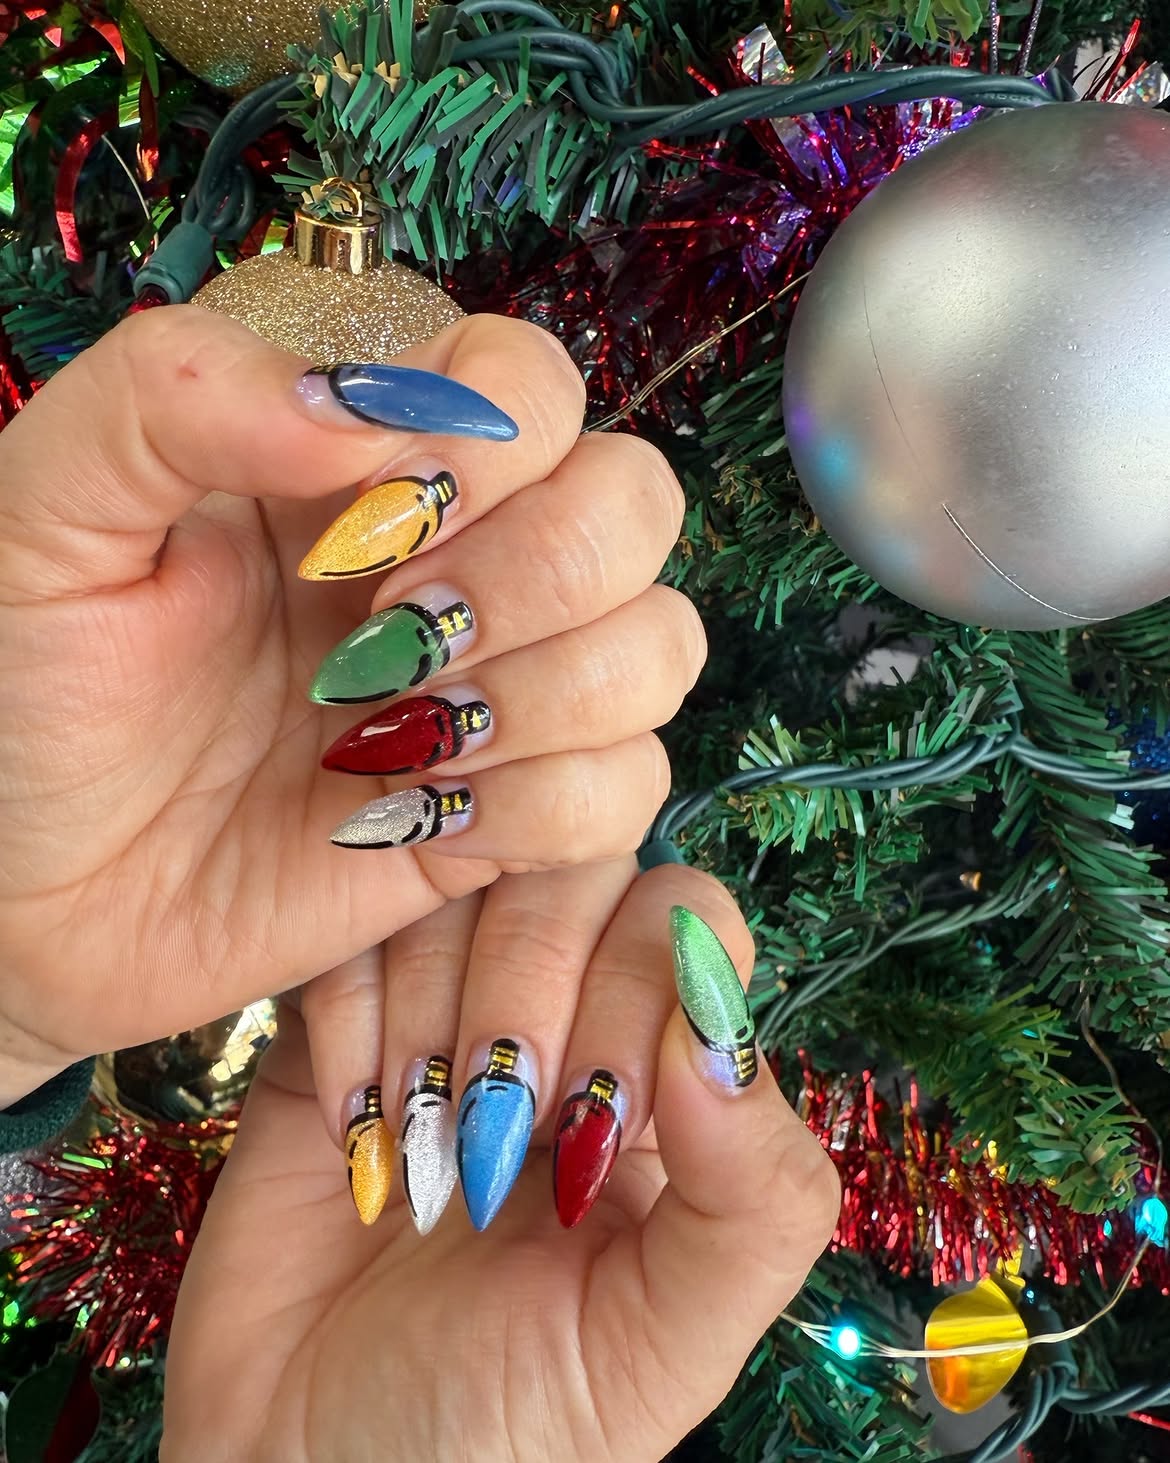
Dazzle this holiday season with almond-shaped nails showcasing vibrant, hand-painted Christmas light bulbs against a chic, glossy backdrop. This look takes a playful motif and elevates it into a glamorous statement, proving that holiday cheer can be utterly sophisticated. Each individual bulb is meticulously crafted, appearing almost three-dimensional thanks to thoughtful detailing and a high-shine finish. It’s one of those brilliant ideas for a manicure that truly captures the essence of the season, making your Christmas light nails shine with a festive glow that’s both fun and elegant.
🔥 Trending Context
Achieving this glossy, vibrant look starts with a perfectly prepped almond shape and a clear or sheer base. Using a fine detail brush, paint the bulb shapes in your preferred holiday colors (red, green, blue, or yellow). For that extra pop, add a tiny white dot on each bulb to simulate a light reflection. Once dry, encapsulate the entire design with a thick, high-gloss top coat to create that stunning, glass-like finish. To ensure your festive manicure stays flawless and chip-free throughout all your holiday gatherings, remember these steps:
- Prep nails thoroughly by cleaning and buffing.
- Use a high-quality base coat.
- Apply thin, even coats of polish.
- Always cap the free edge of your nail.
- Reapply top coat every 2-3 days for extra protection.
For more sparkling options, be sure to check out Idea 9!
6. Playful Christmas Lights Round Tip Nails
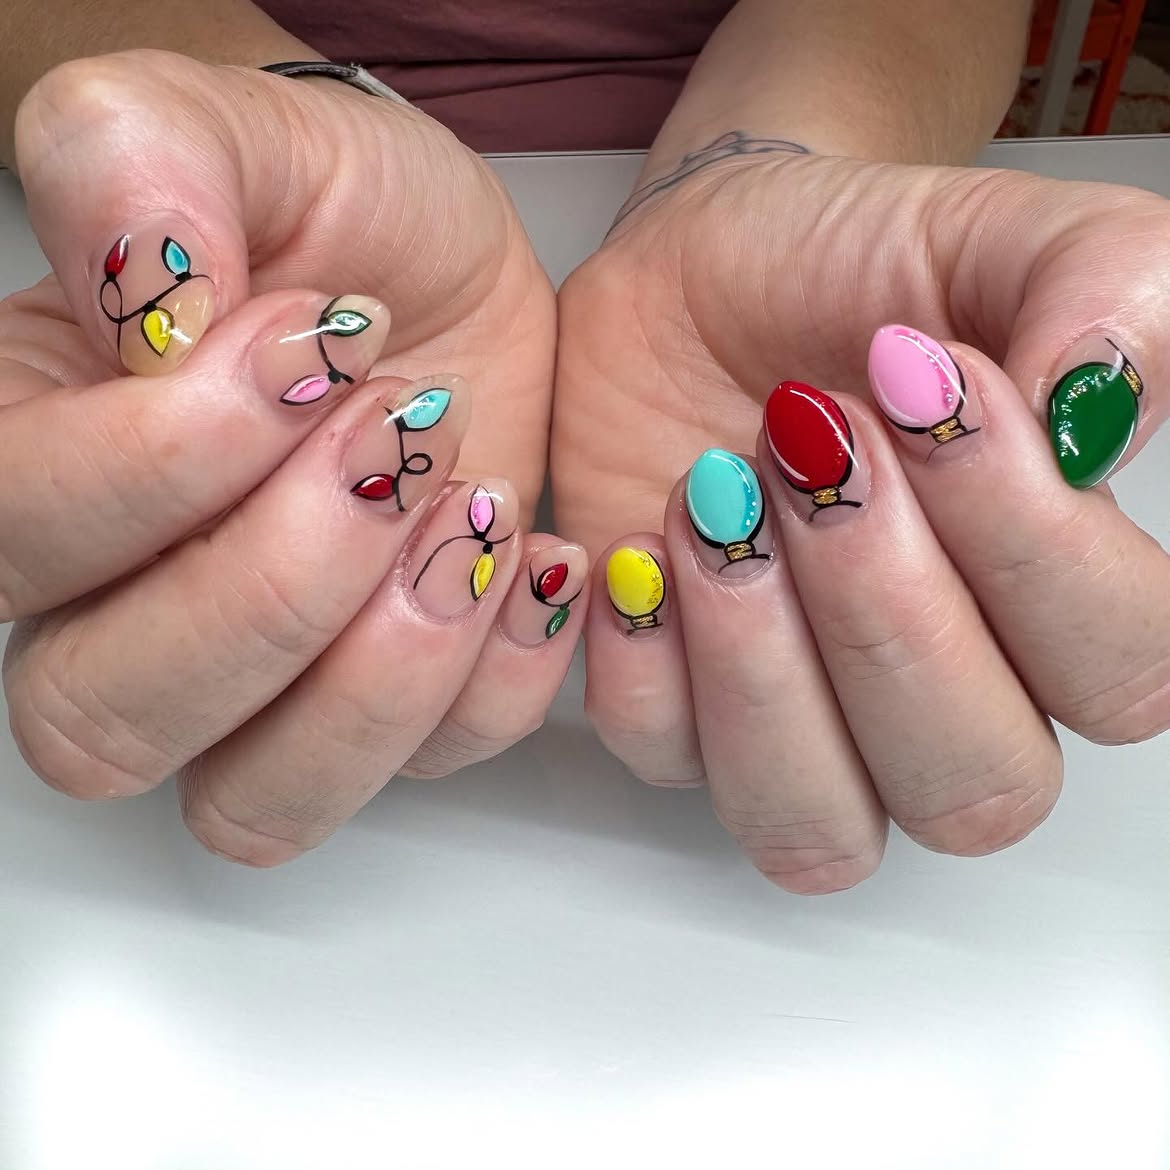
Inject some serious fun into your holiday manicure with these playful Christmas lights on round-tipped nails. Featuring a crystal-clear base that makes the colorful bulbs truly pop, this design is all about embracing whimsical charm. Each light is hand-painted with vibrant, glossy colors, strung together like a tiny festive garland dancing across your fingertips. It’s a wonderfully simple and cheerful look that’s perfect for anyone who loves to express their holiday spirit with a touch of lightheartedness. These art designs are guaranteed to bring a smile, whether you’re decorating the tree or enjoying a festive hot chocolate.
🎯 Who It Suits
To create this clear-base, playful design, ensure your round-tipped nails are perfectly clean and buffed before applying a clear base coat. Once dry, use a very fine nail art brush and your favorite bright polishes (think neon greens, electric blues, sunny yellows, and fiery reds) to draw small, elongated oval shapes for the light bulbs. Connect them with thin black or dark gray lines. The key is precision in painting the bulbs and ensuring they are spaced evenly. Finish with a generous layer of high-gloss top coat to enhance the vibrancy and give that desirable ‘wet’ look. For other minimalist yet cheerful designs, peek at Idea 3.
7. Festive French Tips With Rhinestone Wreaths
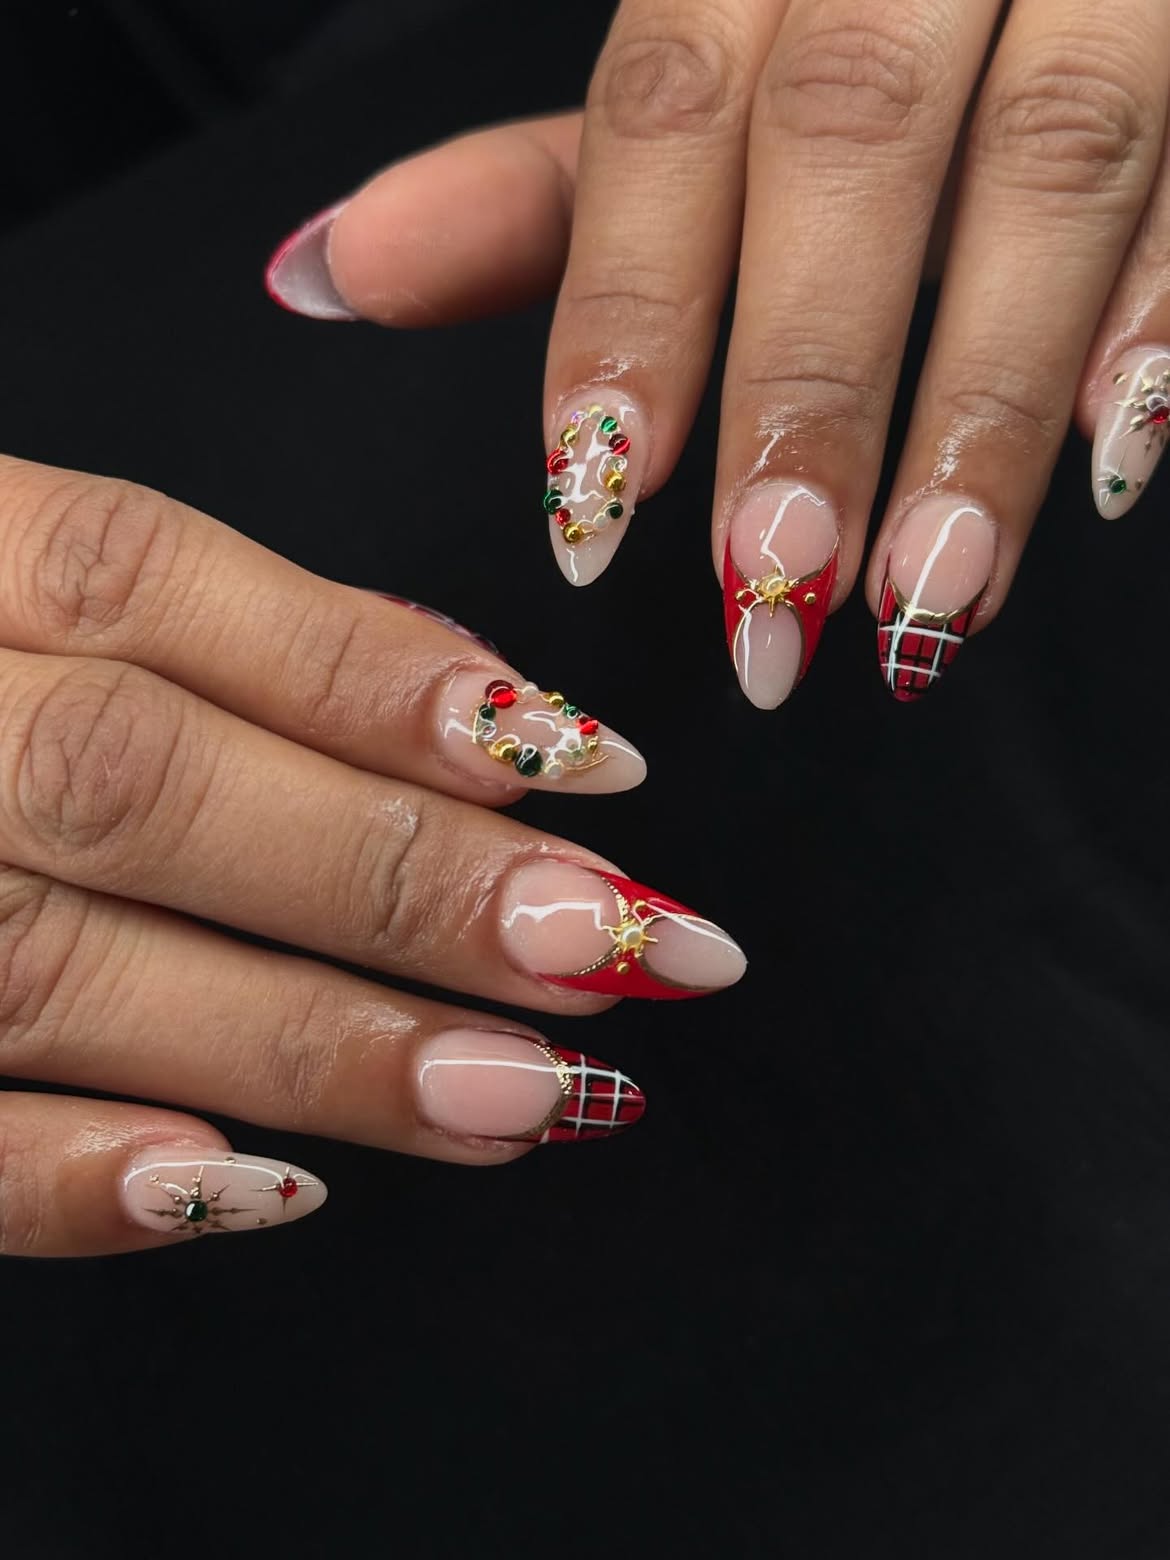
Elevate your festive manicure with French tips adorned with delicate rhinestone wreaths, creating a look that screams holiday glam. This sophisticated design incorporates miniature, sparkling wreaths crafted from tiny rhinestones, strategically placed on accent nails or just above the French tip line. The inclusion of subtle gold charms and a Christmas plaid accent nail adds layers of texture and visual interest, making this almond-shaped style truly stand out. It’s a luxurious and elegant way to incorporate the festive spirit, with the added sparkle of 3D elements catching the light beautifully.
📏 Occasion Fit
For this dazzling holiday look, start with perfectly shaped almond nails and a classic French tip application. For the rhinestone wreaths, carefully arrange tiny green or clear rhinestones in a circular pattern on an accent nail, securing them with nail glue or a strong top coat. You can add a tiny red bow charm in the center for an extra touch of festivity. On another accent nail, apply a Christmas-themed plaid pattern using fine brushes. Ensure all charms and rhinestones are fully secured with a generous layer of high-quality top coat to prevent snagging. If you’re looking for more glam options, Idea 9 also offers a gorgeous sparkly tip!
8. Christmas Lights French Tip Stiletto Nails
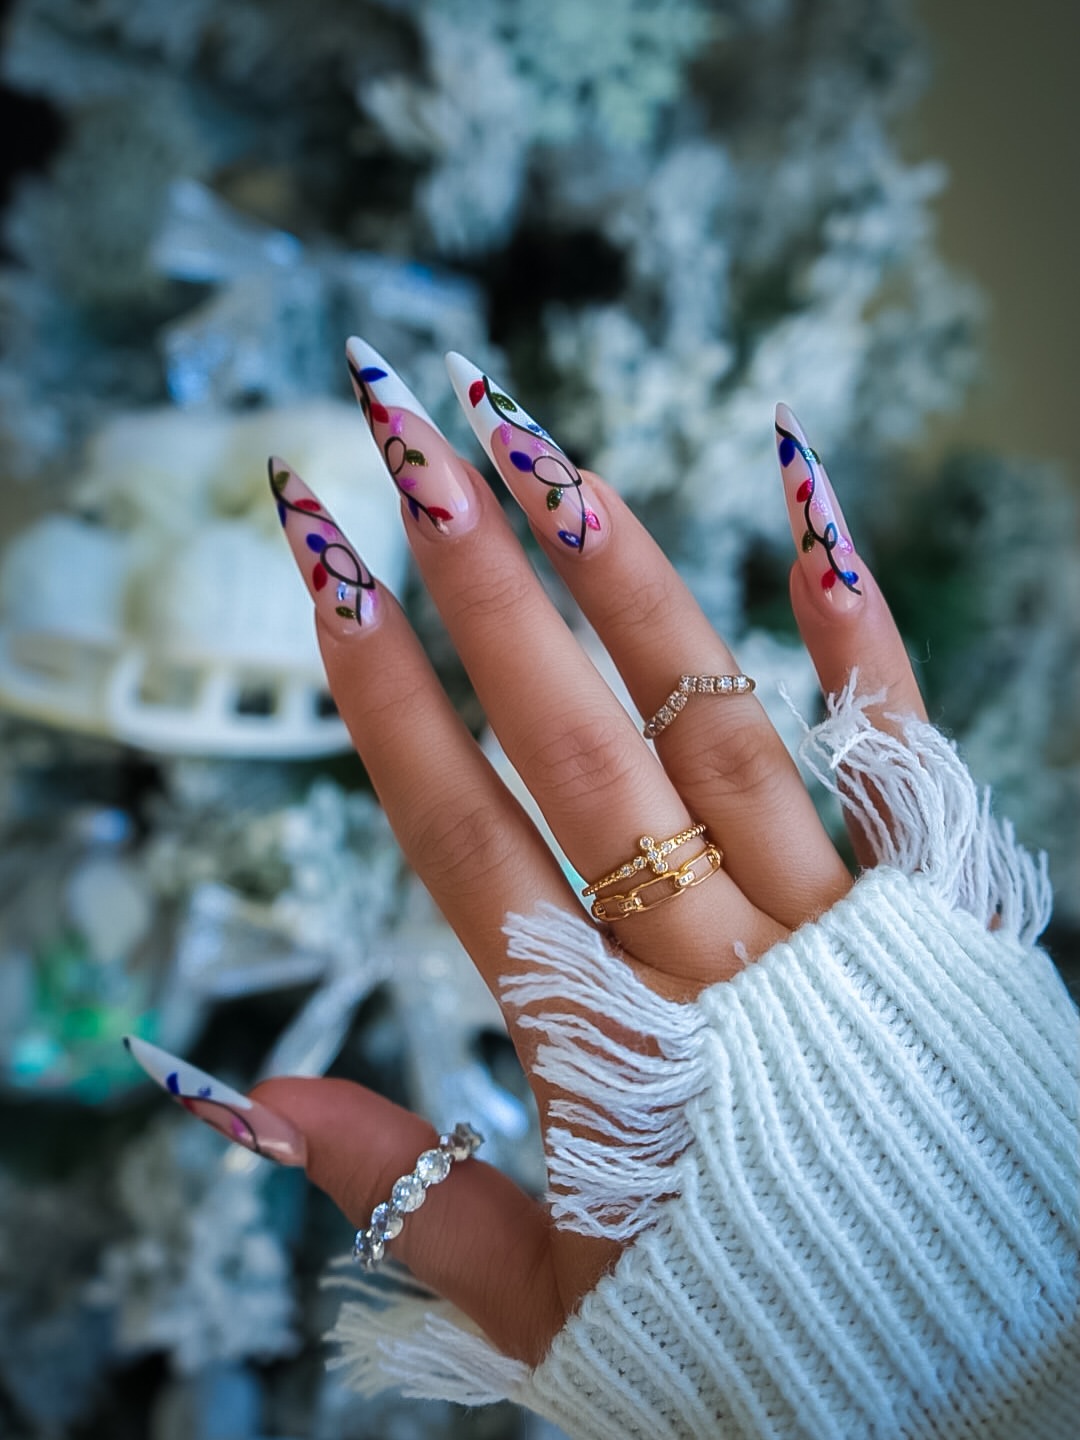
Make a dramatic statement this holiday season with daring stiletto nails adorned with twinkling Christmas lights and French tips. This bold and festive nail art design takes the classic holiday lights motif and marries it with the edgy sophistication of stiletto shapes, creating a truly unforgettable manicure. The long, pointed silhouette of the nails provides an expansive canvas for intricate light strings and vibrant bulbs, making your fingertips the ultimate accessory. It’s an empowering and playful way to showcase your holiday spirit, especially with these stunning Christmas lights nail patterns.
🧹 Wear Reality
To master the stiletto Christmas lights look, begin by ensuring your stiletto nails are perfectly filed and strong. Apply a clear or nude base coat. For the French tip, you can choose a classic white or opt for a glittery silver or gold, allowing it to extend slightly higher than a traditional French. Use a fine-tipped brush to paint delicate black lines across the tip, mimicking electrical wires, and then dot small, brightly colored polishes along these lines for the light bulbs. For added impact, you could even try outlining some bulbs with a tiny amount of black polish to make them pop. Finish with a durable, chip-resistant top coat to protect your stunning design. To keep your long, festive stiletto nails strong and beautiful, consider these tips:
- Moisturize cuticles daily.
- Wear gloves for household chores.
- Use a nail strengthener regularly.
If you prefer a classic, shorter take on French tips, revisit Idea 1!
9. Sparkly Green Christmas Lights French Tips
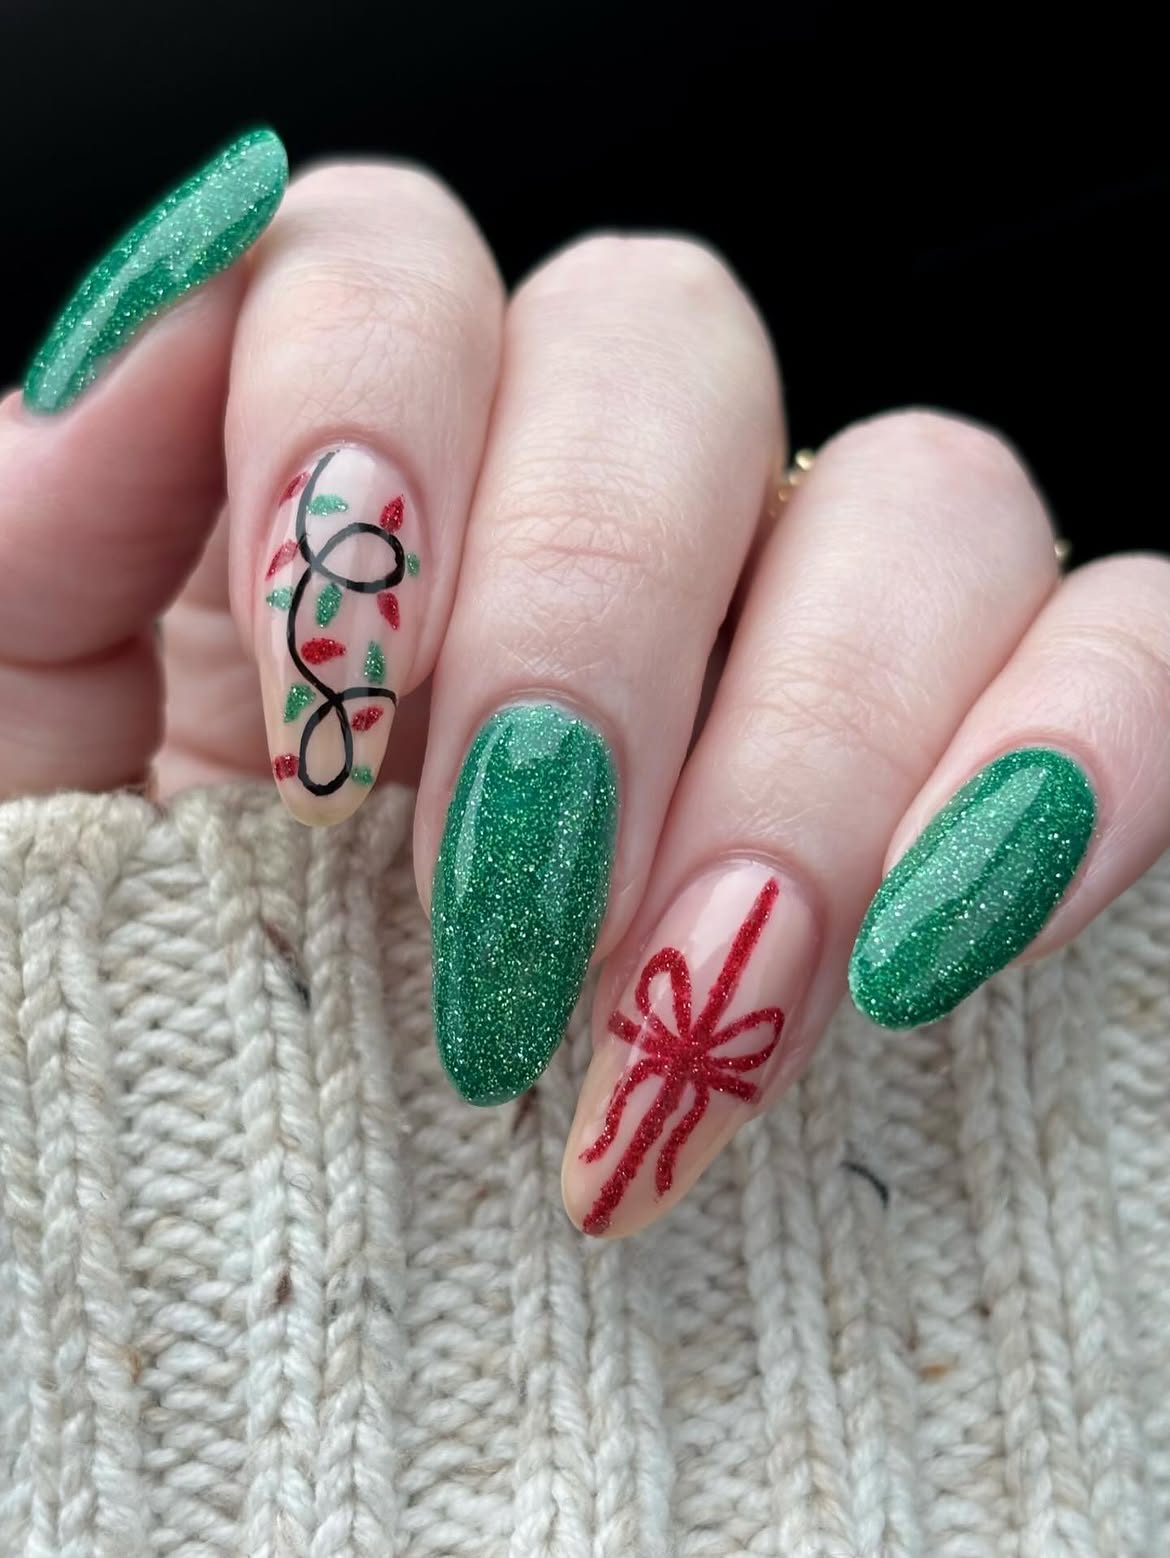
Get ready to sparkle and shine with these glamorous green glitter French tips, beautifully accented with festive Christmas lights and a darling red bow. This almond-shaped design combines the elegance of a classic French tip with an explosion of holiday cheer, making your nails truly captivating. The vibrant green glitter creates a luxurious base, while the hand-painted light bulbs add a playful touch. The subtle shimmer, almost like a Cat eye effect, within the glitter makes this Christmas lights nail art even more mesmerizing, perfect for adding a touch of festive glam to any holiday outfit.
💸 Dupe Alternative
To create this dazzling look, start with well-prepped almond nails and apply a clear or sheer base. For the French tips, use a vibrant green glitter polish, ensuring a clean, crisp line. Once dry, use a fine detail brush and a selection of bright polishes (red, yellow, blue) to paint tiny light bulbs along the glitter tip. For a charming accent, paint a small red bow near the cuticle or at the base of an accent nail. Finish with a super glossy top coat to amplify the glitter’s sparkle and protect your beautiful design. For another chic and glittering option, remember to check out Idea 1!
10. Stranger Things Christmas Lights Nail Art
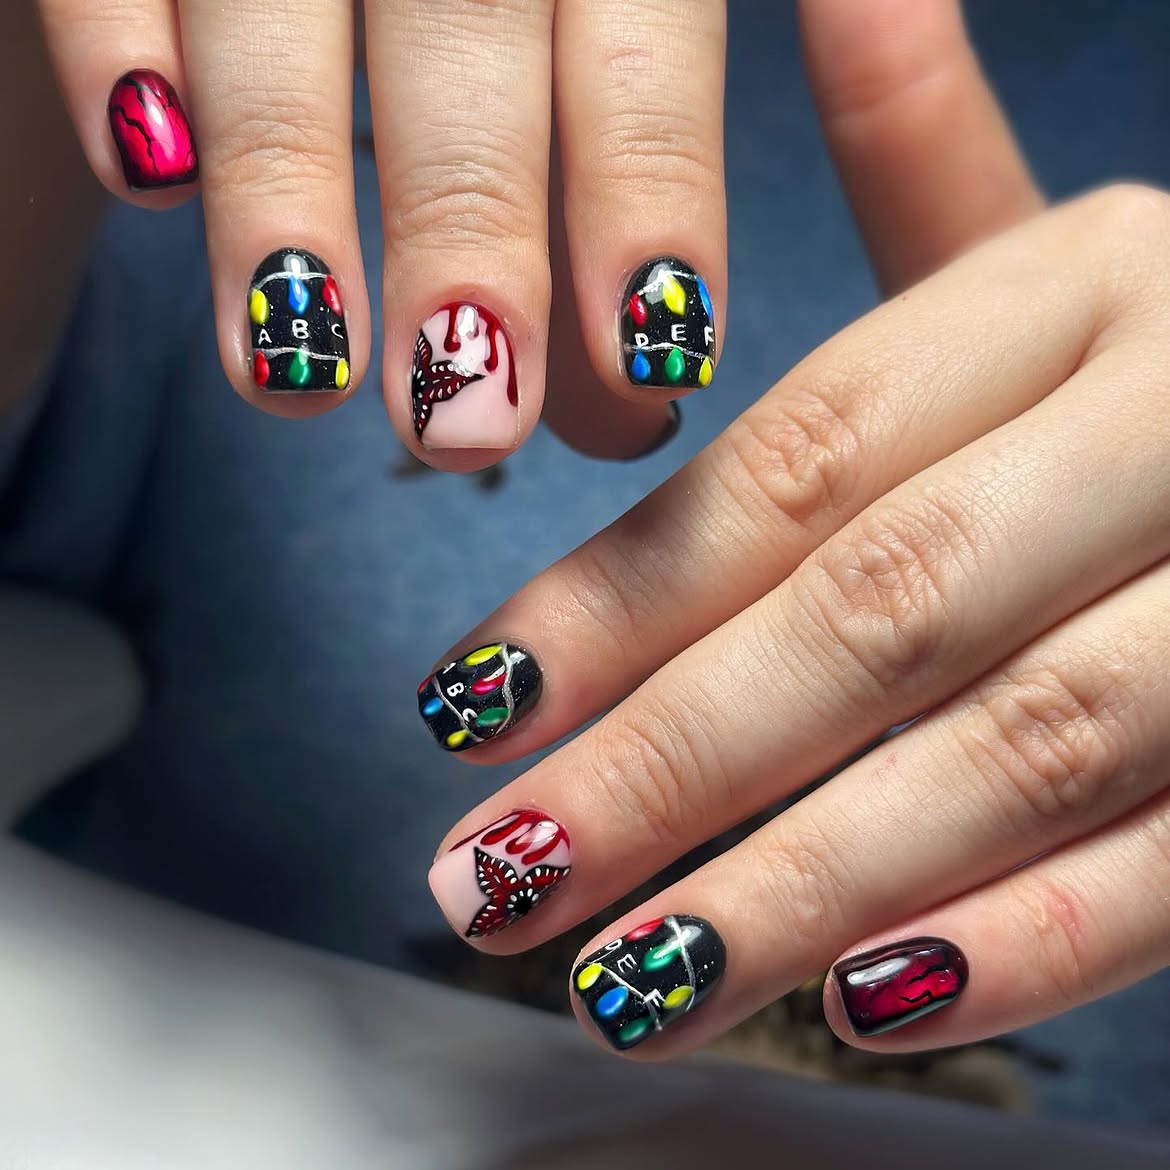
Unleash your inner fan with this incredibly creative Stranger Things Christmas lights nail art, a nod to the iconic scene that captivated audiences. This design features a moody black base, creating the perfect backdrop for hand-painted alphabet letters and a string of twinkling lights, complete with a subtle red ombre effect. It’s a unique and edgy take on traditional holiday nails, blending pop culture with festive cheer to create truly distinctive Art designs. This manicure isn’t just festive; it’s a statement piece that’s sure to get fellow fans talking.
💡 Technique Tip
To recreate this epic themed manicure, begin with a perfectly opaque black base coat on your nails. Once thoroughly dry, use a fine detail brush and white polish to carefully paint small alphabet letters onto some nails. For the Christmas lights, draw a wavy string across other nails using a thin black line, then dot brightly colored polishes for the bulbs. To achieve the red ombre effect seen in the show, gently dab a tiny amount of sheer red polish near the cuticle or around the letters, blending it outwards. Seal your masterpiece with a high-gloss top coat to ensure the intricate details stay put. If you want more classic Christmas lights art, look back at Idea 1 for traditional elegance.
11. Festive Christmas Lights Oval Nails
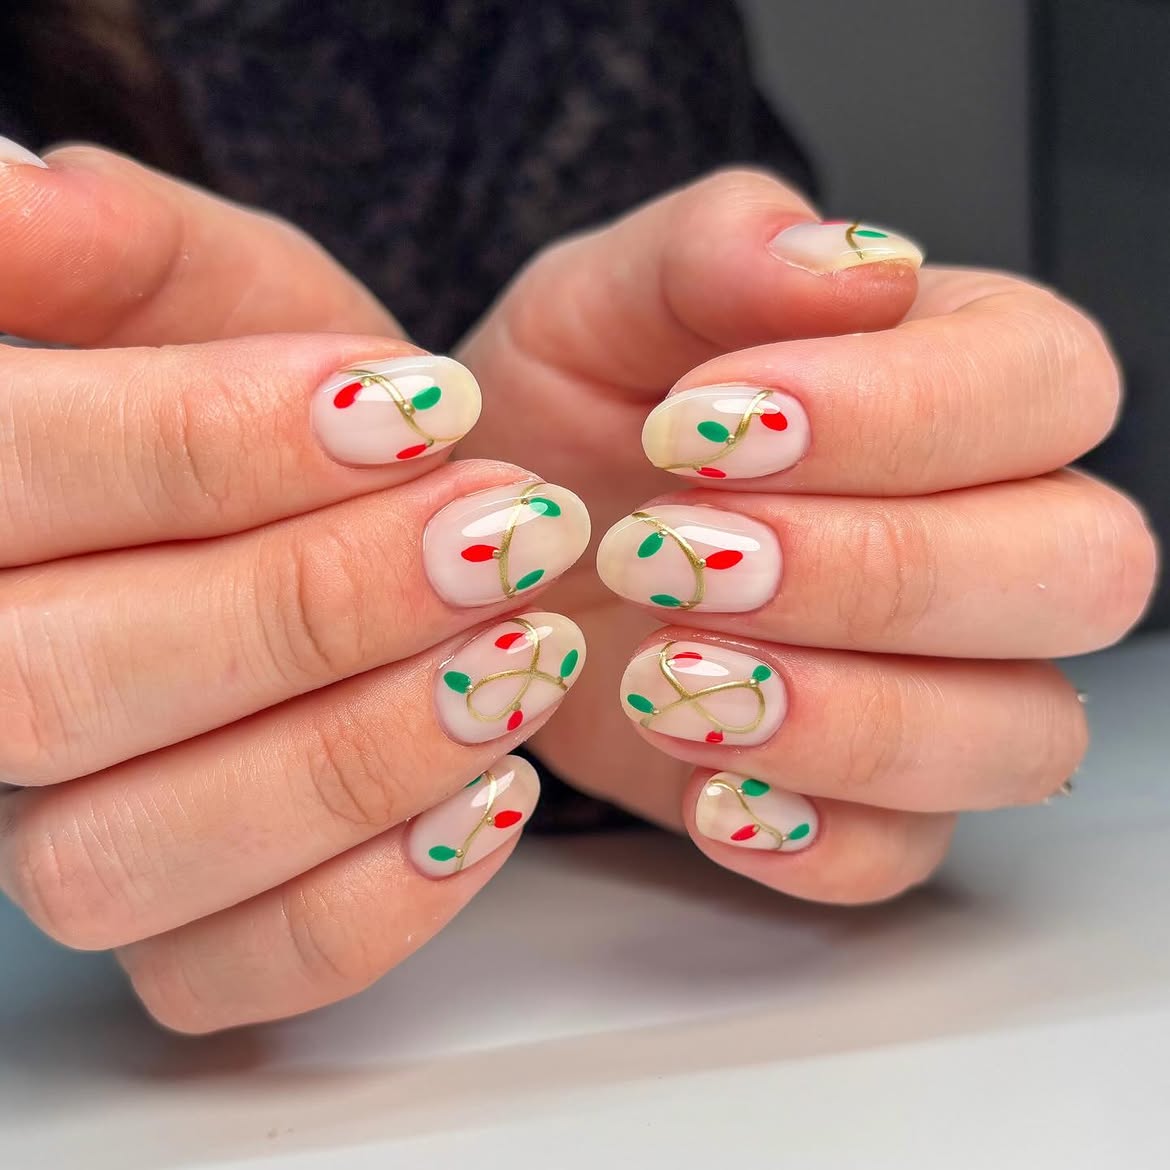
Step into the holiday spirit with this truly enchanting Christmas lights nail art, perfect for oval-shaped nails. This whimsical design features delicate strings of miniature lights gracefully wrapped around a soft, neutral base. Each tiny bulb is meticulously hand-painted, creating a vibrant and joyful scene that embodies the magic of the season. It’s a sophisticated yet playful take on festive finger art, ensuring your nails are as bright and cheerful as the season itself, making every gesture a celebration.
💰 Product Breakdown
To achieve this festive look, start with a sheer nude or light pink base on neatly filed oval nails. For the light strings, use a thin nail art brush and black or dark green polish, creating delicate, slightly curved lines across each nail. For the bulbs, use a dotting tool or the tip of a fine brush with various bright, jelly-like polishes – think reds, greens, blues, and yellows – to create small, round shapes along the lines. Add tiny white dots on each bulb for a glowing effect. Finish with a high-shine top coat to seal in your beautiful Christmas lights nail art.
12. Plaid Christmas Bow French Tip Almond Nails
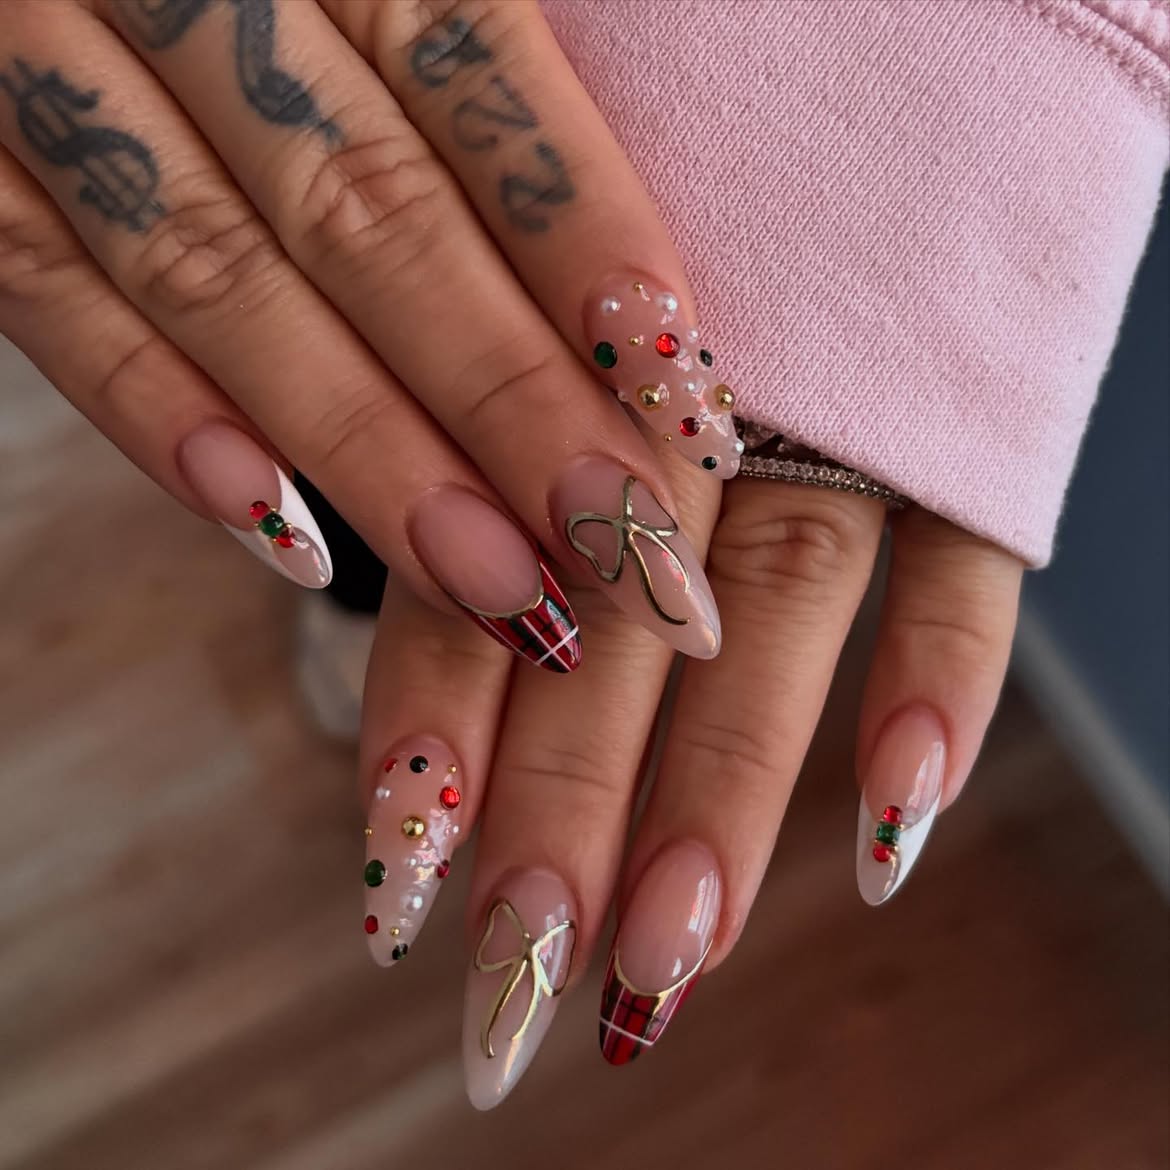
Elevate your holiday look with this chic and festive manicure featuring plaid French tips adorned with delicate gold bow charms. This design merges classic elegance with seasonal charm, offering a sophisticated twist on traditional holiday nails. The plaid pattern adds a cozy, rustic feel, while the shimmering gold bow introduces a touch of luxurious sparkle. It’s one of those beautiful ideas that proves holiday nails don’t have to be overtly complex to make a statement, perfect for those who appreciate refined beauty. The almond shape enhances the overall graceful aesthetic.
⭐ Hero Product
For this elegant style, begin by shaping your nails into a graceful almond silhouette. Apply a clear or very sheer nude base coat. For the plaid French tips, use a fine brush to paint a classic red or green plaid pattern on the tips, contrasting it with a white or gold stripe. Once dry, carefully apply tiny gold bow charms near the base of the French tip on one or two accent nails. This look is surprisingly simple to execute with the right tools, and a glossy top coat will ensure your festive bows stay put and shine bright throughout the celebrations.
13. Christmas Lights French Tip Accent Nails
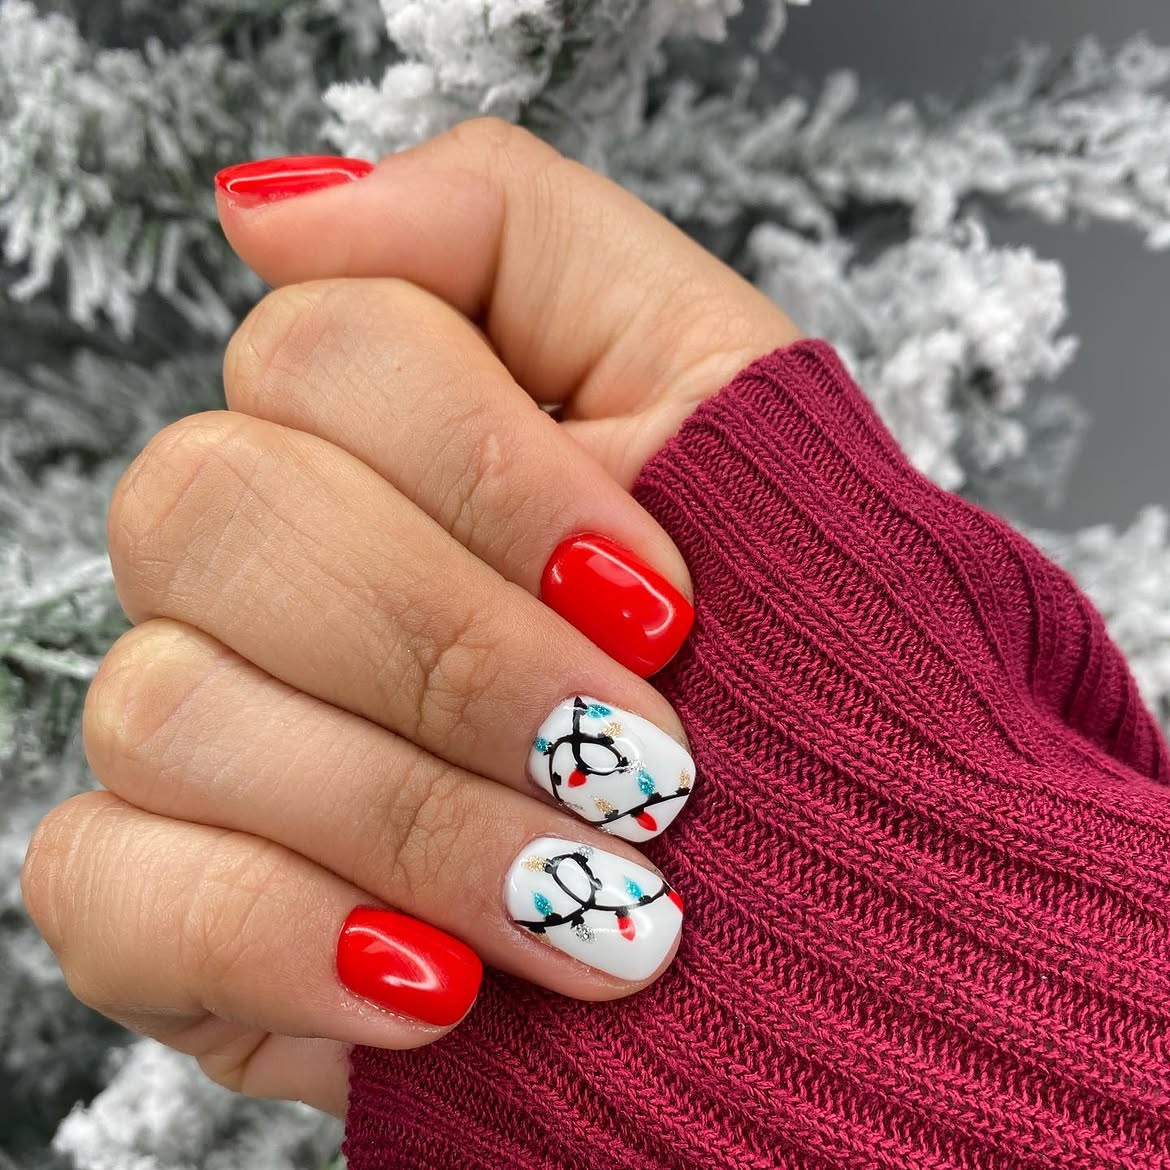
Give your traditional French manicure a holiday makeover with these charming Christmas lights French tip accent nails. This style uses a classic white base on short nails, with a vibrant red French tip that truly pops. The festive touch comes from tiny, hand-painted Christmas lights stringing along the red tip or curving just below it, creating a playful yet polished look. It’s a fantastic way to incorporate holiday cheer without going overboard, proving that even subtle art designs can make a big festive impact. This elegant yet spirited approach is perfect for any holiday gathering.
⚠️ Common Concerns
Start with perfectly manicured short nails and apply a clean white base coat. Once dry, use a precise brush to create crisp red French tips. For the Christmas lights effect, opt for a very fine detail brush. Dip it into black or dark green polish to draw a delicate, squiggly line across or just below the red tip on your accent nails. Then, using a dotting tool or the fine brush, add tiny dots of various bright colors along the line to represent the bulbs. To ensure your art designs truly pop, consider these classic festive hues:
- Jolly red
- Emerald green
- Sky blue
- Sunny yellow
Secure your intricate designs with a durable top coat for lasting holiday cheer.
14. Multi-Colored Cat Eye Oval Nails
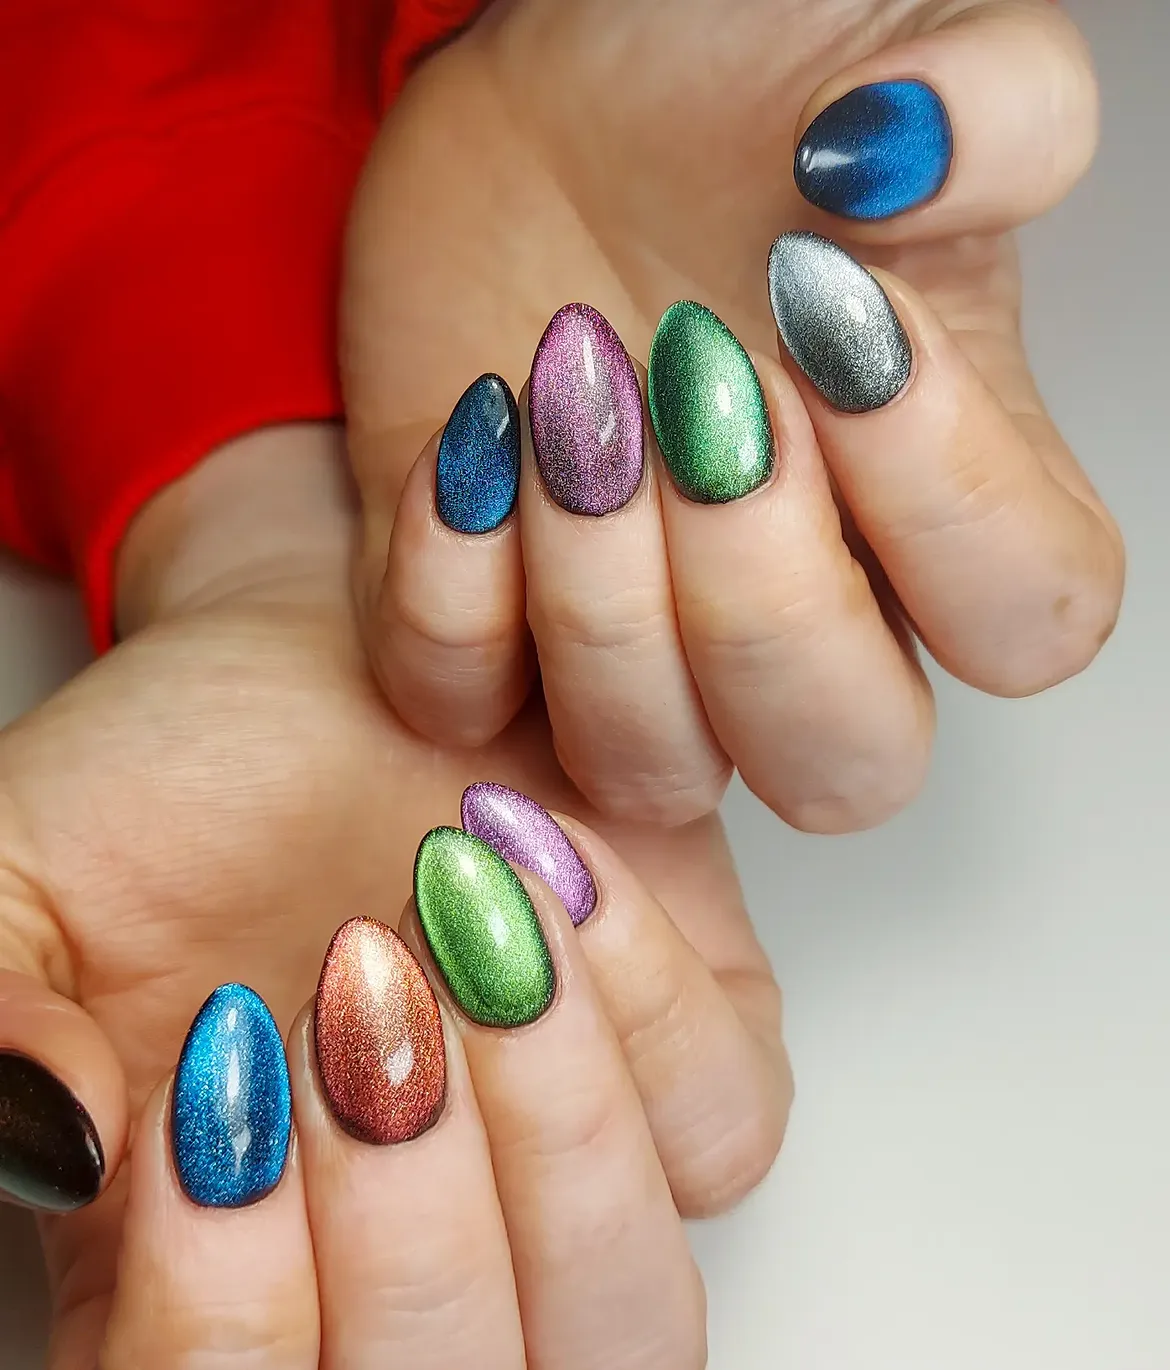
Dive into a kaleidoscope of festive shimmer with these multi-colored Cat eye oval nails, a truly captivating look that will mesmerize everyone. This vibrant design features an array of rich, jewel-toned cat eye gels, each reflecting light with a magnetic, holographic effect. The oval shape provides a sleek canvas, allowing the intense pigments to flow and swirl beautifully, mimicking the magical glow of holiday lights. It’s a modern and sophisticated take on festive nail art, perfect for those who love a touch of glam and a show-stopping finish. This style truly makes your nails the star of the show.
📐 Colour Math
Achieving this stunning look requires special Cat eye gel polishes in various vibrant holiday shades like emerald, ruby, sapphire, and amethyst. After applying a base coat to your oval-shaped nails, paint each nail with a different cat eye gel color. Before curing, use a magnetic tool to create the signature cat eye line, drawing the metallic particles into a sharp stripe. Repeat for each color, ensuring distinct lines. Cure each layer and finish with a high-gloss top coat to enhance the holographic effect. This sophisticated art style is surprisingly easy with the right products and elevates any holiday outfit.
15. Festive Christmas Lights with “Joy” Script
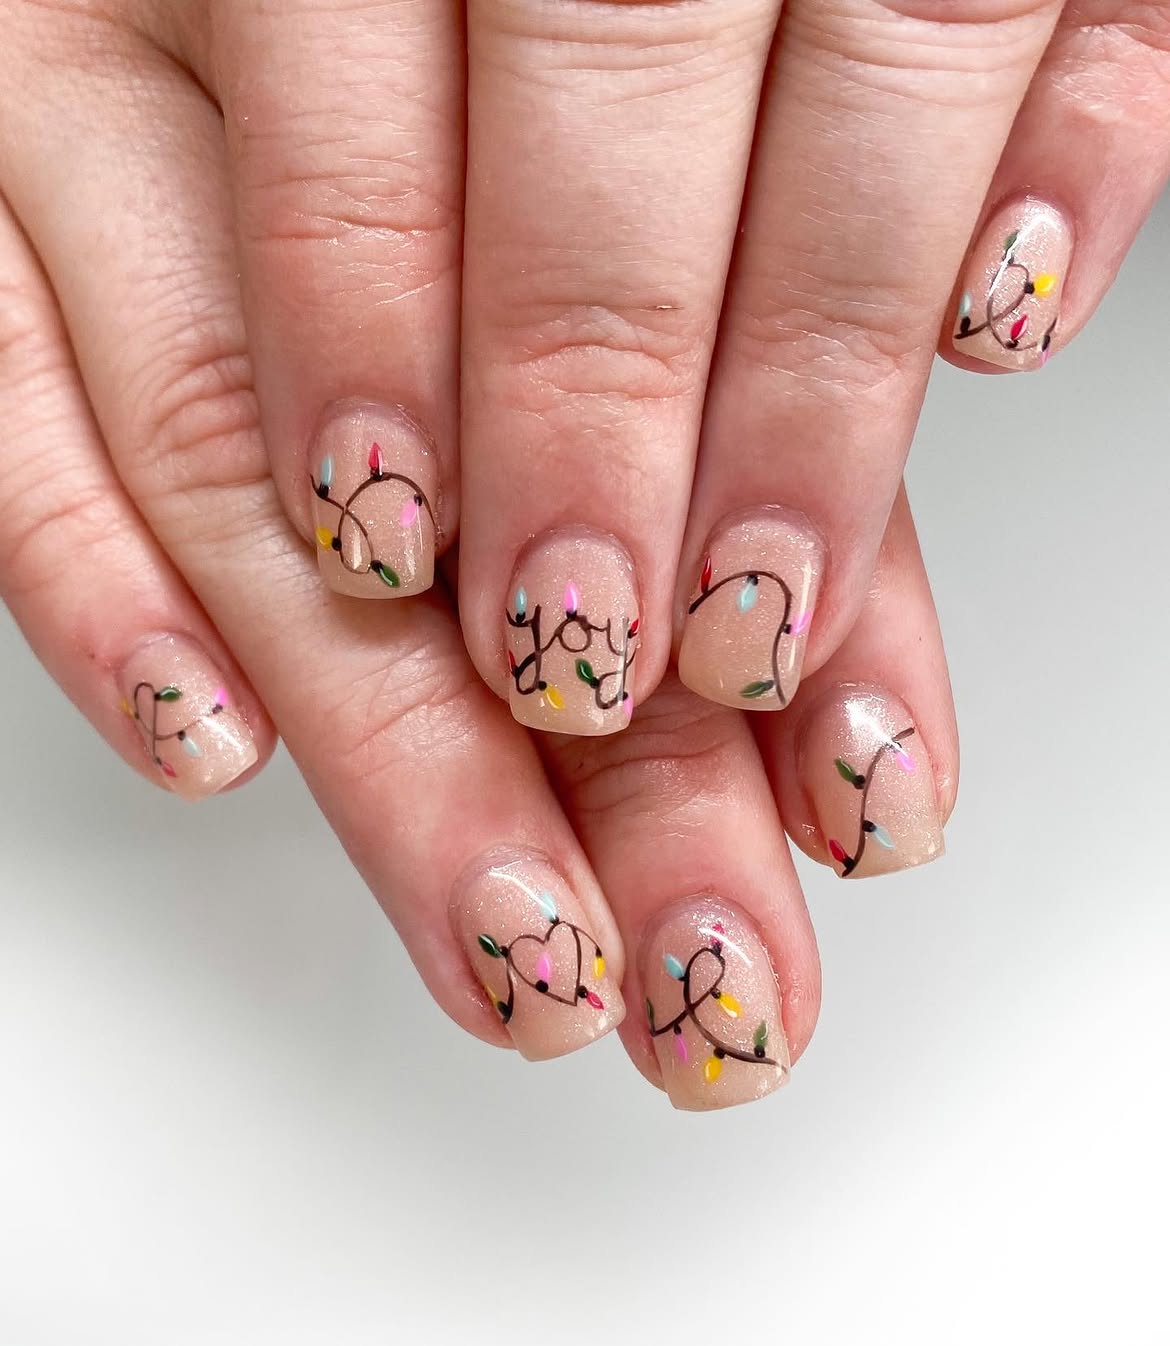
Spread holiday cheer with this heartwarming Christmas lights nail art featuring elegant ‘Joy’ script. This lovely design combines the classic appeal of string lights with a beautiful handwritten message, all set against a chic nude base. The miniature bulbs are carefully placed to appear as if they’re spelling out the festive word, creating a personalized and heartwarming touch. It’s a wonderfully balanced look that is both festive and refined, embodying the true spirit of the season. This particular style offers a subtle yet impactful way to showcase your holiday spirit, making it an excellent choice for a wide range of occasions. For more intricate hand-painted concepts, explore the detailed designs in our *Festive Christmas Lights and Bow Nail Art*.
✅ Before You Start
Start with a clean, well-prepped nail and apply a creamy nude base coat. Once dry, use a fine detail brush and black or dark brown polish to carefully write ‘Joy’ in a delicate script on one or two accent nails. For the Christmas lights nail effect, draw a thin, wavy line with dark green or black polish, then add small dots of various bright colors along the line for the bulbs. Add tiny white specks on the colored dots for a glowing effect. This simple yet effective design requires a steady hand, but the beautiful result is worth the effort. Seal with a clear top coat.
16. Festive Christmas Lights and Bow Nail Art
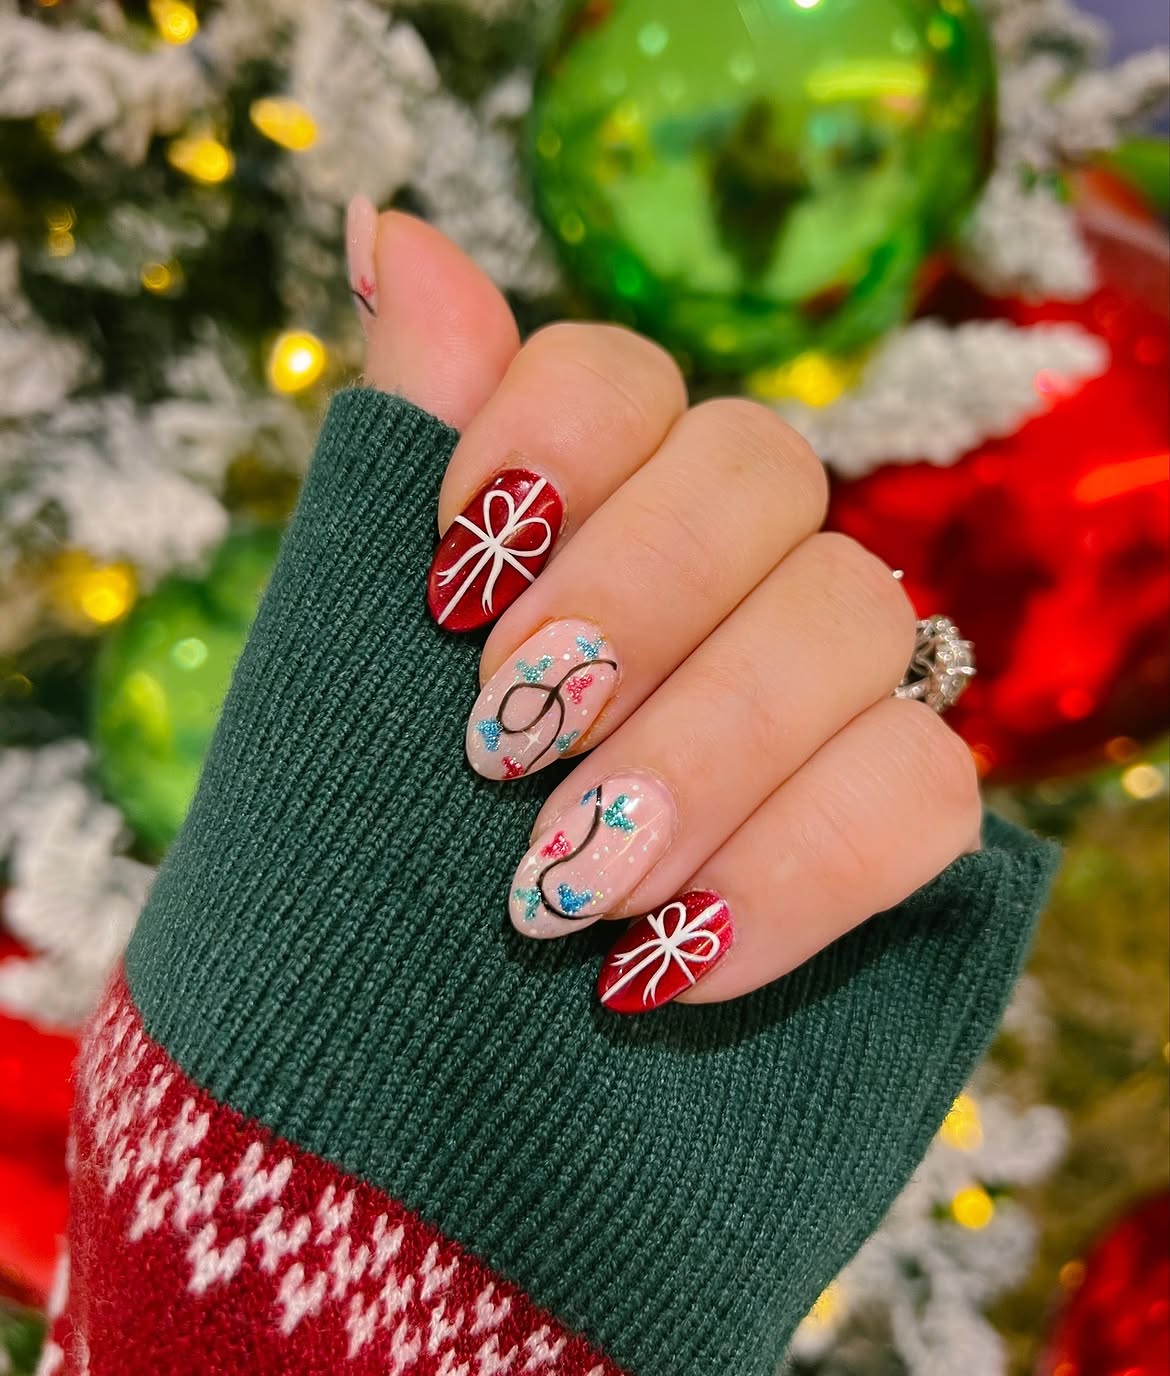
Embrace a whimsical holiday vibe with this adorable Christmas lights and bow nail art. This festive manicure features hand-painted string lights paired with charming red bow accents, all set on a light, sheer base. The combination creates a playful yet polished look, perfect for those who love intricate details and a touch of traditional holiday charm. It’s one of those delightful ideas that brings a smile to your face, making your fingertips a mini celebration. The delicate nature of the design ensures it remains elegant, while the bows add that extra pop of festive flair. Consider pairing this with the sparkling effect from our *Festive Christmas Lights Sparkle Nails* idea for even more dazzle!
🔧 How-To Brief
For this enchanting look, prep your oval nails and apply a light sheer pink or nude base. Use a fine detail brush to create the string of Christmas lights with black or dark green polish, drawing a delicate, looping line across the nail. Then, add tiny dots of bright jelly colors (red, green, blue, yellow) along the line for the bulbs. For the red bow accent, use a slightly thicker brush to paint small, stylized bows near the base or side of an accent nail. These detailed art designs require patience, but the result is a stunning festive manicure that captures the magic of the holidays. To get started, gather these essentials:
- Sheer base coat
- Fine detail nail art brush
- Black or dark green nail polish
- Bright jelly-colored polishes (red, green, blue, yellow)
- Small red nail polish for bows
- High-gloss top coat
Finish with a high-gloss top coat.
17. Playful Christmas Lights Almond Nails
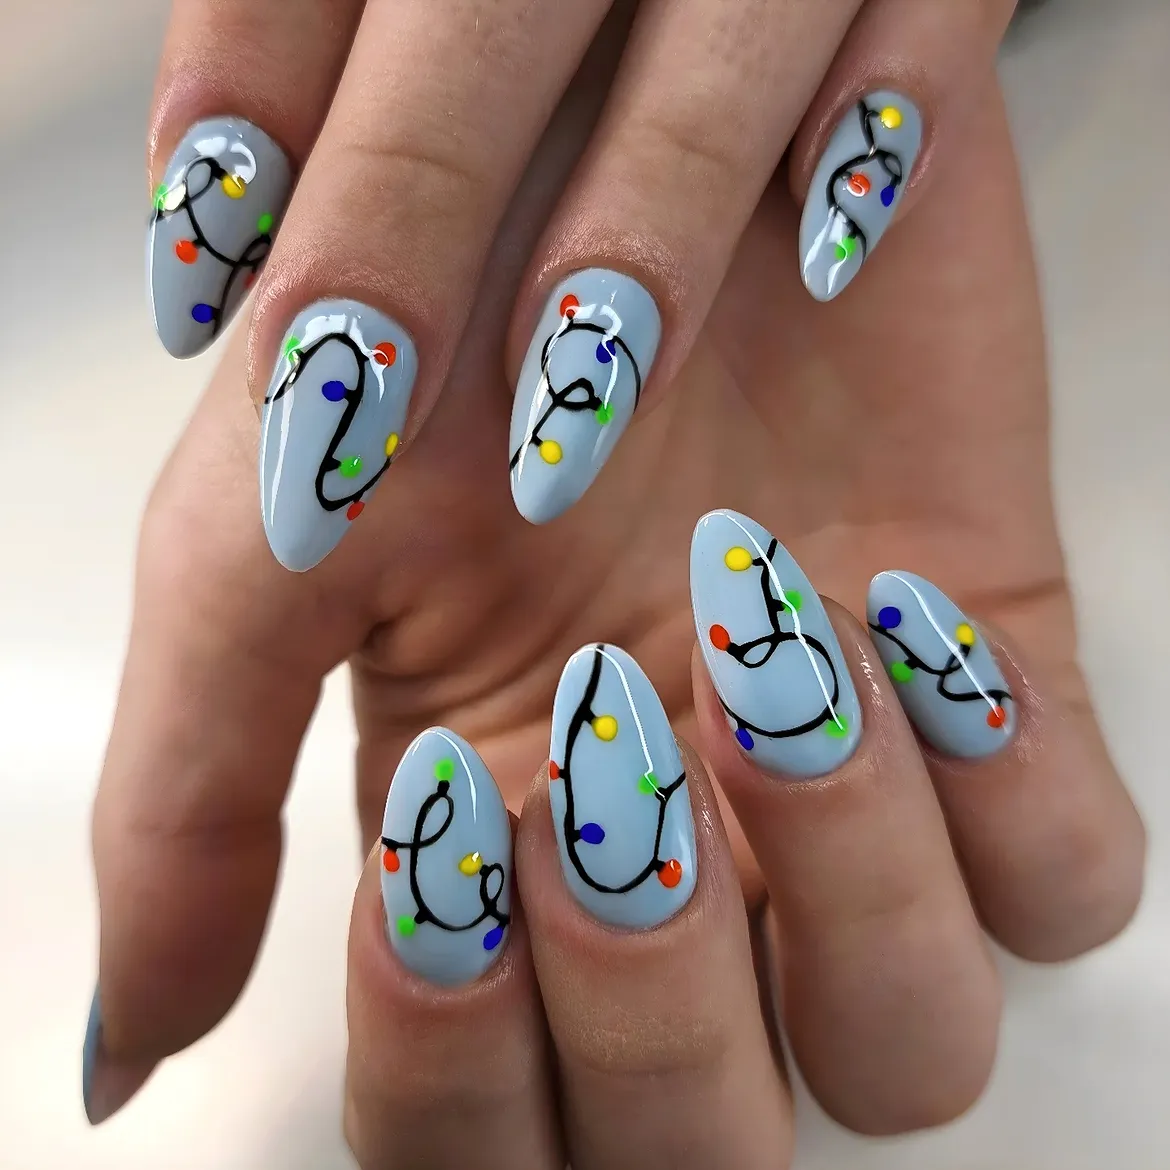
Unleash your inner playful spirit with this vibrant Christmas lights nail art on elegant almond-shaped nails. This eye-catching design features cheerful strings of lights against a striking light blue base, making the colorful bulbs truly pop. The use of a vivid backdrop enhances the festive feel, giving the classic holiday motif a fresh and modern twist. While the overall vibe is bright and cheerful, incorporating a subtle black string for the lights can add depth and definition without losing the playful essence. It’s a joyful expression of holiday art that will certainly get you in the festive mood.
🔥 Trending Context
Begin by shaping your nails into a chic almond form and apply a vibrant light blue polish as your base. Once thoroughly dry, use a thin detail brush and black nail polish to draw delicate, looping strings across your nails. Along these strings, use a dotting tool or the back of a fine brush to apply small, brightly colored dots for the light bulbs. Think reds, greens, yellows, and pinks for maximum cheer. For extra sparkle, you can add a tiny glitter top coat over the bulbs. This fun Christmas lights nail art is all about precision and vibrant color payoff, so take your time and seal with a long-lasting top coat. If you loved the hand-painted detail here, check out the precise technique used in our Festive Christmas Light String Almond Nails for more inspiration!
18. Festive Christmas Lights Sparkle Nails
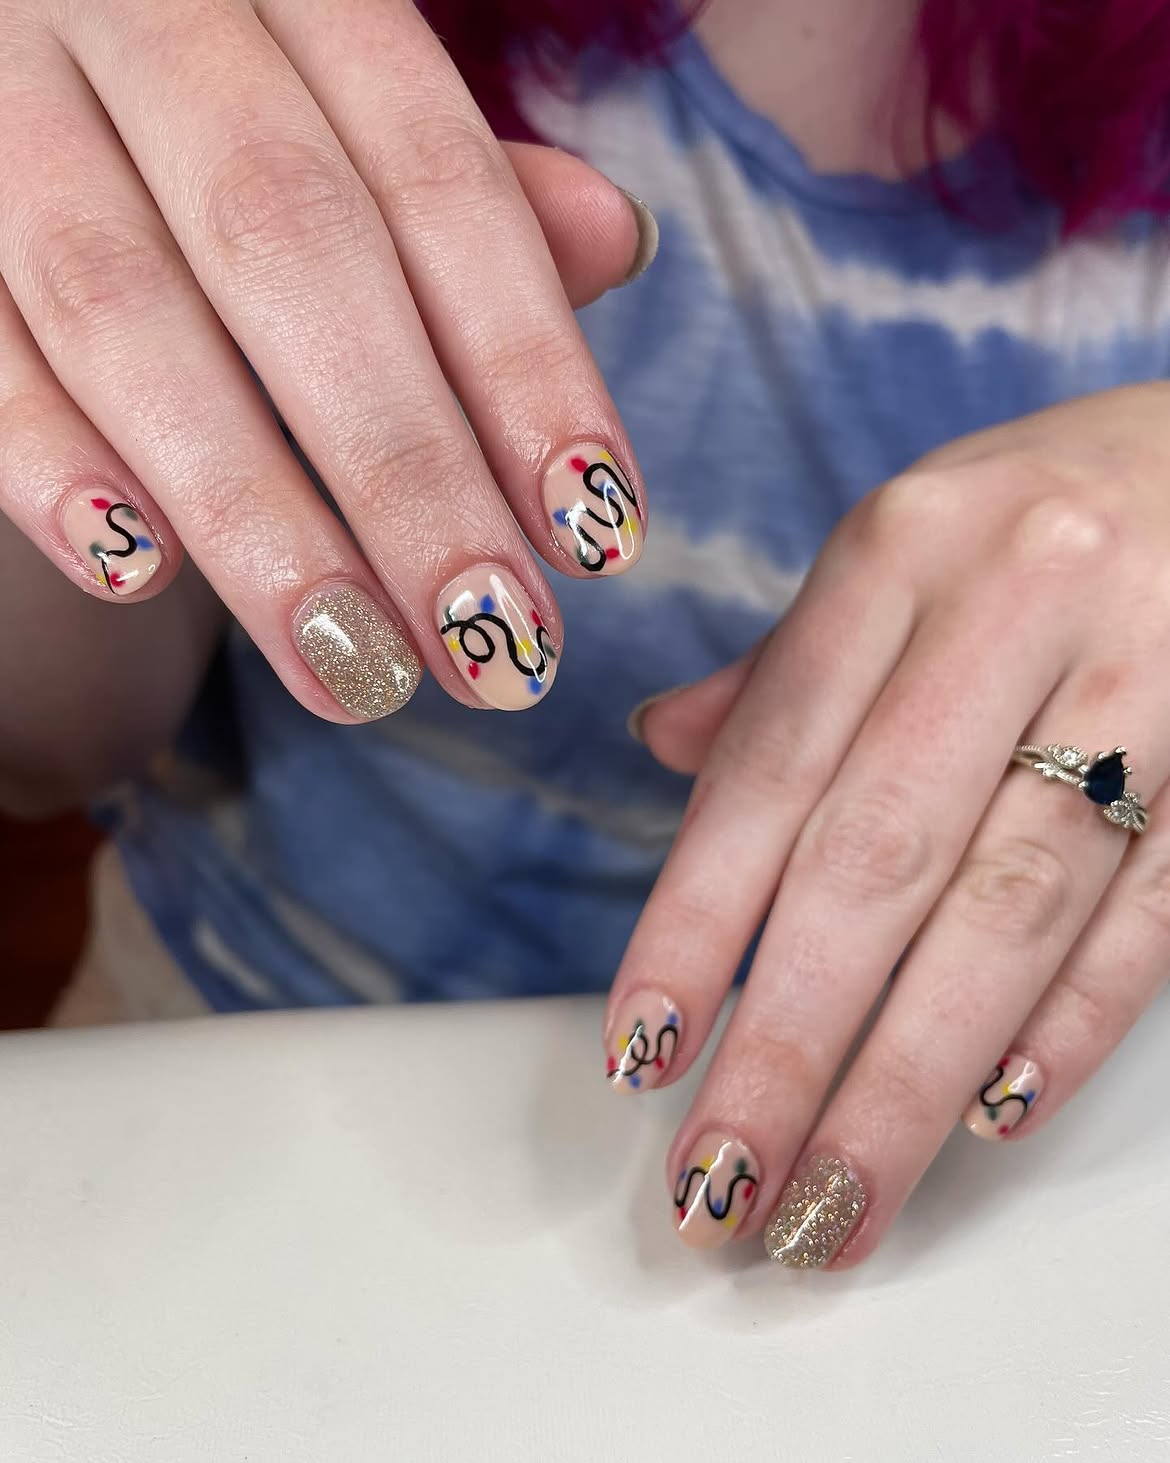
Get ready to dazzle with these festive Christmas lights sparkle nails, perfectly designed for short nails! This glittering look combines hand-painted strings of lights with a touch of radiant sparkle, creating a truly magical holiday manicure. The neutral base allows the colorful lights and subtle glitter accents to truly shine, making your nails look like tiny, enchanting ornaments. For an extra touch of wonder, consider adding a subtle 3d element to a few bulbs, giving them a raised, jewel-like appearance. It’s an elegant yet celebratory design that proves even short nails can make a big festive statement, perfect for every holiday party.
🎯 Who It Suits
For this sparkling design on your short nails, start with a neutral or sheer pink base coat. Use a fine detail brush to paint delicate black or dark green strings of lights across each nail. Then, with a dotting tool, apply small dots of bright, festive colors for the bulbs. While the colored dots are still wet, gently sprinkle fine glitter onto them or use a glitter top coat for a sparkling effect. To introduce a subtle 3d element, you can apply a tiny drop of clear builder gel over a few selected bulbs to give them a raised, domed appearance before curing. Here’s a quick guide to creating those dazzling lights:
- Apply base coat and string lines.
- Dot bright colors for bulbs.
- Add glitter for sparkle.
- Optionally apply clear gel for 3d effect.
- Seal with top coat.
Finish with a high-shine top coat to lock in the sparkle and ensure longevity. This style makes a great companion to the traditional look of *Festive Christmas Lights Oval Nails* if you want to mix and match.
19. Sparkling Christmas Lights Almond French Tips
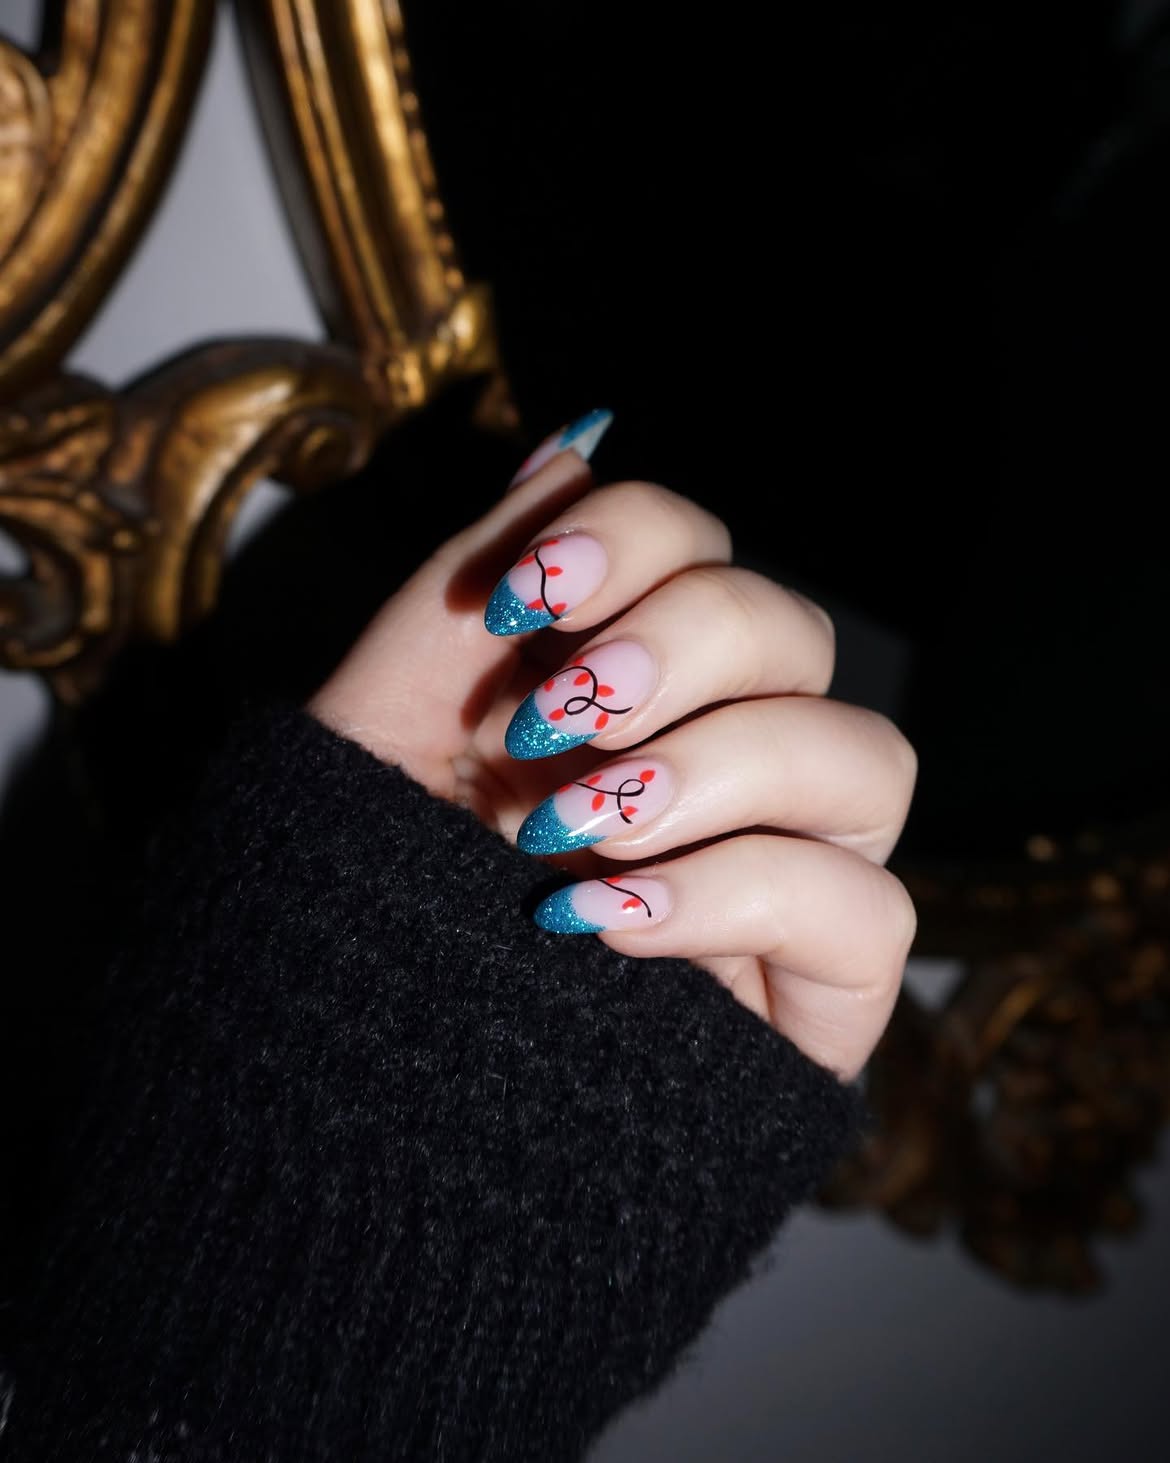
Unleash a touch of unexpected charm with these sparkling Christmas lights nail art almond French tips. This unique design puts a fresh spin on the classic French manicure by adorning blue glitter tips with delicate red string lights. The glitter provides a dazzling backdrop, while the red string lights create a striking contrast, reminiscent of a mysterious, festive glow. For those who appreciate a pop culture nod, the arrangement of the lights can subtly evoke a certain retro, perhaps even Stranger things inspired, aesthetic without being overtly themed. It’s a chic and intriguing design that’s perfect for making a statement this holiday season, blending sparkle with an edgy vibe.
📏 Occasion Fit
Achieve this standout look by shaping your nails into an elegant almond form. Apply a clear base coat, then paint crisp French tips using a vibrant blue glitter polish. Once dry, use a very fine detail brush and red nail polish to draw a thin, slightly wavy string of lights across the glitter tips, or even down the nail bed. For the bulbs, use a dotting tool with tiny drops of clear top coat, or even small iridescent glitters, to add subtle light effects along the red string. To subtly hint at a Stranger things vibe, you could strategically place a few bulbs slightly off-kilter, creating an intentional, almost eerie, yet festive pattern. Finish with a high-gloss top coat to magnify the sparkle and protect your unique Christmas lights nail art. This specific type of French tip could also inspire other variations, much like the *Christmas Lights French Tip Accent Nails* idea.
20. Festive Christmas Light String Almond Nails
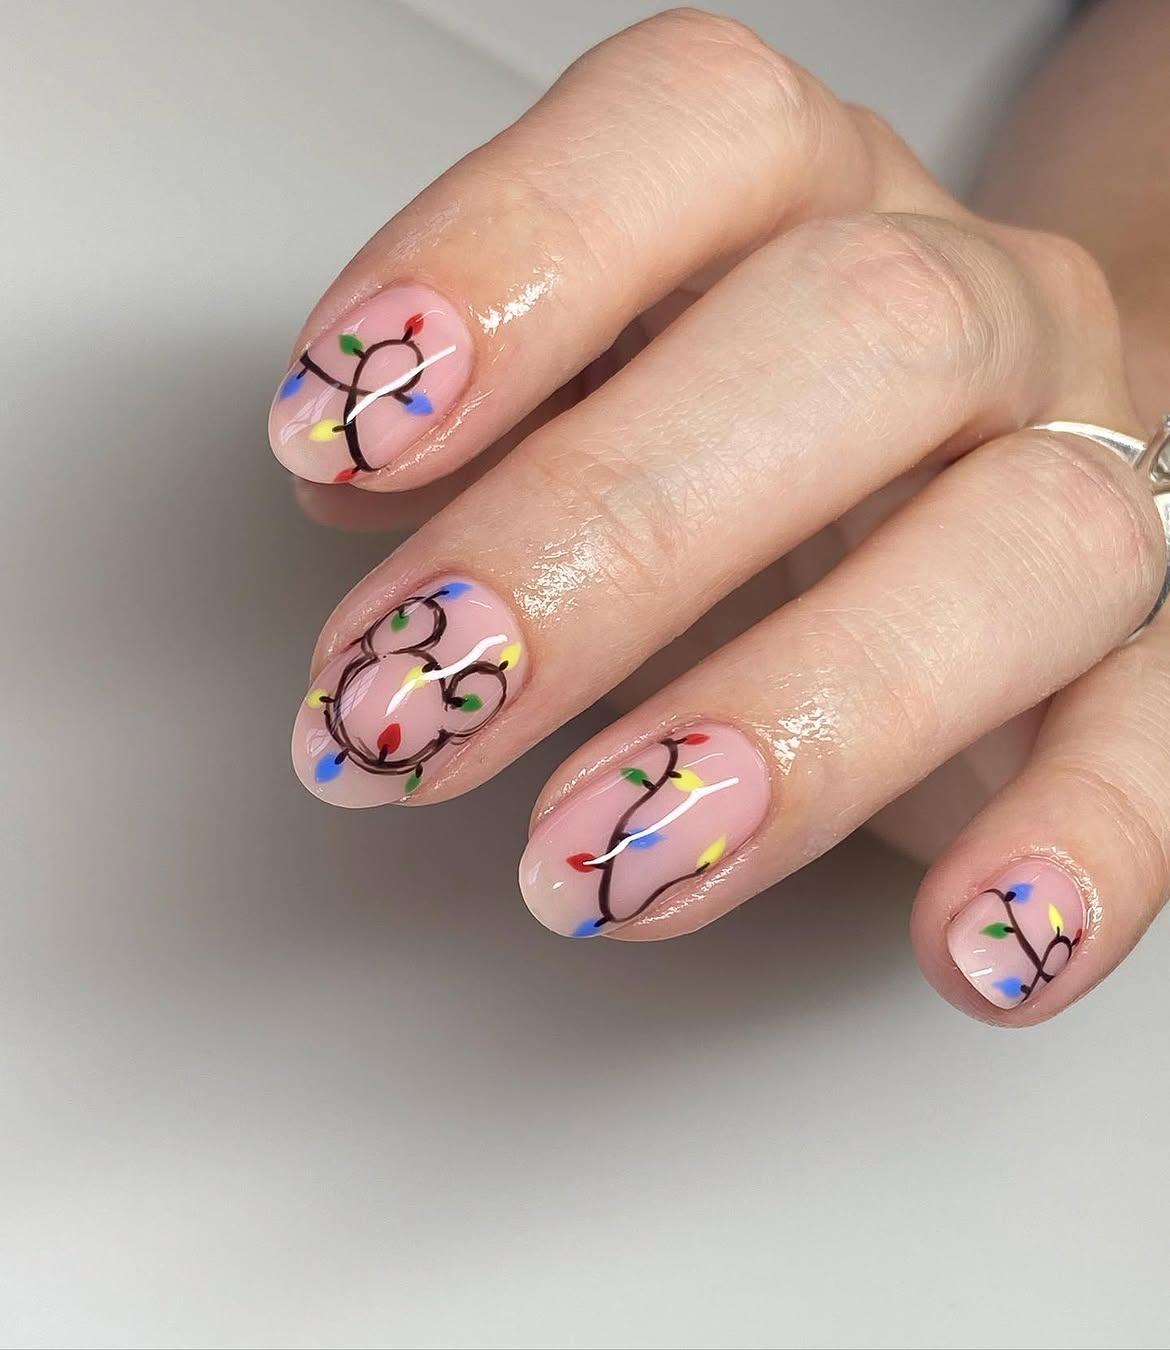
Illuminate your festive season with these delightful Christmas light string almond nails, featuring vibrant jelly colors that truly pop. This playful manicure captures the essence of holiday cheer with strings of miniature lights expertly hand-painted across a clear or sheer base. The translucent, candy-like hues of the bulbs give a joyful, almost edible appearance, making each nail a tiny celebration. It’s one of those brilliant ideas that proves holiday nails can be both intricate in detail and beautifully executed. The almond shape provides an elegant canvas for this whimsical design, ensuring your fingertips radiate happiness. This is a very versatile look, easily adapted for various nail lengths and shapes.
🧹 Wear Reality
For this cheerful design, begin by filing your nails into a graceful almond shape. Apply a clear or very sheer nude base coat to let the colors shine. Using a fine detail brush, create delicate, looping black or dark green strings of lights across each nail. The magic happens with jelly polishes: use a dotting tool to place small dots of vibrant, translucent colors (red, green, blue, yellow, purple) along the strings for a truly glowing effect. This approach is surprisingly simple, but yields an impressive result. Add tiny white reflective dots on each bulb for that extra pop. Seal your festive masterpiece with a high-gloss top coat to protect the art and enhance the jelly-like sheen, making your holiday ideas truly shine.
21. Festive Christmas Lights Oval Nails
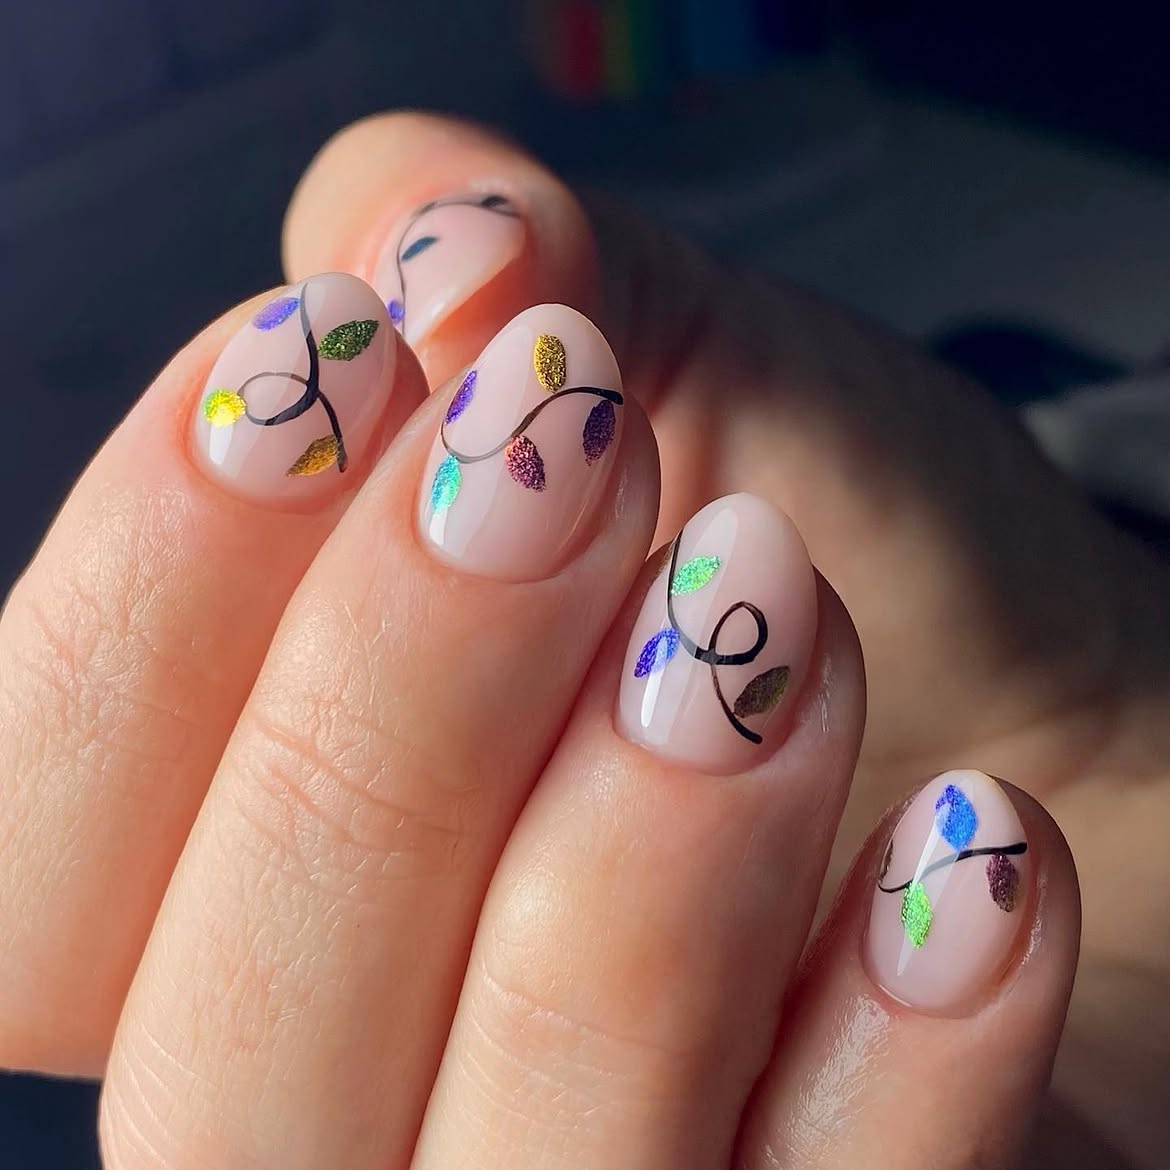
Step into holiday cheer with captivating Christmas lights nail designs, perfectly adorning an elegant oval shape. This popular Art form transforms your fingertips into miniature festive canvases, featuring tiny, illuminated bulbs against a soft, often translucent base. The beauty of this Design lies in its playful yet sophisticated appeal, making it a top choice for vibrant holiday Ideas that truly pop. It brings that whimsical glow, ensuring your nails are merry and bright. For a subtler approach, explore our Delicate Christmas Lights Oval Manicure.
💸 Dupe Alternative
Achieve this joyful look by prepping oval nails. Apply a sheer nude or light pink base. Use a fine detail brush to meticulously paint small light bulb shapes in various bright colors: red, green, blue, yellow. For the ‘string,’ a thin black or white line connects them, adding tiny white dots on each ‘bulb’ for an illuminated effect. Finish with a high-shine top coat to encapsulate the Art work, giving it a glossy, festive finish that lasts through all your holiday parties. Craving bolder statement Ideas? Our Retro Holiday Almond Vibes might be your next obsession!
22. Delicate Christmas Lights Oval Nails
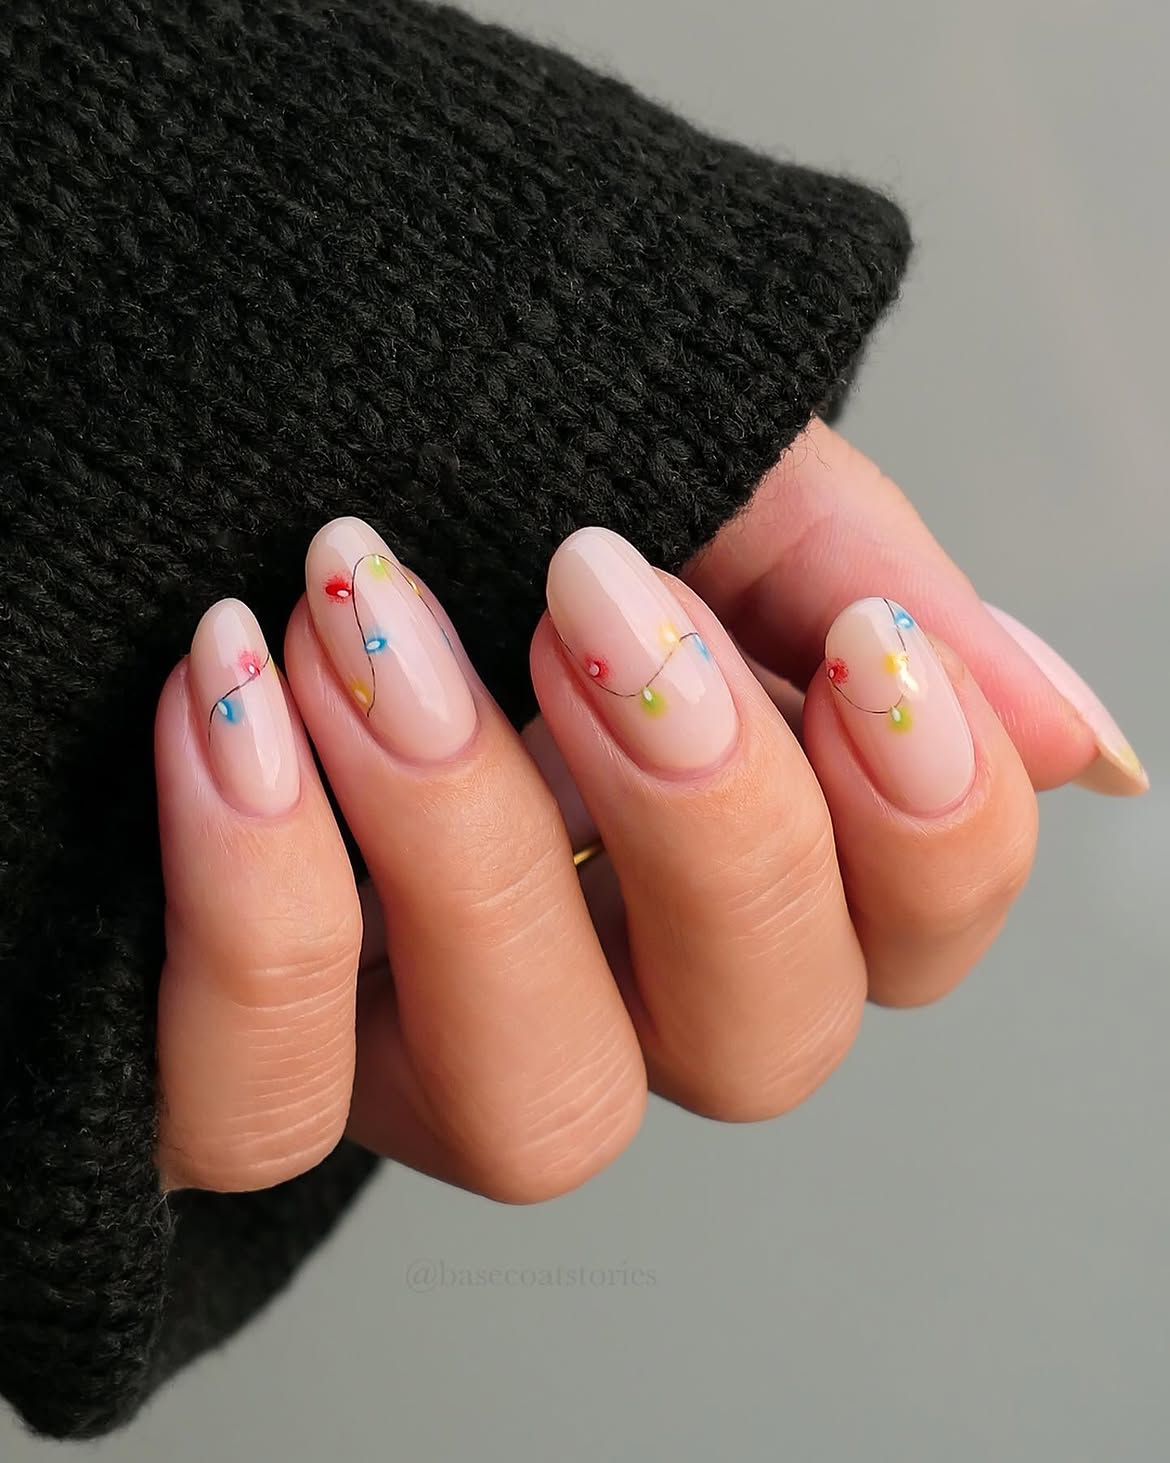
For understated elegance, this delicate Christmas lights nail art is a dream. Perfect for Short nails, it focuses on minimalist charm, proving a subtle glow can be impactful. It’s about creating Simple yet sophisticated patterns, hinting at the festive season. Think tiny, meticulously placed light dots or barely-there strings for unexpected sparkle. This allows for refined, chic Art designs, ideal for casual or formal settings. A faint Cat eye shimmer within the lights adds an ethereal touch. If you love unique twists, check out our Retro Holiday Almond Vibes!
💡 Technique Tip
Start with perfectly manicured Short oval nails and a neutral base coat. Use an ultra-fine dotting tool or brush to create miniature light dots in pastel or muted metallic shades. For sophistication, add a thin, almost invisible connecting line between selected lights, or use fine silver glitter for the ‘string’. Restraint is key; less is more. Finish with a glossy top coat to seal your elegant Art designs, ensuring a smooth, polished appearance. Remember our vibrant Festive Twinkle Oval Nails for another festive Art approach!
23. Whimsical Christmas Lights Almond Nails
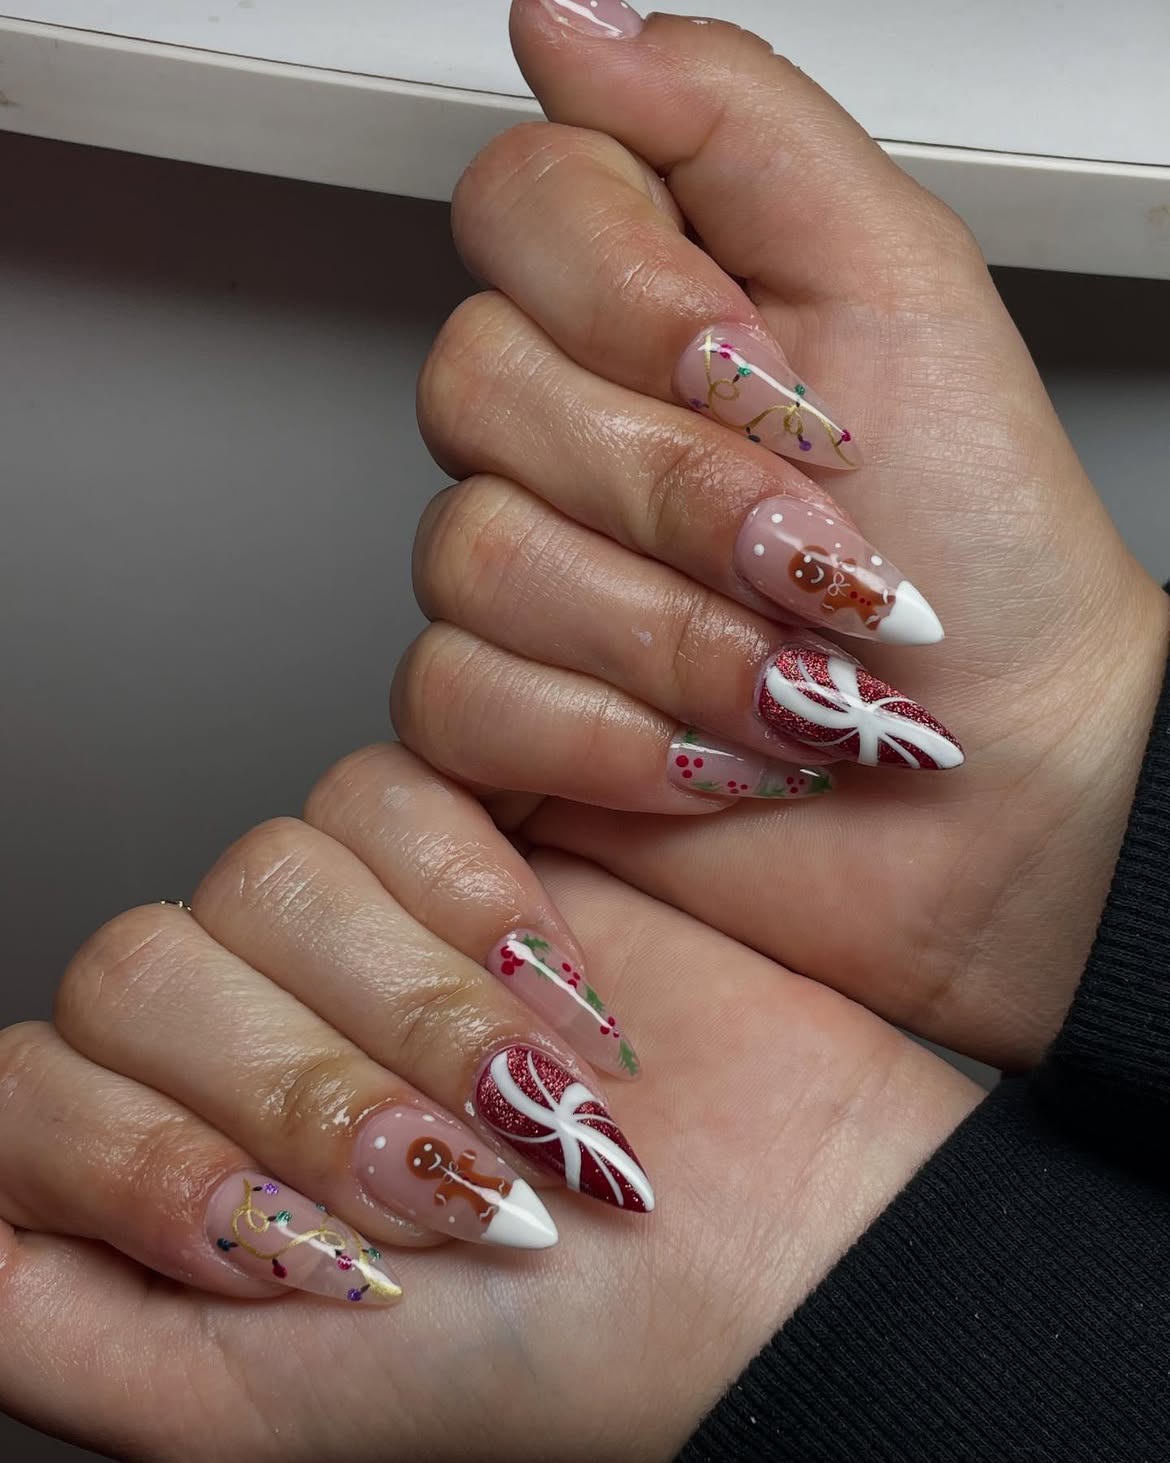
Embrace playful, nostalgic vibes with whimsical Christmas lights nail designs on chic almond nails. This style goes bold, incorporating vibrant colors and characters, evoking vintage holiday charm or a retro feel. Picture string lights in vivid shades, perhaps with a subtle Black outline. Experiment with clever 3d accents like tiny sculpted bows or raised glitter bulbs for depth. This look invites imagination, drawing inspiration from classic cartoons or even Stranger things for a cool twist.
💰 Product Breakdown
Begin with well-shaped almond nails and apply a vibrant base color that complements your chosen light palette – a deep red or emerald green works. Using a fine brush, sketch out your string light pattern, opting for a mix of bold, bright colors for the bulbs. For that extra ‘wow’ factor, try incorporating small 3d elements, such as tiny acrylic beads for realistic bulbs or a carefully placed dab of builder gel for a raised effect. A clear, high-gloss top coat is essential to protect your intricate Art designs and give them a professional, long-lasting finish.
Twinkling Tips: Your Ultimate Holiday Nail Art Guide
We hope these merry and bright Christmas lights nail art ideas have sparked your creativity and given you plenty of festive inspiration! Whether you opt for a subtle shimmer or an eye-catching statement, these looks are sure to bring joy to your fingertips all season long. Don’t forget to save your favorite designs to Pinterest so you can easily recreate them or show your nail tech!