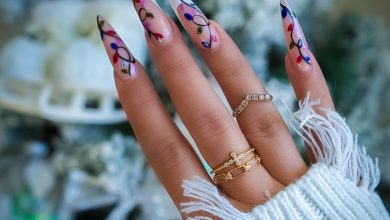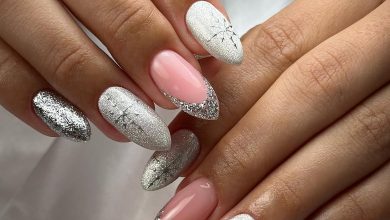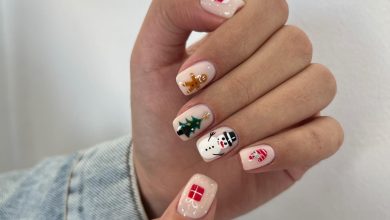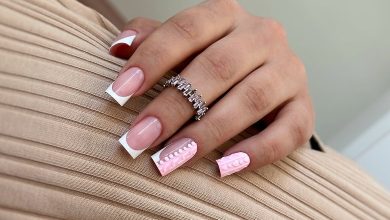
Get ready to tie a bow on your holiday look, because Christmas bow nails are set to be the must-have accessory for 2026! Moving beyond simple festive accents, this year’s trends are all about intricate designs, playful textures, and a touch of nostalgic charm that perfectly captures the spirit of the season. From elegant minimalist touches to full-on glamorous statements, there’s a bow-inspired manicure waiting to deck out every style. We’ve rounded up 26 stunning ideas that will have your fingertips looking perfectly wrapped and ready for any festive occasion.
1. Pink French Tip Nails with Silver Bow Detail
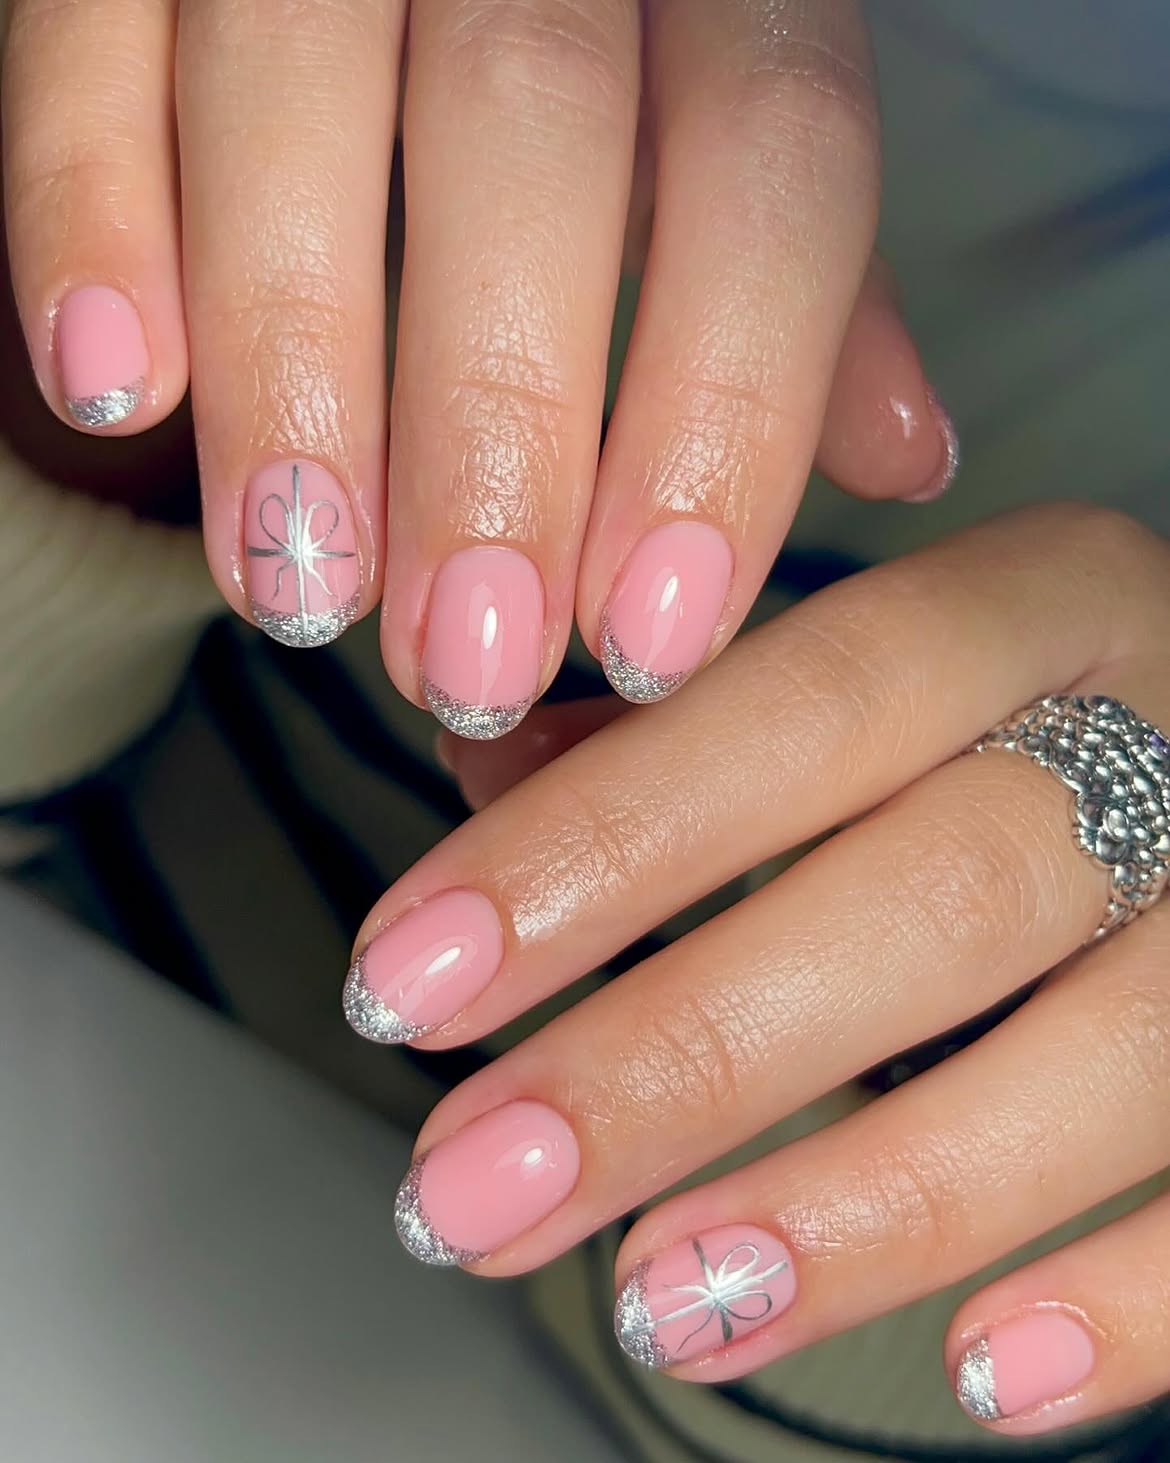
Embrace your inner coquette with this utterly charming take on classic French tips, perfected for the holiday season. This look features delicate pink bases with crisp white tips, elevated by a tiny, shimmering silver bow detail placed on one or two accent nails. It’s a wonderfully sweet and sophisticated design that proves holiday nails don’t always have to be bold and bright. The subtly elegant approach makes it versatile for any festive gathering, offering a polished yet playful vibe, especially gorgeous on short oval nails, making them look incredibly cute.
💰 Product Breakdown
To recreate this sweet style, start with a sheer nude or light pink base coat. Once dry, carefully apply a thin white French tip. For the silver bow, you can use tiny nail decals or, if you have a steady hand, use a fine-tipped brush and silver glitter polish to paint a miniature bow. A dotting tool can help create the loops and tails. Finish with a high-gloss top coat to seal in the design and give it that coveted polished shine. This look pairs beautifully with delicate jewelry and soft, romantic outfits.
2. Sheer Glitter Base with Red Bow Accents
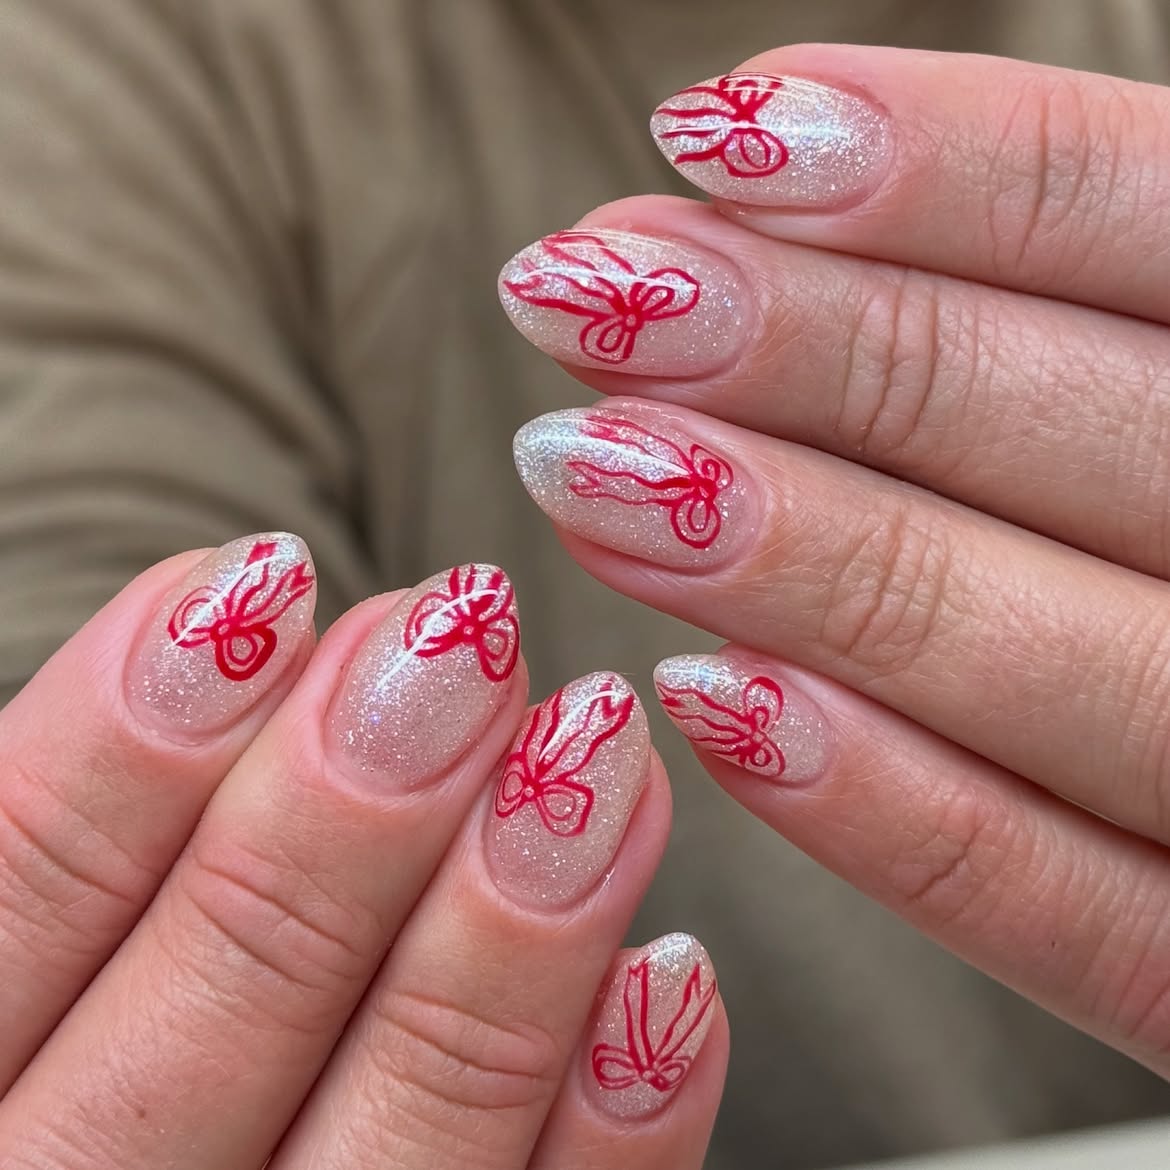
For those who adore a touch of sparkle without going overboard, this sheer glitter base with delicate red bow accents is pure holiday magic. The nails feature a translucent, shimmery base that catches the light beautifully, creating an ethereal glow. Each nail is then adorned with a tiny, perfectly placed red bow, adding a pop of festive color and a touch of whimsical art. This design is all about understated elegance, making your hands look effortlessly chic and ready for any holiday party. It’s a fresh take on traditional Christmas bow nails, offering a modern, delicate feel.
💡 Technique Tip
Achieving this look starts with a sheer, glitter-infused polish as your base—think fine silver or iridescent glitter. Apply two thin coats for optimal shimmer. Once the base is completely dry, use a very fine nail art brush and a vibrant red polish to carefully paint small bows. Alternatively, tiny red bow nail charms or stickers can make this step much easier. Position them near the cuticle or slightly off-center for a contemporary feel. Seal everything with a durable top coat to ensure your delicate design lasts through all your holiday festivities.
3. Elegant Red Bow Sparkle French Tip Nails
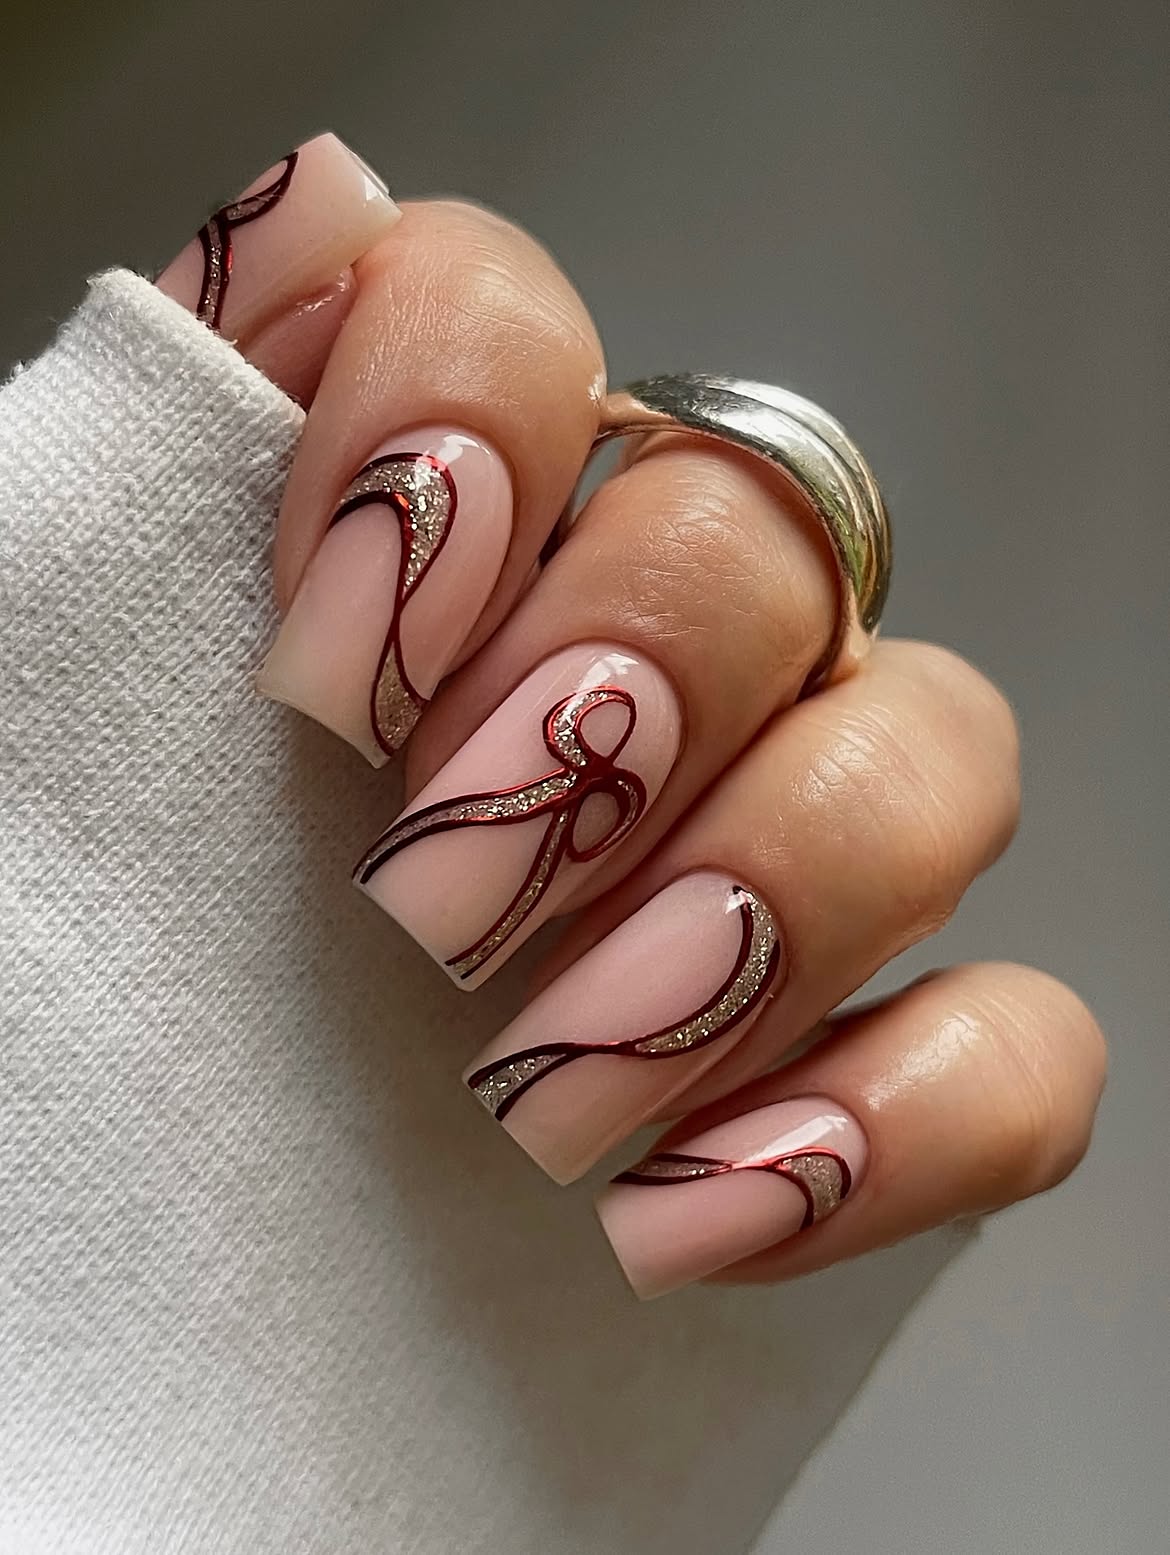
Step into the spotlight with this truly elegant and festive manicure that perfectly blends classic sophistication with holiday sparkle. This look features a soft, nude base that beautifully complements a shimmering French tip, infused with subtle glitter for that extra festive touch. The star of the show is a meticulously crafted red bow nail art, often placed on an accent nail, adding a focal point of rich color and intricate design. This style is particularly striking on a neat square nail shape, giving it a modern yet timeless appeal that’s perfect for any upscale holiday event or cozy family gathering.
⭐ Hero Product
To get this polished look, begin with a high-quality nude base coat that matches your skin tone. For the sparkle French tip, use a glitter polish with fine particles or mix a touch of loose glitter into your regular white tip polish before applying. For the red bow, you can either freehand it with a fine brush and opaque red polish or opt for pre-made bow decals for precision. Consider adding a tiny rhinestone in the center of the bow for an extra touch of glam. Finish with a high-shine top coat to enhance the sparkle and protect your festive manicure.
4. Deep Red Glitter Bow French Manicure
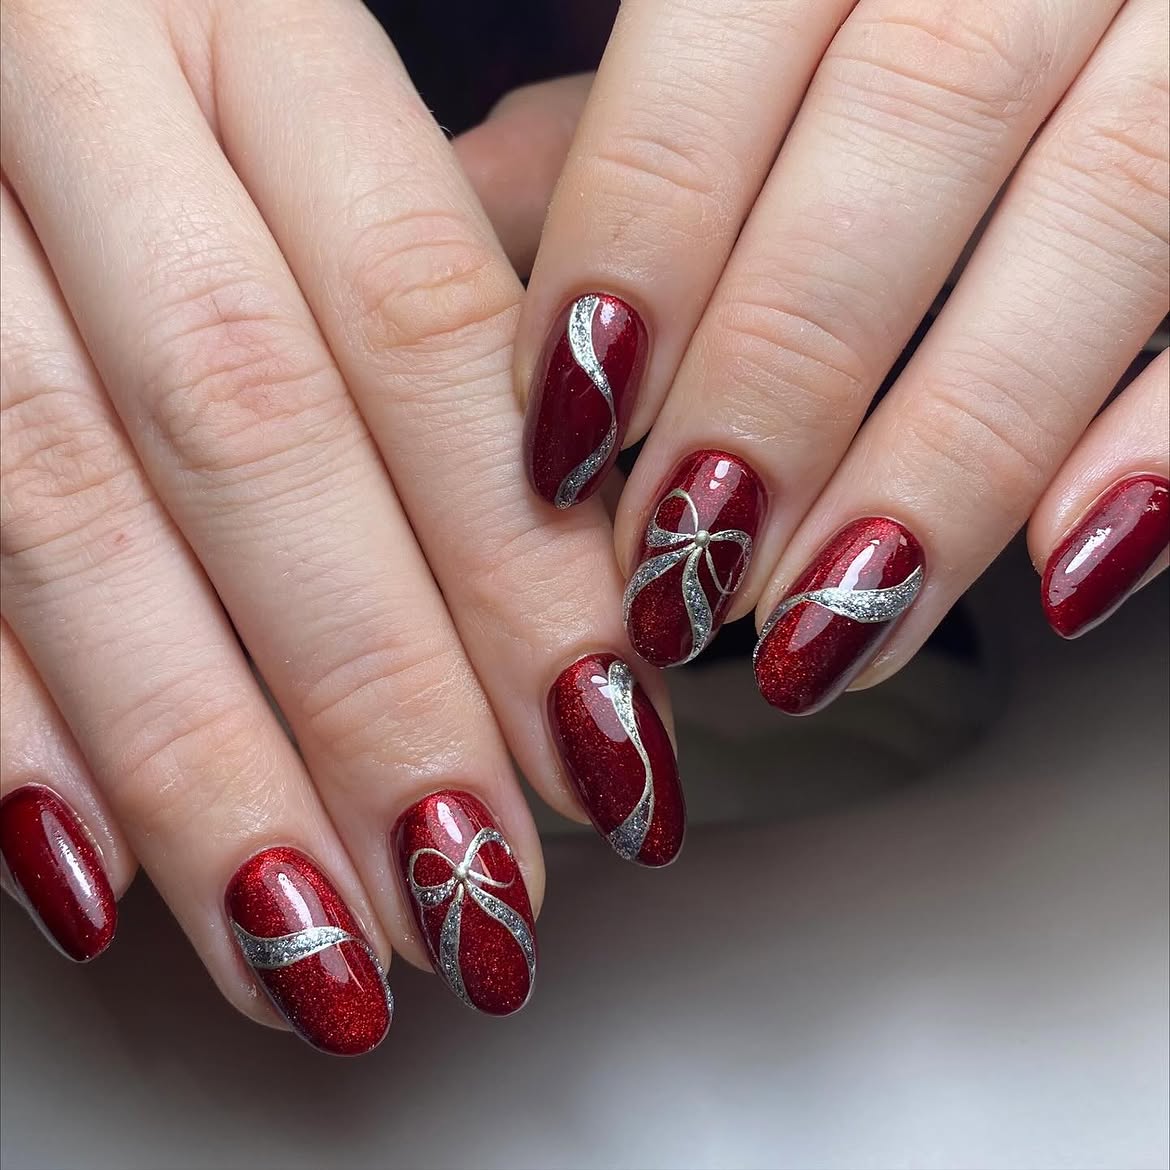
Dive into the luxurious side of holiday nails with this opulent deep red glitter bow French manicure. This design takes the classic French tip and elevates it with a rich, deep red glitter that screams festive glamour. Instead of a traditional white tip, a vibrant, sparkling red defines the free edge, creating a striking contrast against a nude or sheer pink base. A delicate silver or gold bow detail, often placed at the base of the nail or on an accent nail, adds a touch of intricate charm. It’s a surprisingly simple yet impactful way to incorporate holiday cheer, offering fresh ideas for your seasonal nail wardrobe.
📏 Occasion Fit
For this dazzling look, start with a clear or natural base coat. For the deep red glitter tip, apply a deep red glitter polish carefully to the tips using a steady hand or a French tip guide. Two thin coats will provide optimal sparkle and opacity. Once the tips are completely dry, use a tiny nail art brush or a bow decal for the silver or gold bow detail. Place it artfully on your ring finger or pinky for a subtle accent. A glossy top coat is essential to seal in the glitter and give your nails that salon-quality finish, ensuring your manicure looks impeccable for days.
5. Festive Red and White Striped Bow Nails
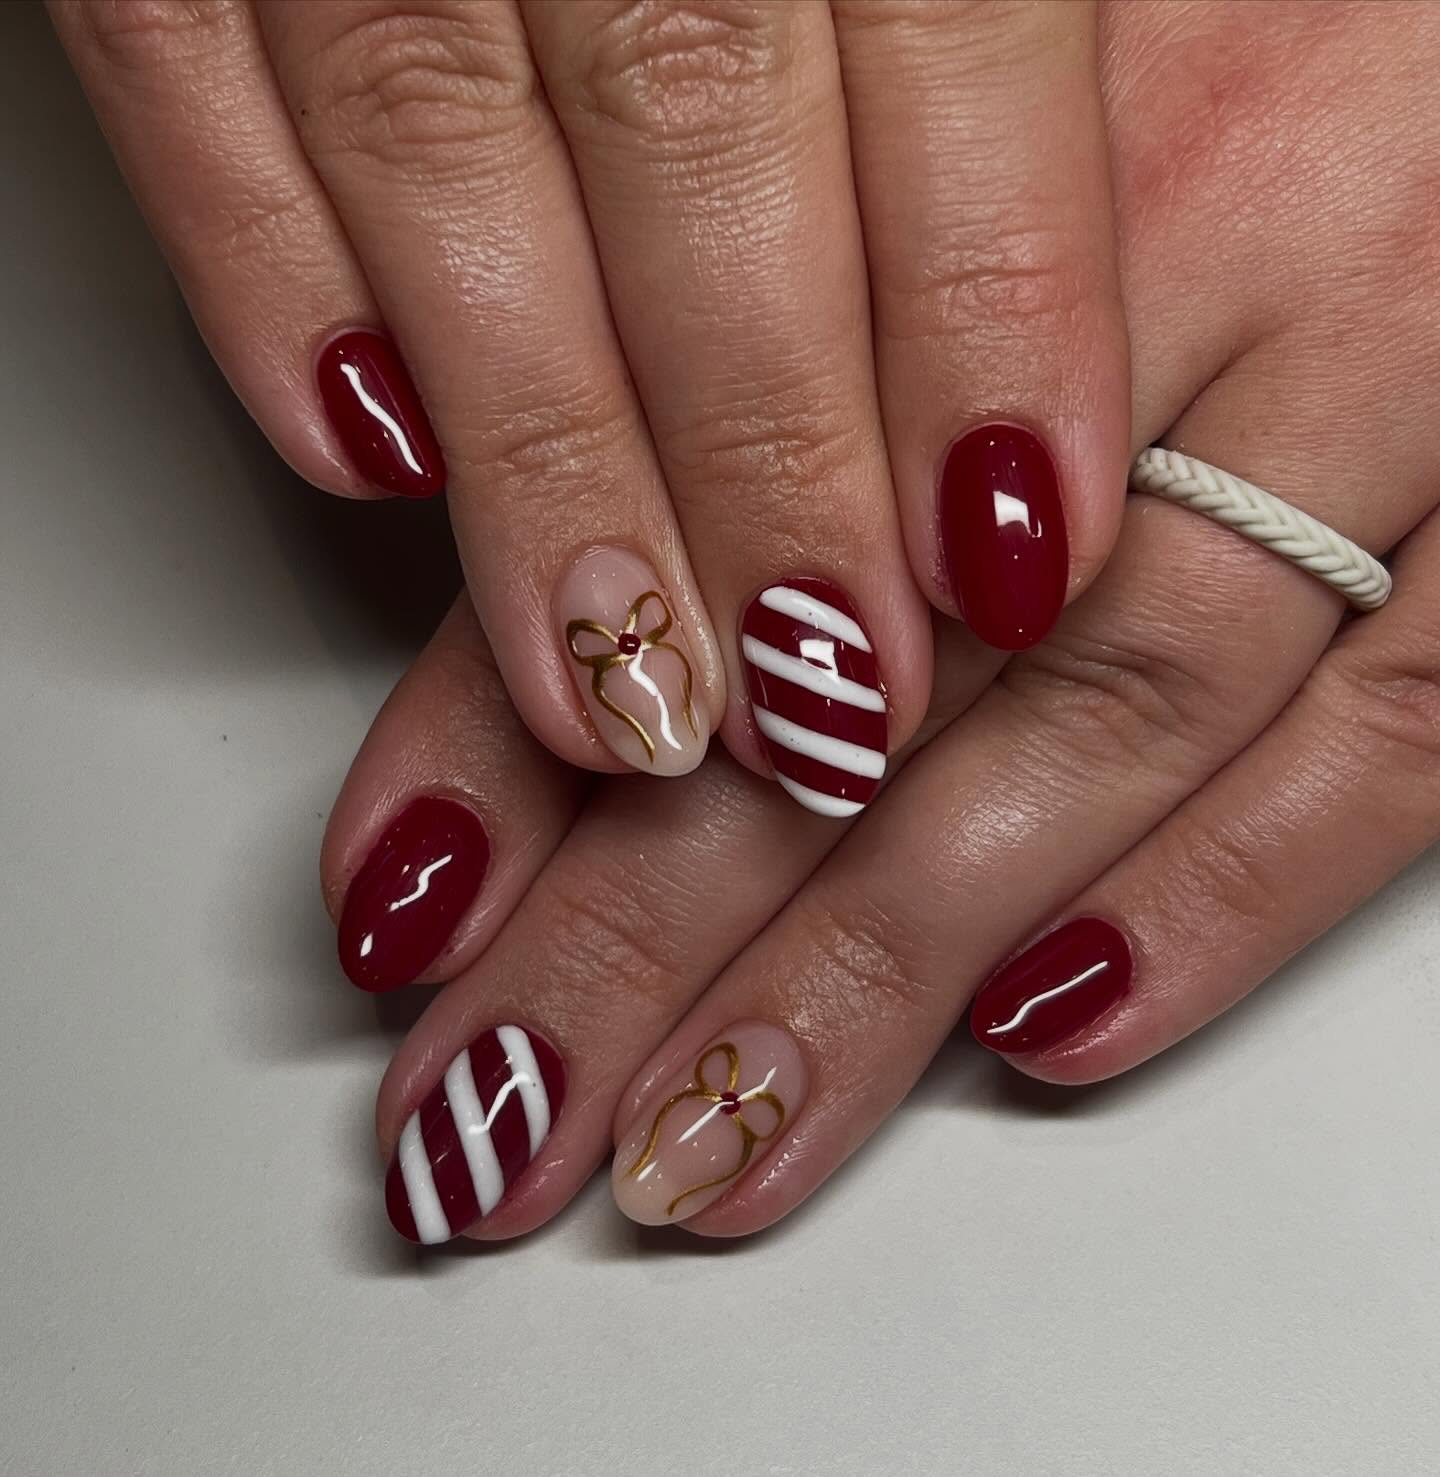
Nothing says holiday cheer quite like candy cane stripes, and this festive design combines that iconic look with adorable bows for a truly celebratory manicure. These Christmas bow nails feature classic red and white stripes, evoking a playful, sweet aesthetic. Often, one or two accent nails will showcase a detailed bow, either painted on or as a delicate 3D charm, adding an extra layer of cuteness. This style works wonderfully on short oval nails, making them look neat, festive, and incredibly cute, perfect for any holiday gathering, from cookie decorating to caroling. See also our classic French ideas, like the one in Idea 7, for a more subdued approach with a red bow accent.
📐 Color Math
To achieve these delightful nails, begin by applying a white base coat. Once dry, use a thin striper brush and a vibrant red polish to create crisp diagonal stripes. For the bow accent, you can either paint a small red bow onto a solid white nail or use a small nail art charm for a three-dimensional effect. If painting, use a dotting tool for the loops and a fine brush for the tails. Finish with a clear, high-shine top coat to protect your striped design and secure any charms, ensuring your candy cane nails last throughout the season.
6. Festive Christmas Sweater French Tip Nail Art
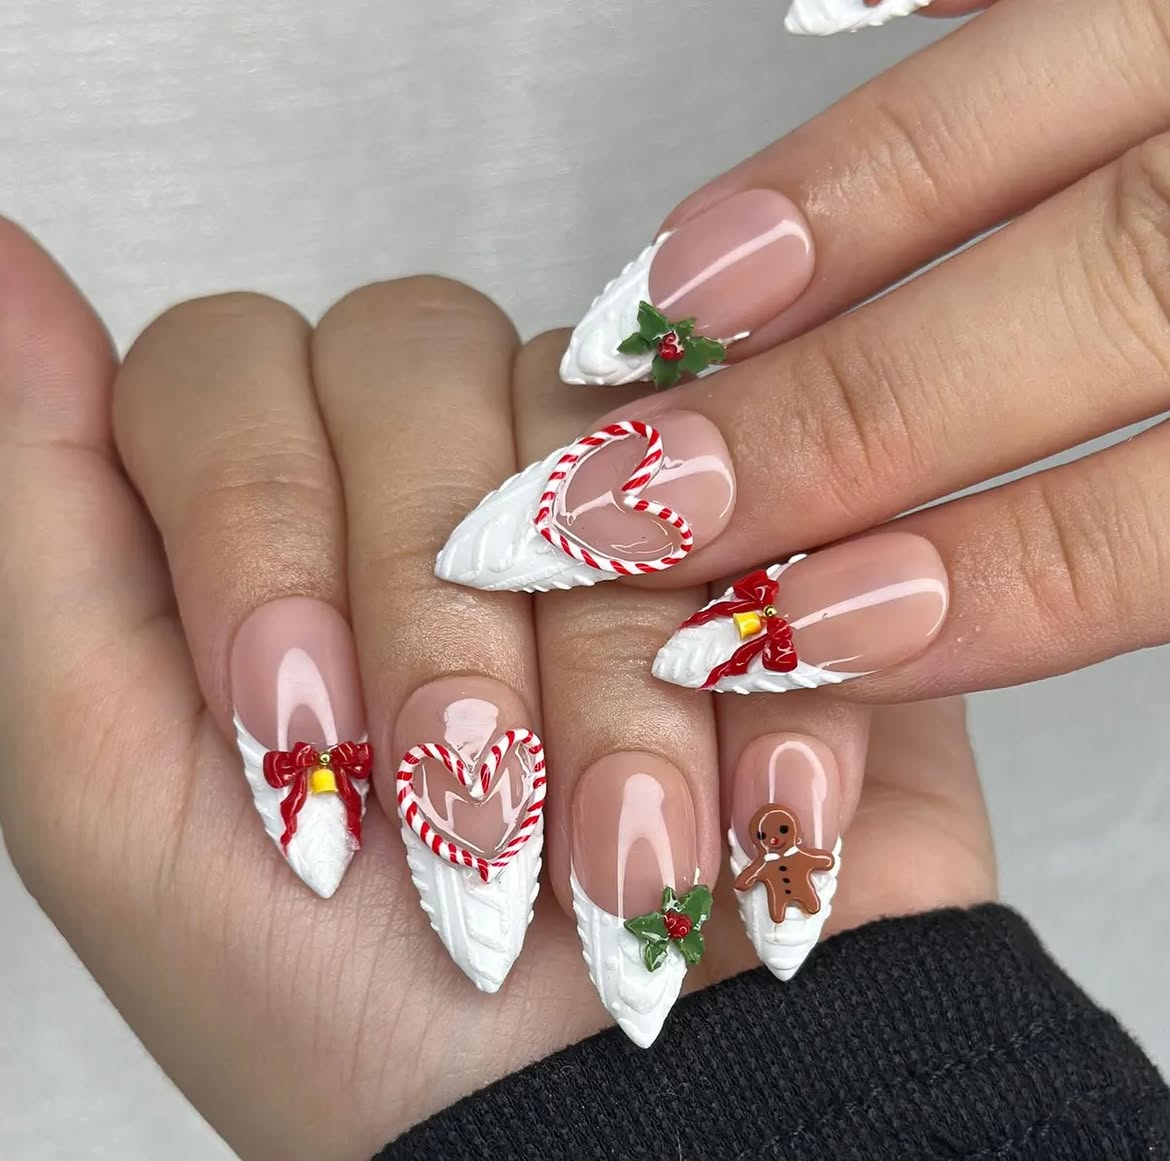
Get ready to feel all warm and fuzzy with this incredibly cozy and chic Christmas sweater and French tip nail art. This design takes inspiration from your favorite holiday knits, featuring intricate patterns like snowflakes, fair isle motifs, or even tiny gingerbread men along the French tip line. The look is then elevated with a charming 3D bow, often in a festive shade like emerald green or classic red, making it feel extra special. It’s a creative way to showcase your holiday spirit, offering endless ideas for unique festive details that are both intricate and irresistibly cute. This particular style feels incredibly unique and artisanal.
🧹 Wear Reality
Creating this detailed look requires a steady hand and some specialized tools. Start with a nude or sheer pink base. For the sweater patterns on the French tip, use a very fine nail art brush and white or contrasting colored polish to draw tiny stitches, snowflakes, or lines. You can use stamping plates for intricate designs if freehand is too challenging. The 3D bow can be sculpted using builder gel or applied as a pre-made nail charm, securing it with a strong top coat adhesive. Finish with a matte top coat over the sweater elements to mimic the texture of fabric, while keeping the bow glossy for contrast.
7. Classic French with Red Bow Accent Nails
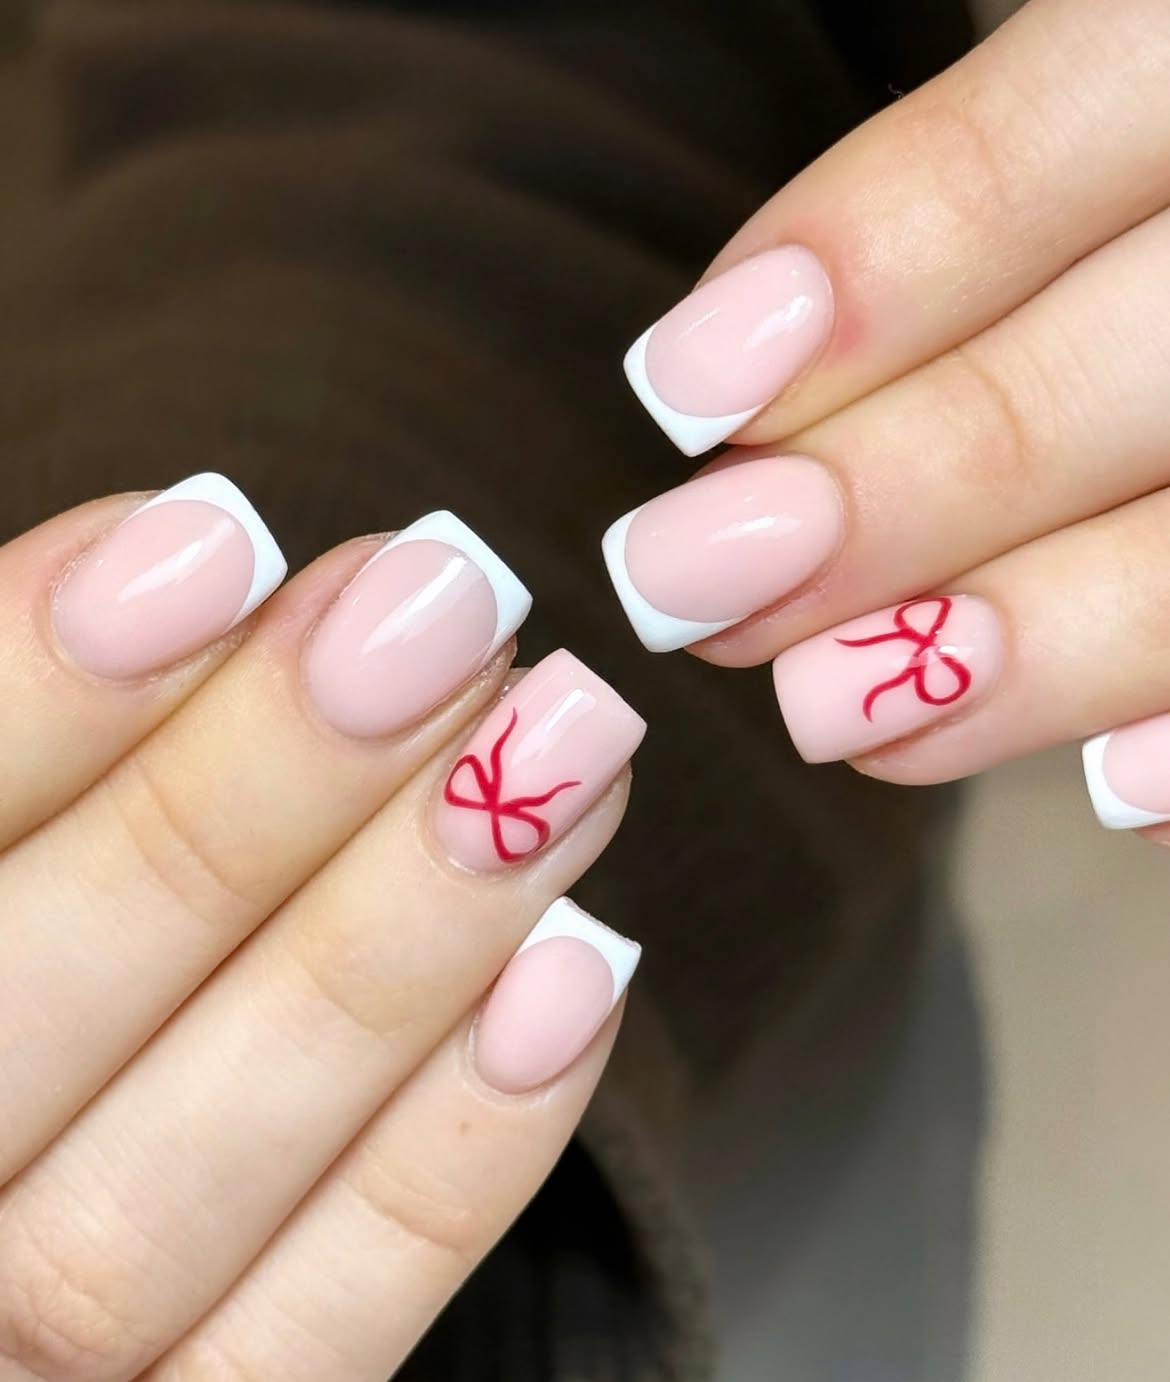
Sometimes, less truly is more, and this classic French manicure with a vibrant red bow accent proves it. This timeless design features the elegant combination of a sheer pink base with a crisp white tip, known for its universally flattering appeal. What makes it festive is the addition of a single, perfectly placed red bow on an accent nail, often the ring finger. This subtle pop of color and charming detail instantly transforms a sophisticated everyday look into something special for the holidays. It’s a chic and simple way to embrace the festive spirit without overwhelming your manicure, offering understated elegance.
✅ Before You Start
To recreate this sophisticated look, begin with a flawless French manicure—apply a sheer pink base coat, then carefully paint thin white tips. Once the French base is completely dry and set, select an accent nail for your bow. Using a fine-tipped nail art brush and opaque red polish, carefully draw a small, neat bow. You can use a dotting tool to create the loops first and then add the tails. For extra durability and shine, seal the entire manicure with a high-quality, long-lasting top coat. This style is perfect if you’re seeking a refined holiday touch.
8. Gold Ribbon Bow French Tips with Sparkle
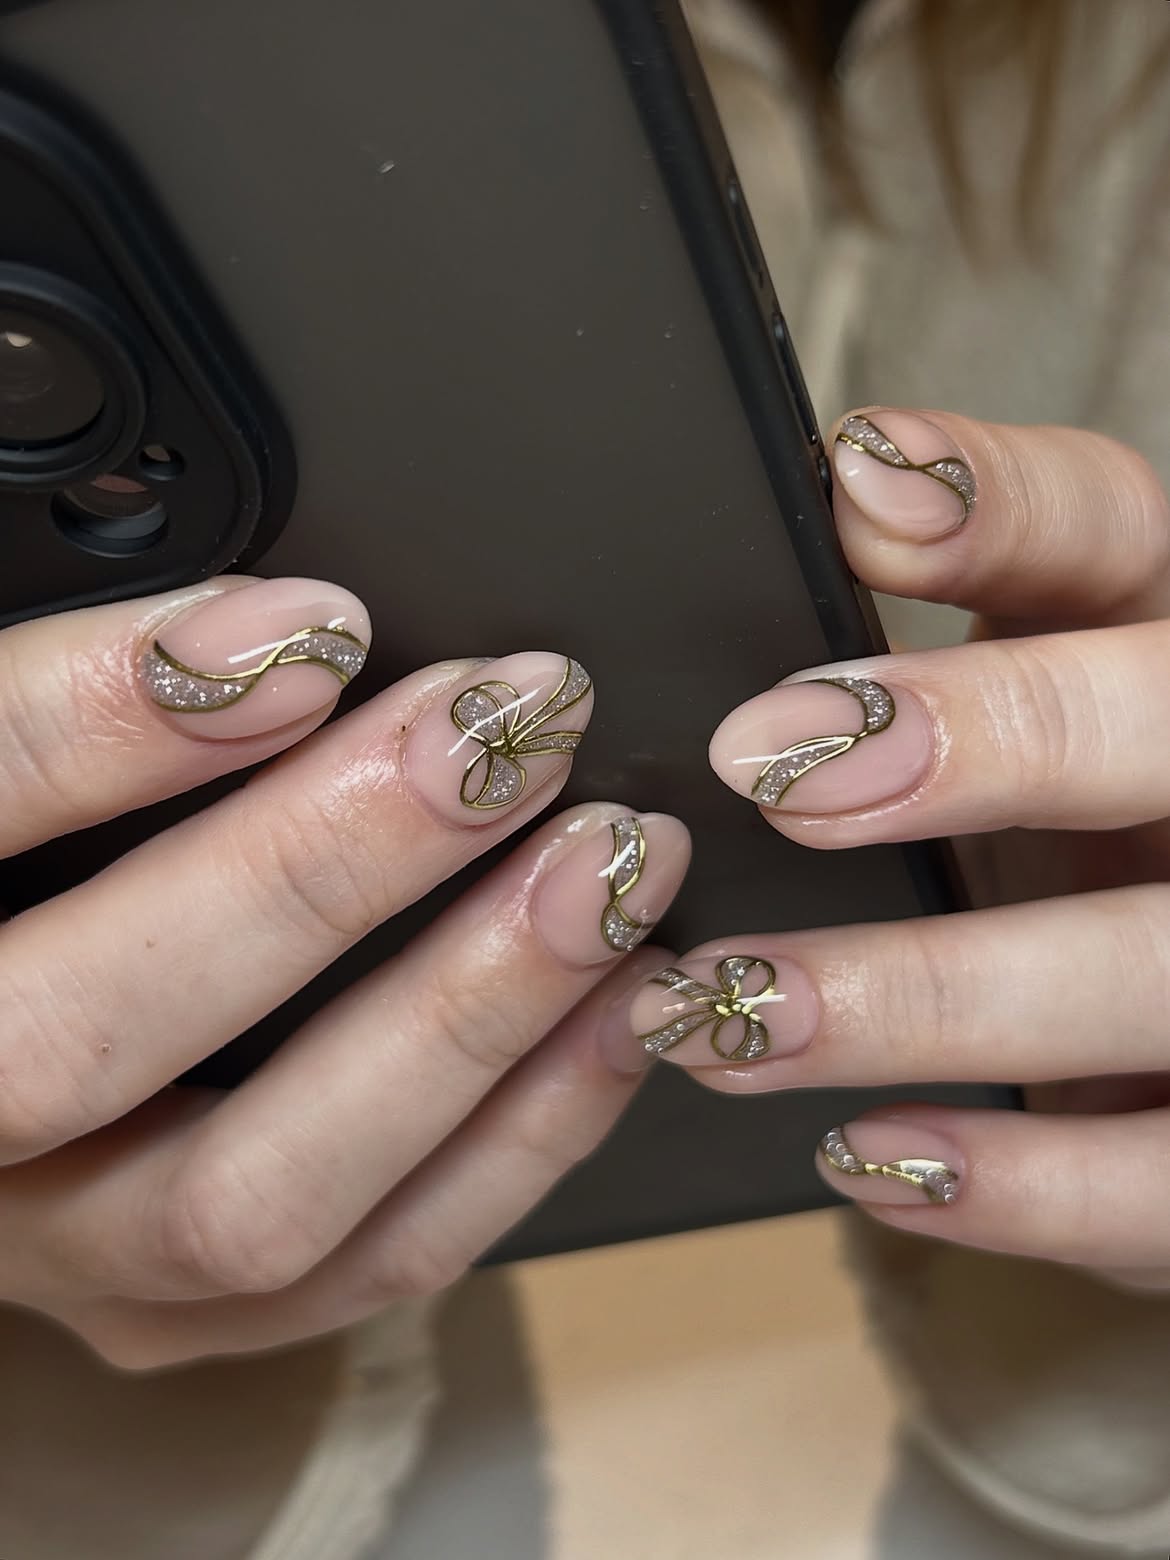
Elevate your holiday manicure with a touch of gilded glamour through these stunning gold ribbon bow French tips. This sophisticated design takes the classic French manicure and infuses it with luxurious golden accents. Instead of a traditional white tip, a delicate gold line or a subtle gold glitter tip adorns the nail’s edge. The true highlight is the exquisite gold ribbon art, fashioned into a charming bow on one or two accent nails. This look is perfect for those who appreciate refined elegance and a chic metallic touch, making your Christmas bow nails truly stand out. It offers a more luxurious alternative to the silver details seen in Idea 1.
🔧 How-To Brief
To achieve this opulent style, start with a neutral or clear base coat. For the gold French tip, use a metallic gold polish or a fine gold glitter polish to create a precise line along the free edge of your nail. Once dry, use a very fine nail art brush and the same gold polish to carefully draw the delicate bow design on your chosen accent nails. You can also use thin gold nail striping tape to form the bow shape for a crisp, clean look. Finish with a high-gloss top coat to enhance the metallic shine and protect your intricate design, ensuring it dazzles throughout the holiday season.
9. Sparkling Cranberry Bow Almond Nails
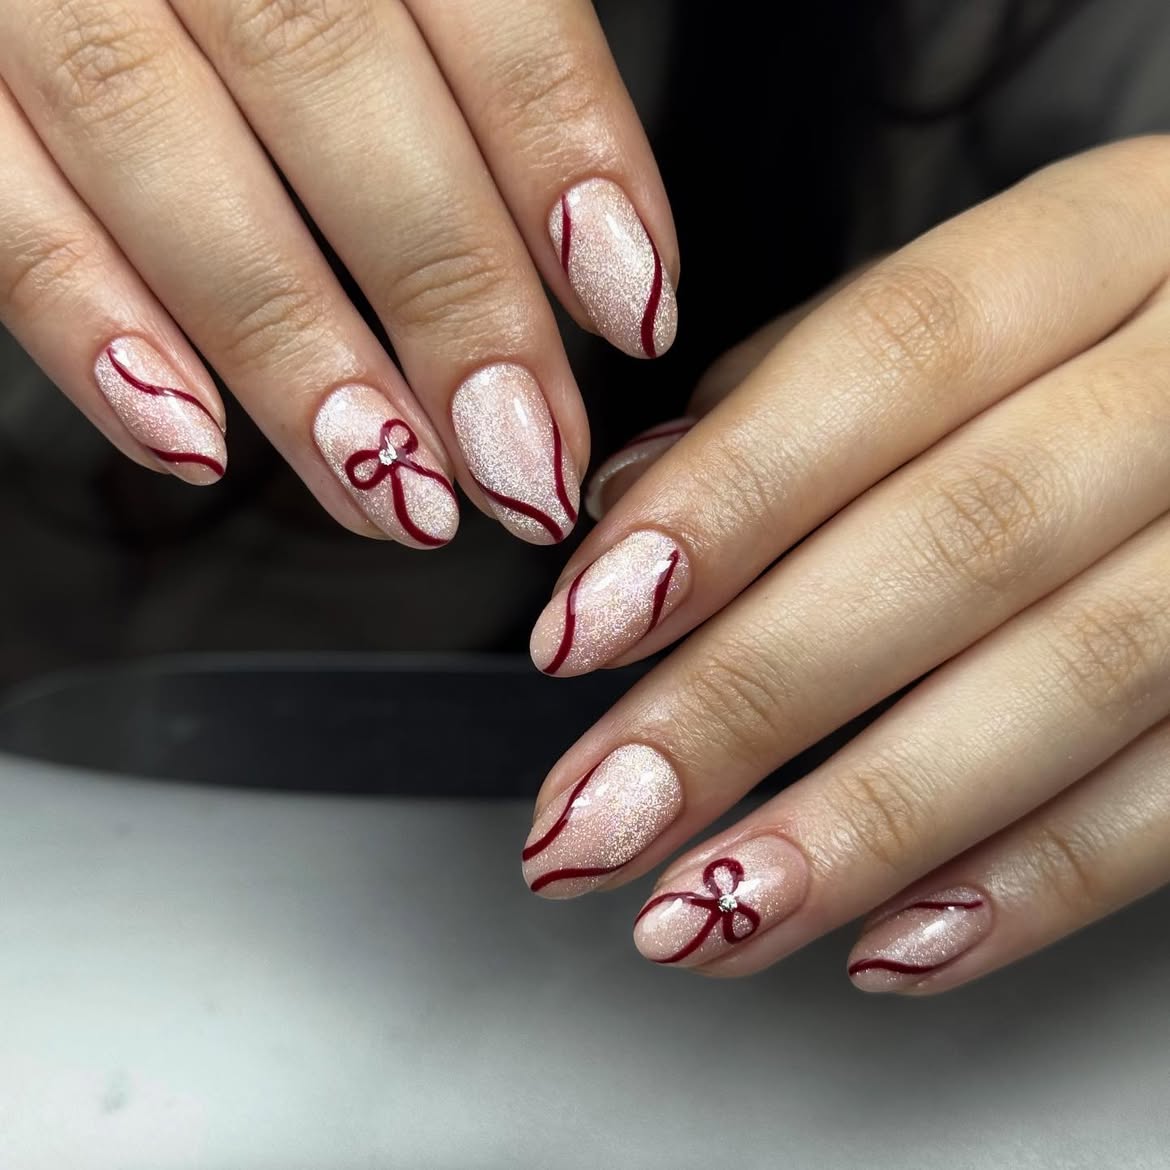
Indulge in the rich, deep hues of the season with these sparkling cranberry bow almond nails. This manicure features a gorgeous cranberry red, often with a subtle glitter shimmer, giving it a jewel-toned depth that feels incredibly luxurious and festive. The almond shape elongates the fingers beautifully, making the nails look elegant and refined. A delicate bow detail, either painted in a contrasting metallic or a slightly lighter shade of red, is strategically placed, often using negative space to make it pop. This design is effortlessly cute and offers fresh ideas for those wanting a sophisticated yet playful holiday look.
💸 Dupe Alternative
To recreate this stunning design, begin with a perfectly shaped almond nail. Apply two coats of a high-quality cranberry red polish, opting for one with a fine shimmer if you desire extra sparkle. For the bow detail, use a thin nail art brush and either a metallic gold, silver, or a lighter pink polish. You can paint the bow directly onto the cranberry base, or for a negative space effect, paint the outline of the bow and leave the center clear or filled with a very sheer nude. Finish with a super glossy top coat to amplify the richness of the cranberry and make the bow detail truly shine.
10. Chic Winter Plaid & Cable Knit Stiletto Nails
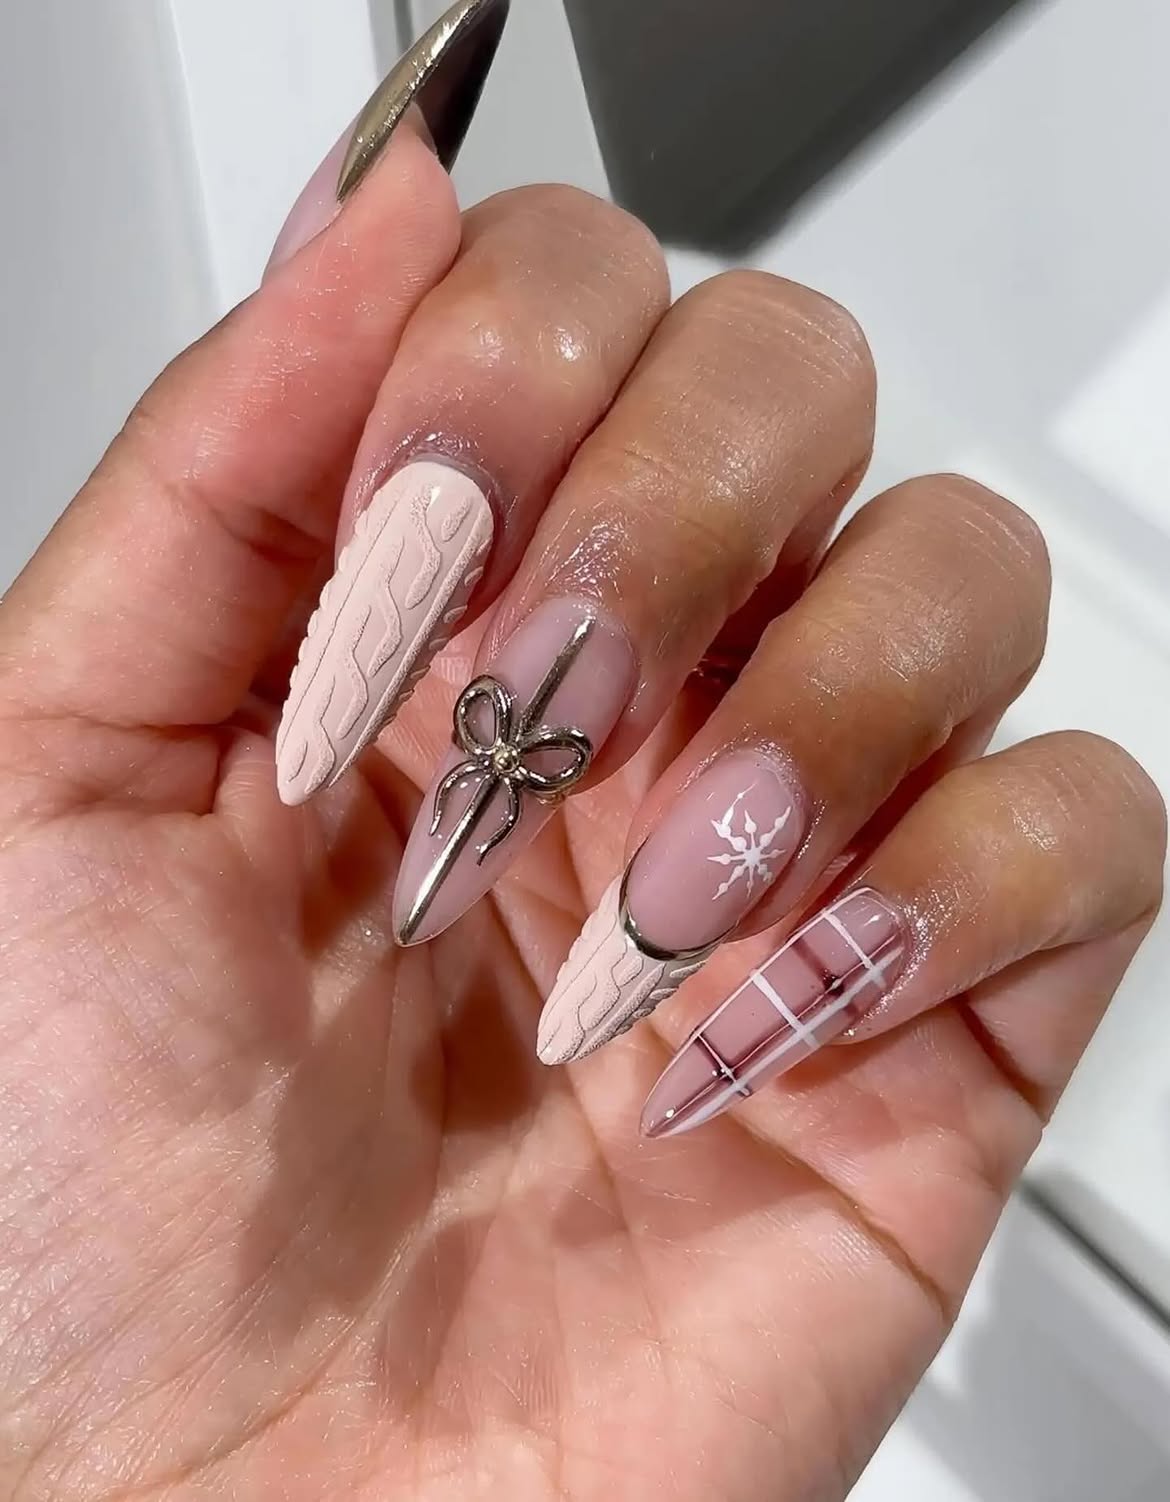
Step into a winter wonderland with these incredibly chic plaid and cable knit stiletto nails, embodying cozy glam for the holiday season. This intricate design combines the warmth of sweater patterns with classic plaid motifs, often in festive colors like deep reds, creams, and emerald green. The stiletto shape adds a dramatic, high-fashion edge, while metallic accents and often a charming 3D bow charm bring in that touch of luxury. It’s a statement-making manicure that showcases true nail art, perfect for those who love to go all out with their holiday style. This design takes intricate texture to the next level, offering a unique blend of cozy and edgy.
🎯 Who It Suits
This advanced nail art look requires precision and patience. Start with a durable stiletto base. For the cable knit effect, use a builder gel or thick polish applied with a fine brush to create raised, textured patterns, then cure or let dry. For the plaid, use striping tape or a very thin brush to create intersecting lines in contrasting colors. Adhere any 3D bow charms with strong nail glue or builder gel. Finish with a mix of matte and glossy top coats – matte for the knit and plaid to enhance texture, and glossy for the bow or metallic accents to make them pop. This creates a visually rich and tactile experience.
11. Burgundy and Pink Bow Almond Nails
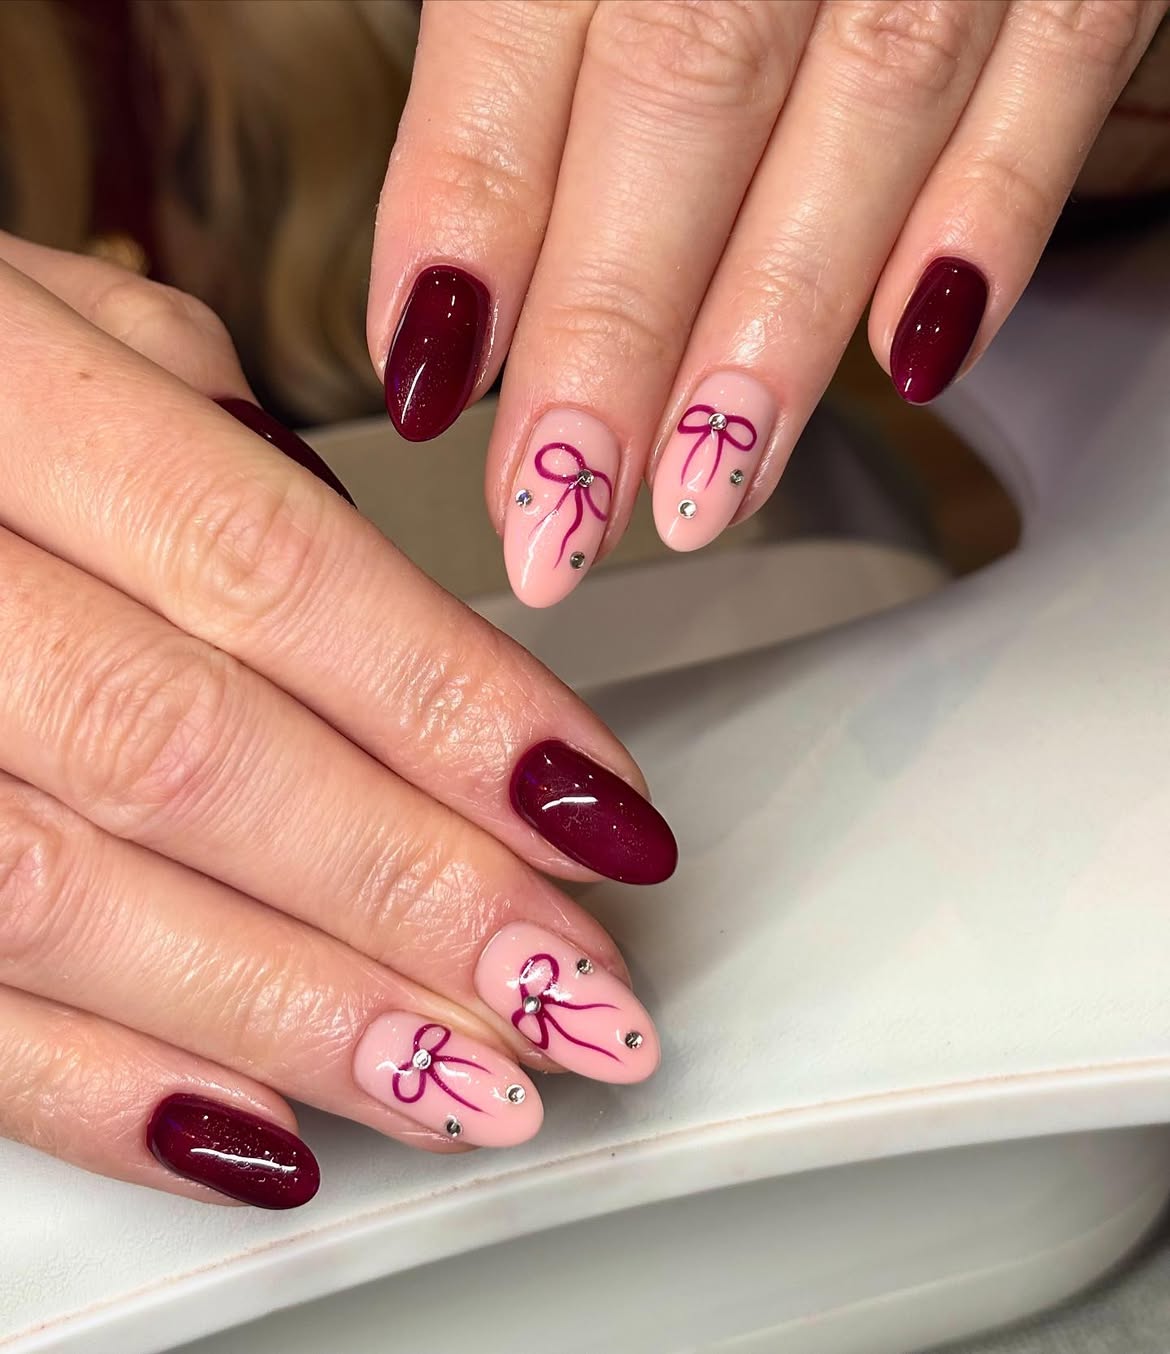
This luxurious look merges the deep richness of burgundy with soft, delicate Pink tones, creating a sophisticated twist on traditional festive palettes. The focal point is intricate bow nail Art, often rendered with subtle glitter or tiny rhinestone accents that catch the light beautifully. Shaped into an elegant almond, this Design feels both classic and contemporary, offering a refined way to embrace the holiday spirit without overpowering your outfit. It’s a chic statement for any holiday event, proving that Red hues can be endlessly versatile.
🔥 Trending Context
To achieve this elevated style, start with a perfectly prepped almond shape, ensuring a smooth surface for your polish. Apply a burgundy base coat, allowing it to dry completely before carefully adding pink accents or bow details using a fine-tipped brush. For that extra sparkle, gently place tiny rhinestones on your bows while the topcoat is still wet, then seal everything with a high-gloss topcoat for lasting wear and shine. A steady hand and patience are key for creating those delicate bow designs.
12. Red Glitter Bow Accent Almond Nails
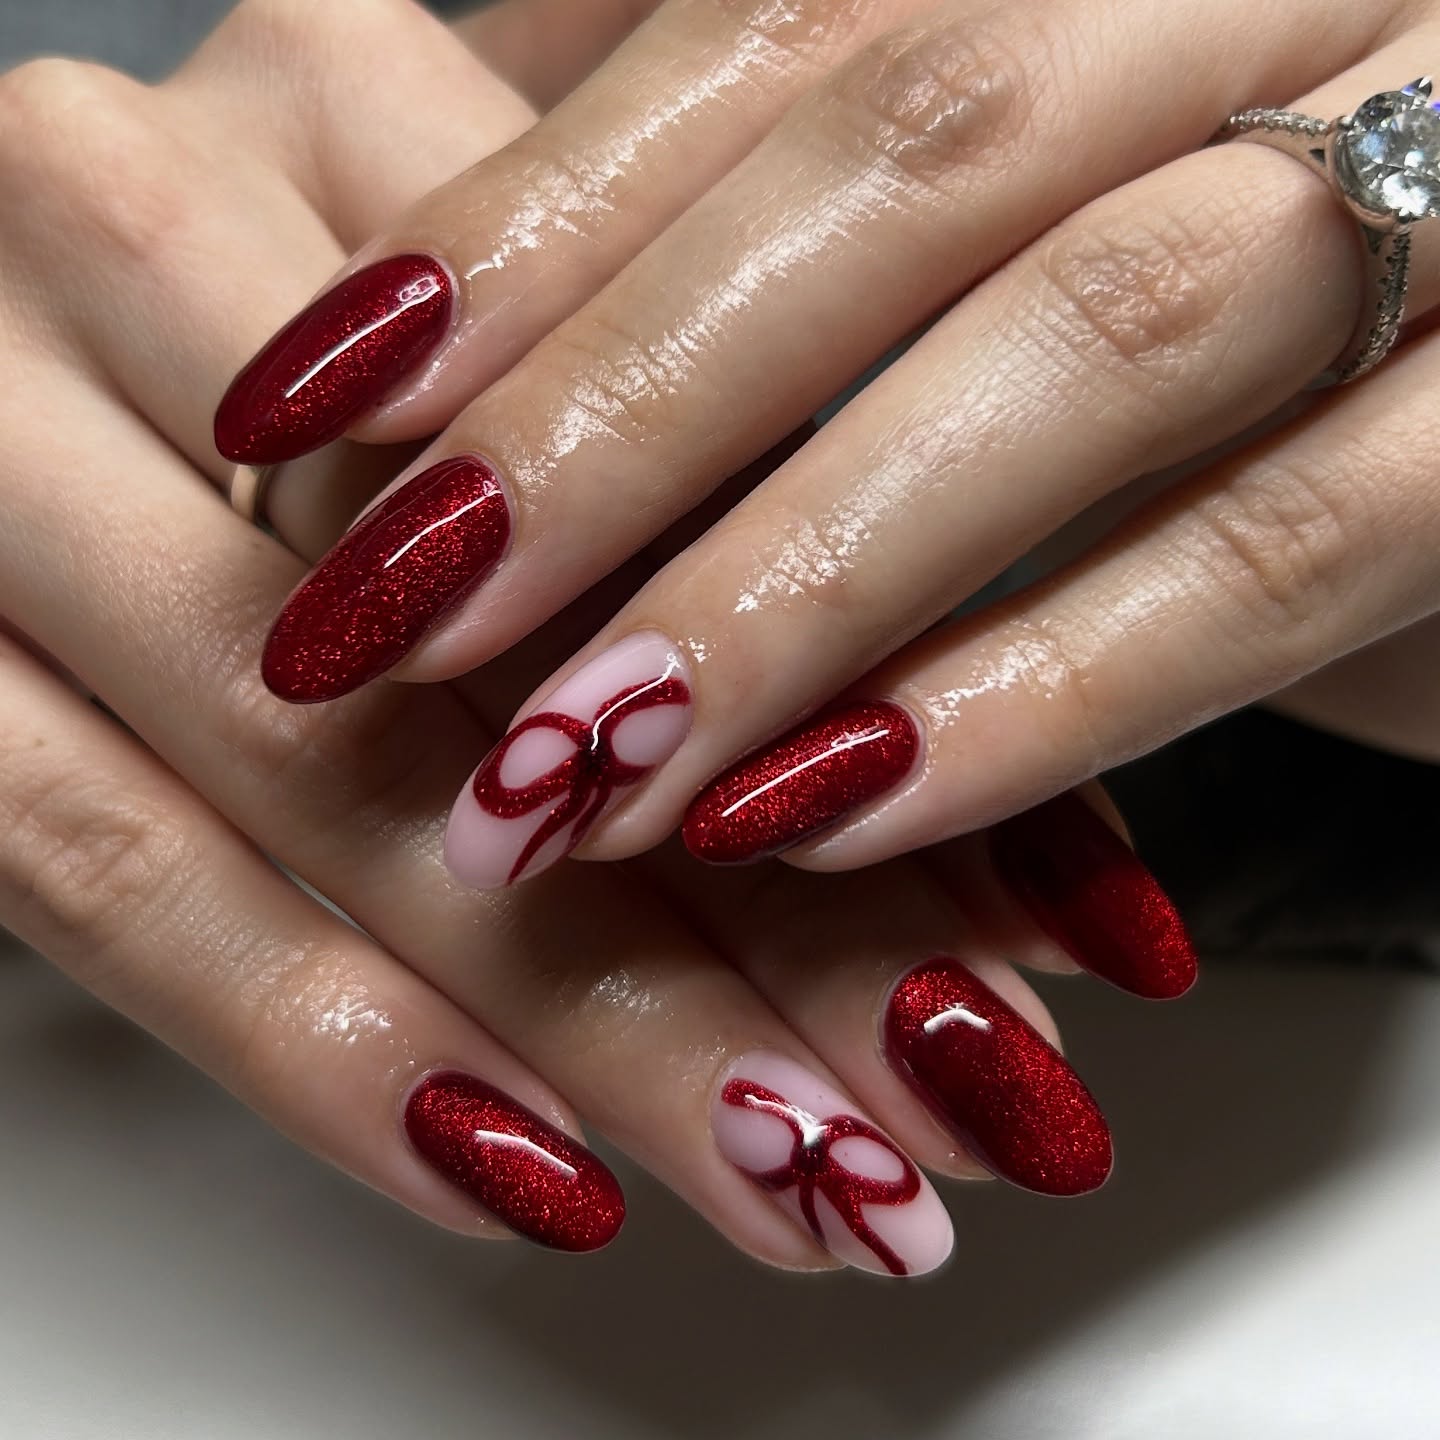
Get ready to sparkle with this enchanting look, where vibrant Red glitter takes center stage, creating an undeniable festive vibe. This dazzling Design is all about making a statement, featuring a single, beautifully placed bow accent on one or two nails, transforming a classic glitter manicure into something truly special. The almond shape provides a graceful canvas, allowing the shimmering red to truly pop. It’s one of those brilliant Ideas that proves you don’t need an overly complex approach for stunning results, making it feel perfectly Simple to recreate.
⚠️ Common Concerns
Begin by shaping your nails into a smooth almond. Apply a glitter base, building up layers for full opacity and maximum sparkle, then seal with a quick-dry topcoat. For the bow accent, use a contrasting opaque red or even white polish and a fine detailing brush to draw your bow shape. Alternatively, a delicate nail decal or a tiny 3D charm can instantly elevate the look. Finish with a generous layer of high-gloss topcoat to encapsulate the glitter and protect your artistic bow.
13. Sparkly White Nails with Red Bow Accents
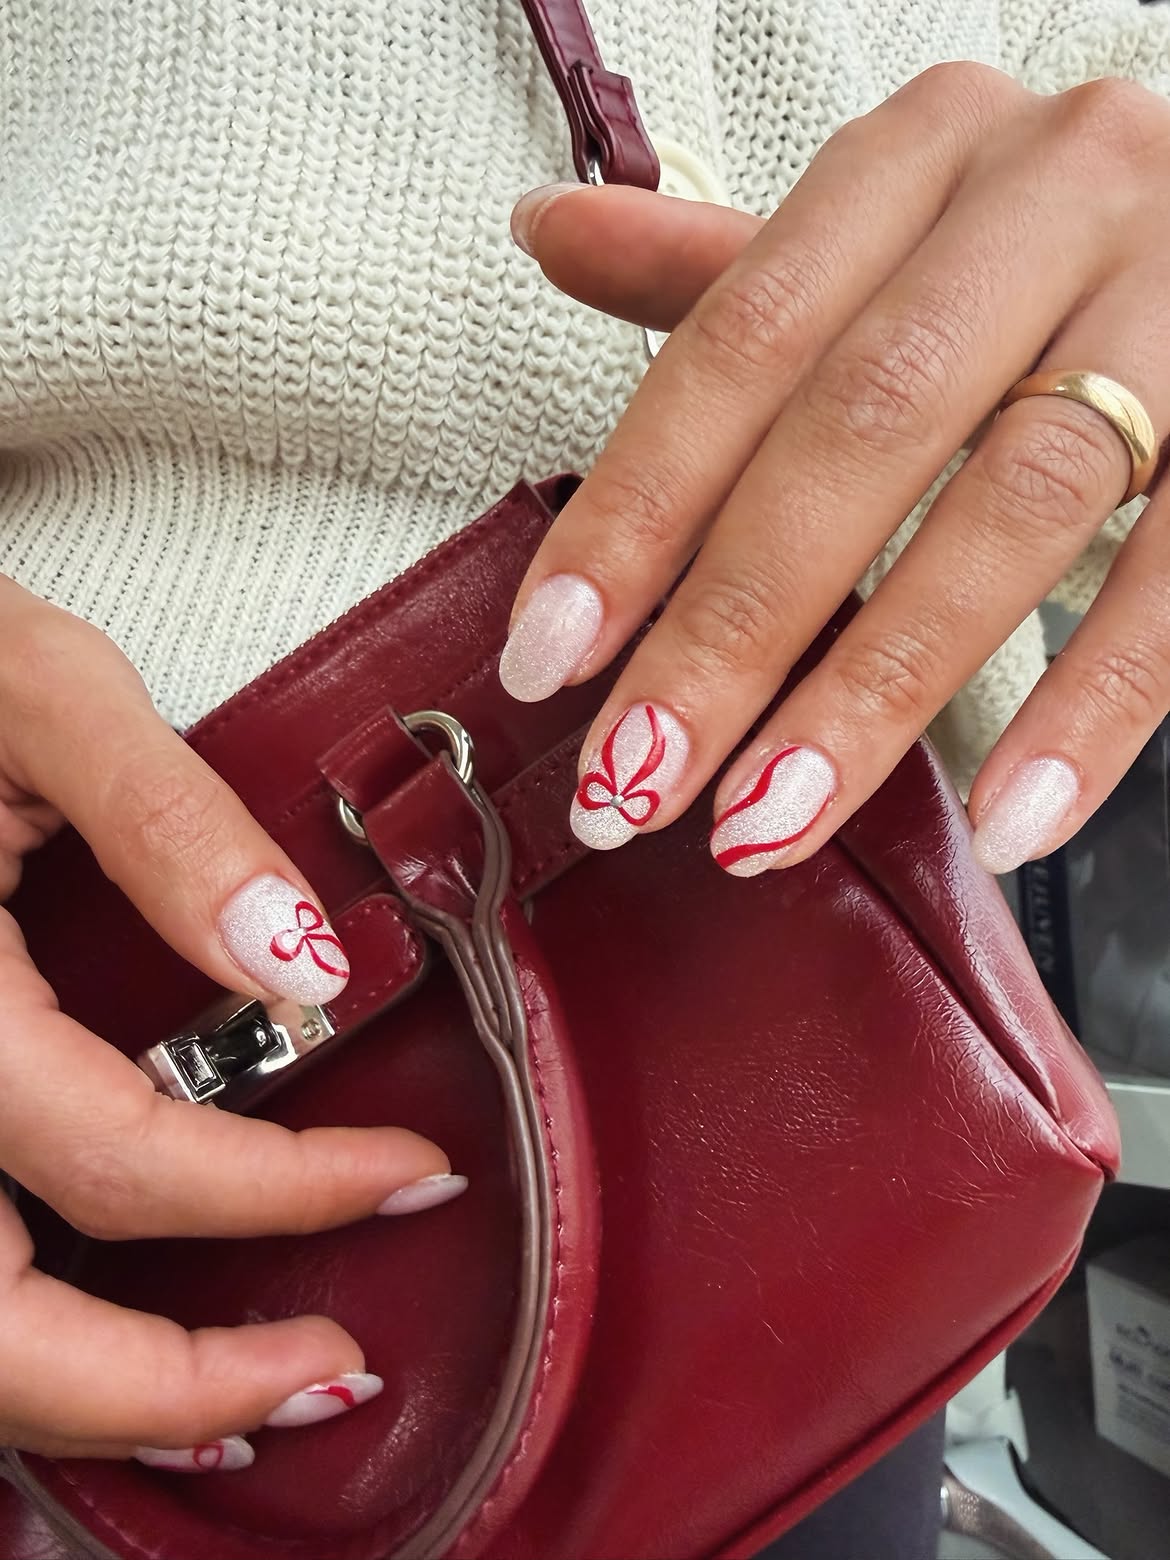
Embrace the magic of a winter wonderland with this charming and effortlessly Cute nail style. Imagine pristine sparkly white nails, reminiscent of fresh snow, adorned with vibrant Red bow accents that pop beautifully against the frosty backdrop. This look is particularly stunning on a Short length, where the subtle glitter finish adds a touch of enchantment without being overwhelming. It’s a delightful choice for those seeking elegant and festive Christmas bow nails that exude cheerful holiday spirit, perfect for any casual or dressy occasion.
💰 Product Breakdown
Start with clean, shaped nails, opting for a neat, short oval or squoval style. Apply a few thin coats of a sparkly white polish, allowing each to dry thoroughly to prevent streaking. For the red bows, you can freehand them with a fine brush using opaque red polish, or choose small bow stickers or decals for precision. Position your bows strategically – maybe one on each accent nail or scattered playfully across a few. Finish with a clear topcoat to seal in the design and enhance the sparkle.
14. Festive Red Bow Christmas Wreath Oval Nails
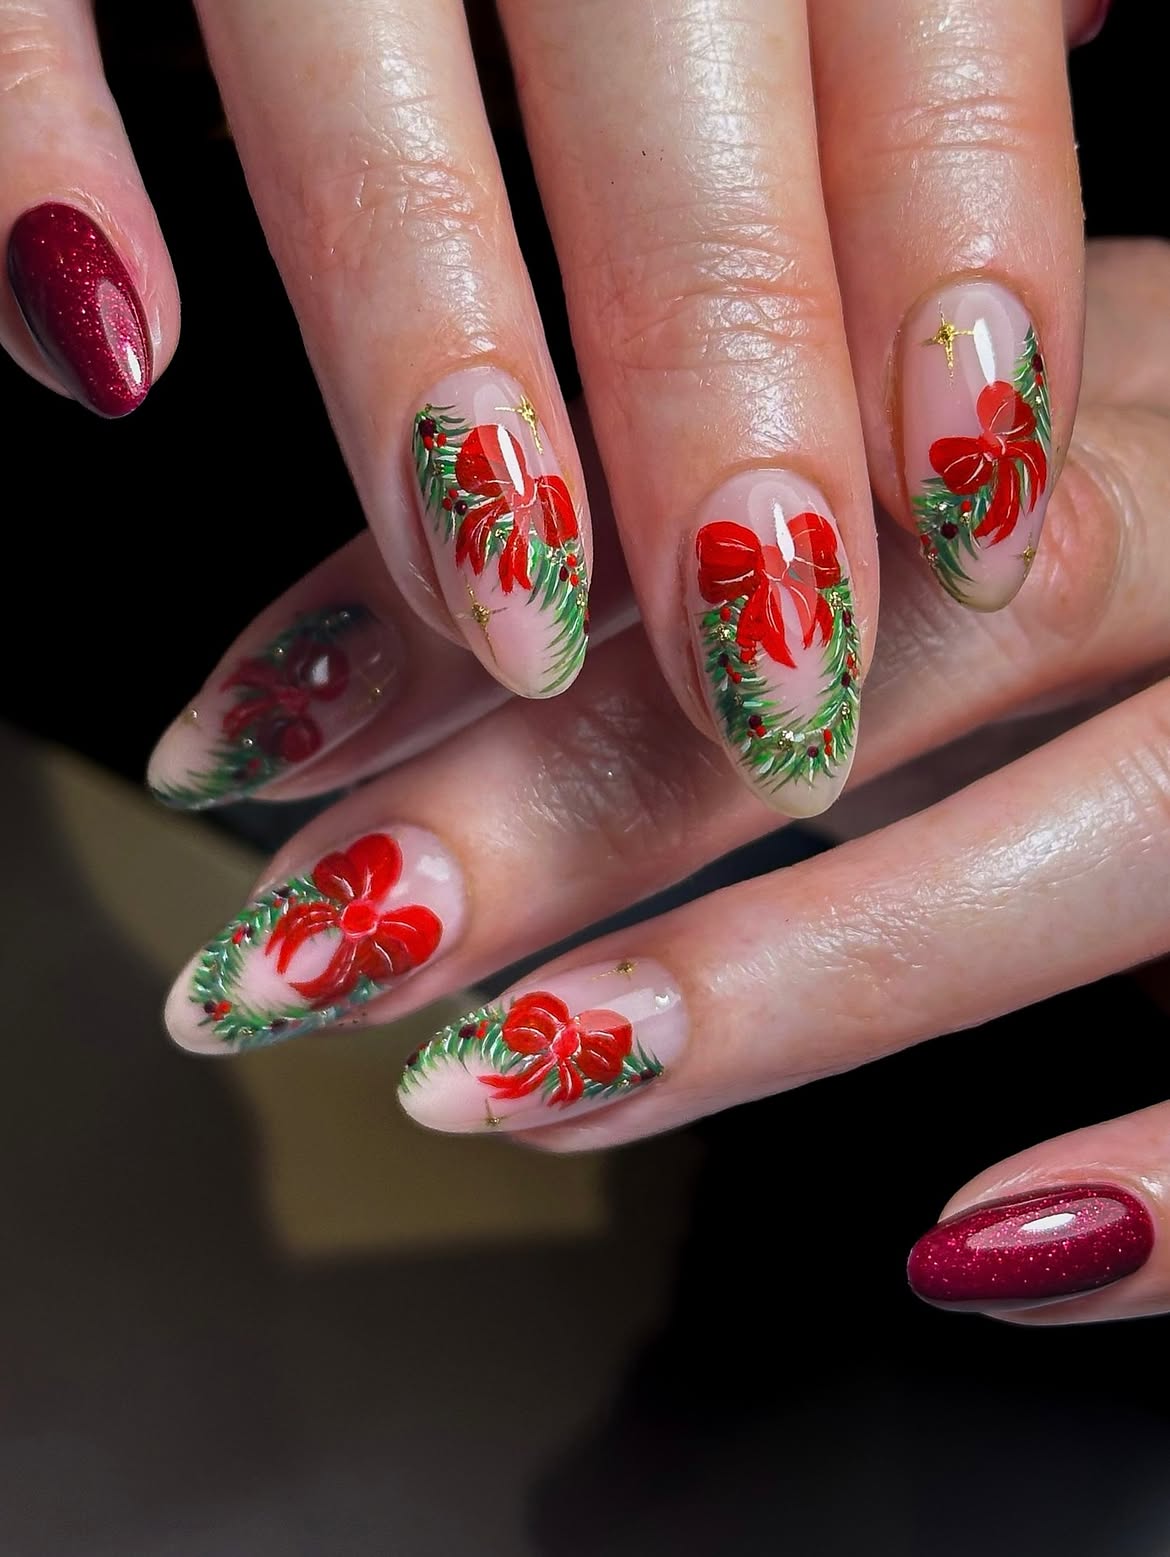
Step into a holiday fairytale with this intricately detailed and absolutely stunning nail Design. This festive look features miniature Christmas wreaths, beautifully crafted with delicate pine needles in various shades of Green, encircling tiny yet vibrant Red bows that serve as the focal point. Subtle gold accents add a touch of luxury, making each oval-shaped nail a tiny piece of holiday Art. It’s an ideal choice for those who love to embrace the full magic of the season, showcasing creativity and festive spirit on their fingertips.
💡 Technique Tip
Achieving this intricate look requires patience and a very fine nail art brush. Start with a neutral or light green base coat. Once dry, use a dark green and a lighter green to dab small, overlapping strokes to create the pine needle effect for the wreath. Next, carefully paint small red bows at the bottom or top of each wreath, adding tiny gold dots for accents. A glossy topcoat will help bring out the details and ensure longevity. Consider using a dotting tool for perfectly round gold accents.
15. Elegant Red and Gold Bow French Tips
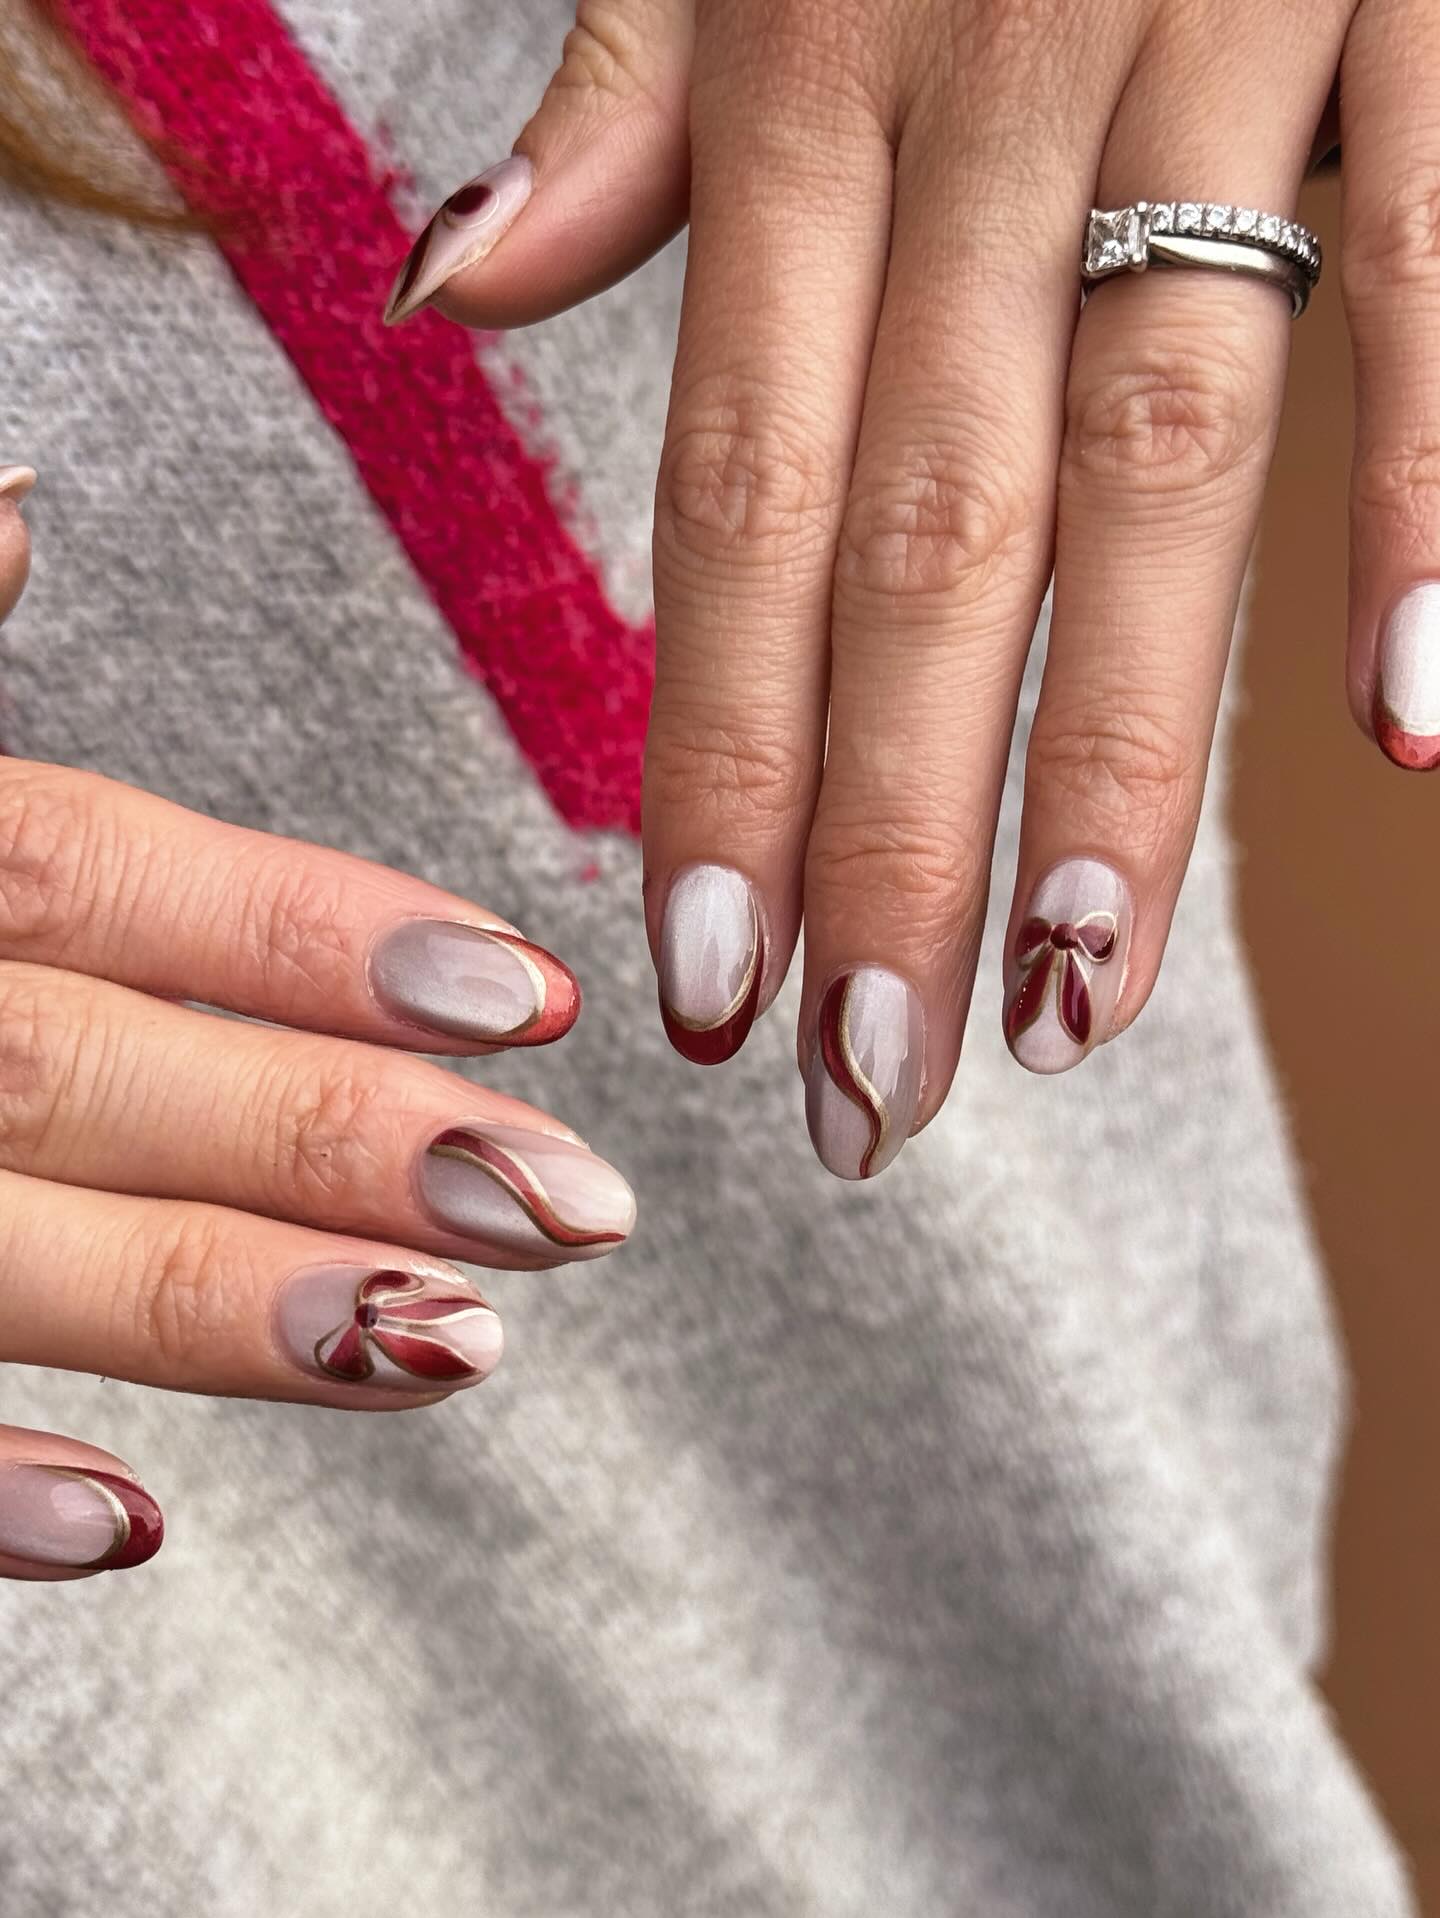
This sophisticated manicure is a beautiful fusion of classic elegance and festive flair, perfect for any holiday celebration. A delicate neutral base sets the stage for a striking Red French tip, offering a contemporary twist on a timeless style. The real magic happens with the subtle gold accents and tiny 3D bow nail Design, which adds texture and visual interest without overwhelming the overall aesthetic. It’s a refined way to incorporate Christmas bow nails into your look, proving that festive can also be incredibly Simple and chic.
⭐ Hero Product
Begin with perfectly shaped nails and a clean, neutral sheer pink or nude base coat. Once dry, carefully apply your red French tips using a steady hand or nail guides for a crisp, clean line. For the gold accent, a thin strip of gold polish or a delicate gold foil sticker along the tip line works wonders. Attach a small 3D bow charm with nail glue or a thick clear topcoat, securing it firmly. Finish with a high-gloss topcoat, being careful not to obscure the 3D element.
16. Sparkling Red Gift Bow Almond Nails
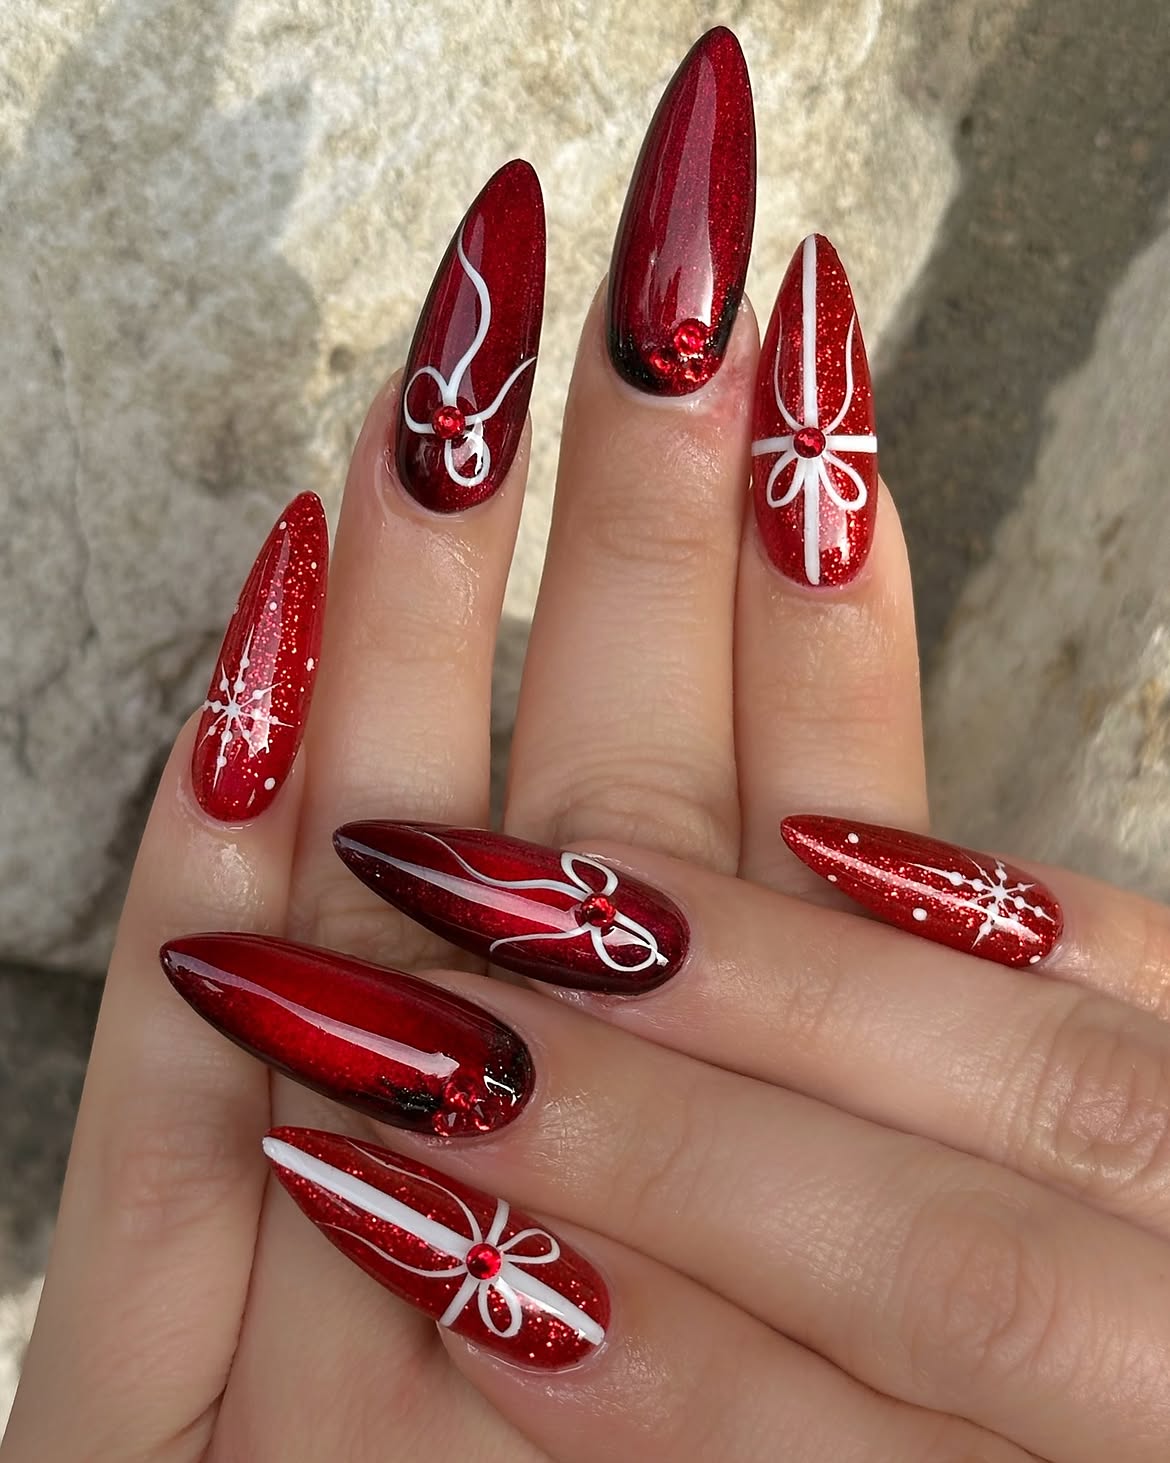
Transform your nails into tiny, sparkling presents with this utterly enchanting and festive look! This manicure celebrates the joy of giving, featuring dazzling Red glitter nails that truly shimmer, reminiscent of beautifully wrapped holiday gifts. The focal point is intricate white ribbon Art, cleverly designed to resemble a bow, often adorned with a tiny jeweled accent for an extra touch of glamour. It’s one of the most delightful Ideas for long almond-shaped nails, creating an undeniably Cute and playful statement for the Christmas season.
📏 Occasion Fit
Start by shaping your nails into a sleek, elongated almond. Apply two to three coats of a vibrant red glitter polish, ensuring full coverage and intense sparkle. Once thoroughly dry, use a fine nail art brush and opaque white polish to create the ‘ribbon’ effect, outlining the bow shape across the nail. For a truly jeweled accent, place a small rhinestone or pearl at the center of the bow while the topcoat is still wet. Seal the entire design with a clear, high-shine topcoat for protection and brilliance.
17. Festive Gold Bows and Holly Christmas Nails
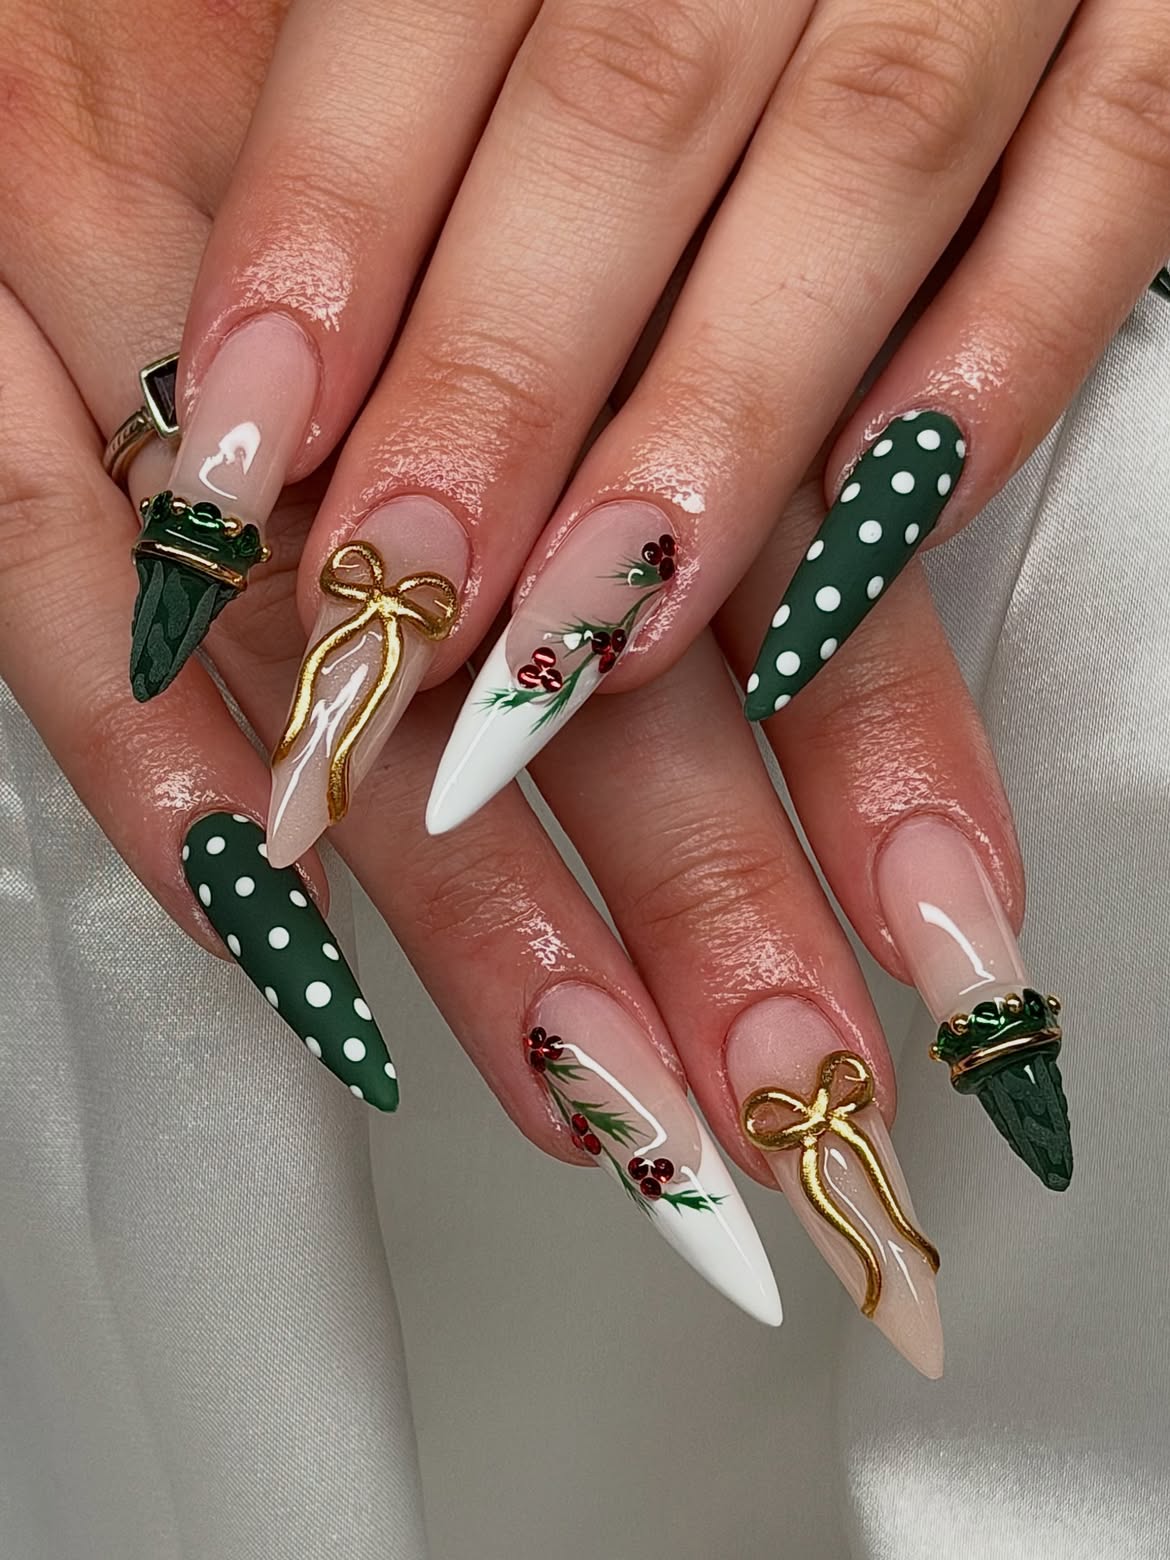
This glamorous and whimsical nail Design perfectly captures the festive spirit of Christmas with a touch of elegance. Featuring delicate gold bows, often paired with classic holly Art and playful polka dot accents, this look is a celebration of holiday cheer. The vibrant Green of the holly berries beautifully complements the shimmering gold, creating a rich and luxurious palette. It’s a fantastic option for longer stiletto-shaped nails, offering ample canvas for these intricate Christmas bow nails that truly stand out.
📐 Colour Math
For this bold design, start with well-prepped stiletto nails, perhaps a rich cream or a deep forest green base. Use a fine brush for the holly leaves in varying shades of green, then add small red dots for berries. For the gold bows, you can use a metallic gold polish for freehand designs or opt for gold nail stickers for a more intricate, symmetrical look. Play with polka dot accents in white or gold on a few nails to add a playful touch. Finish with a durable topcoat to protect your festive masterpiece.
18. Red Ombre Almond Nails with Rhinestone Bows
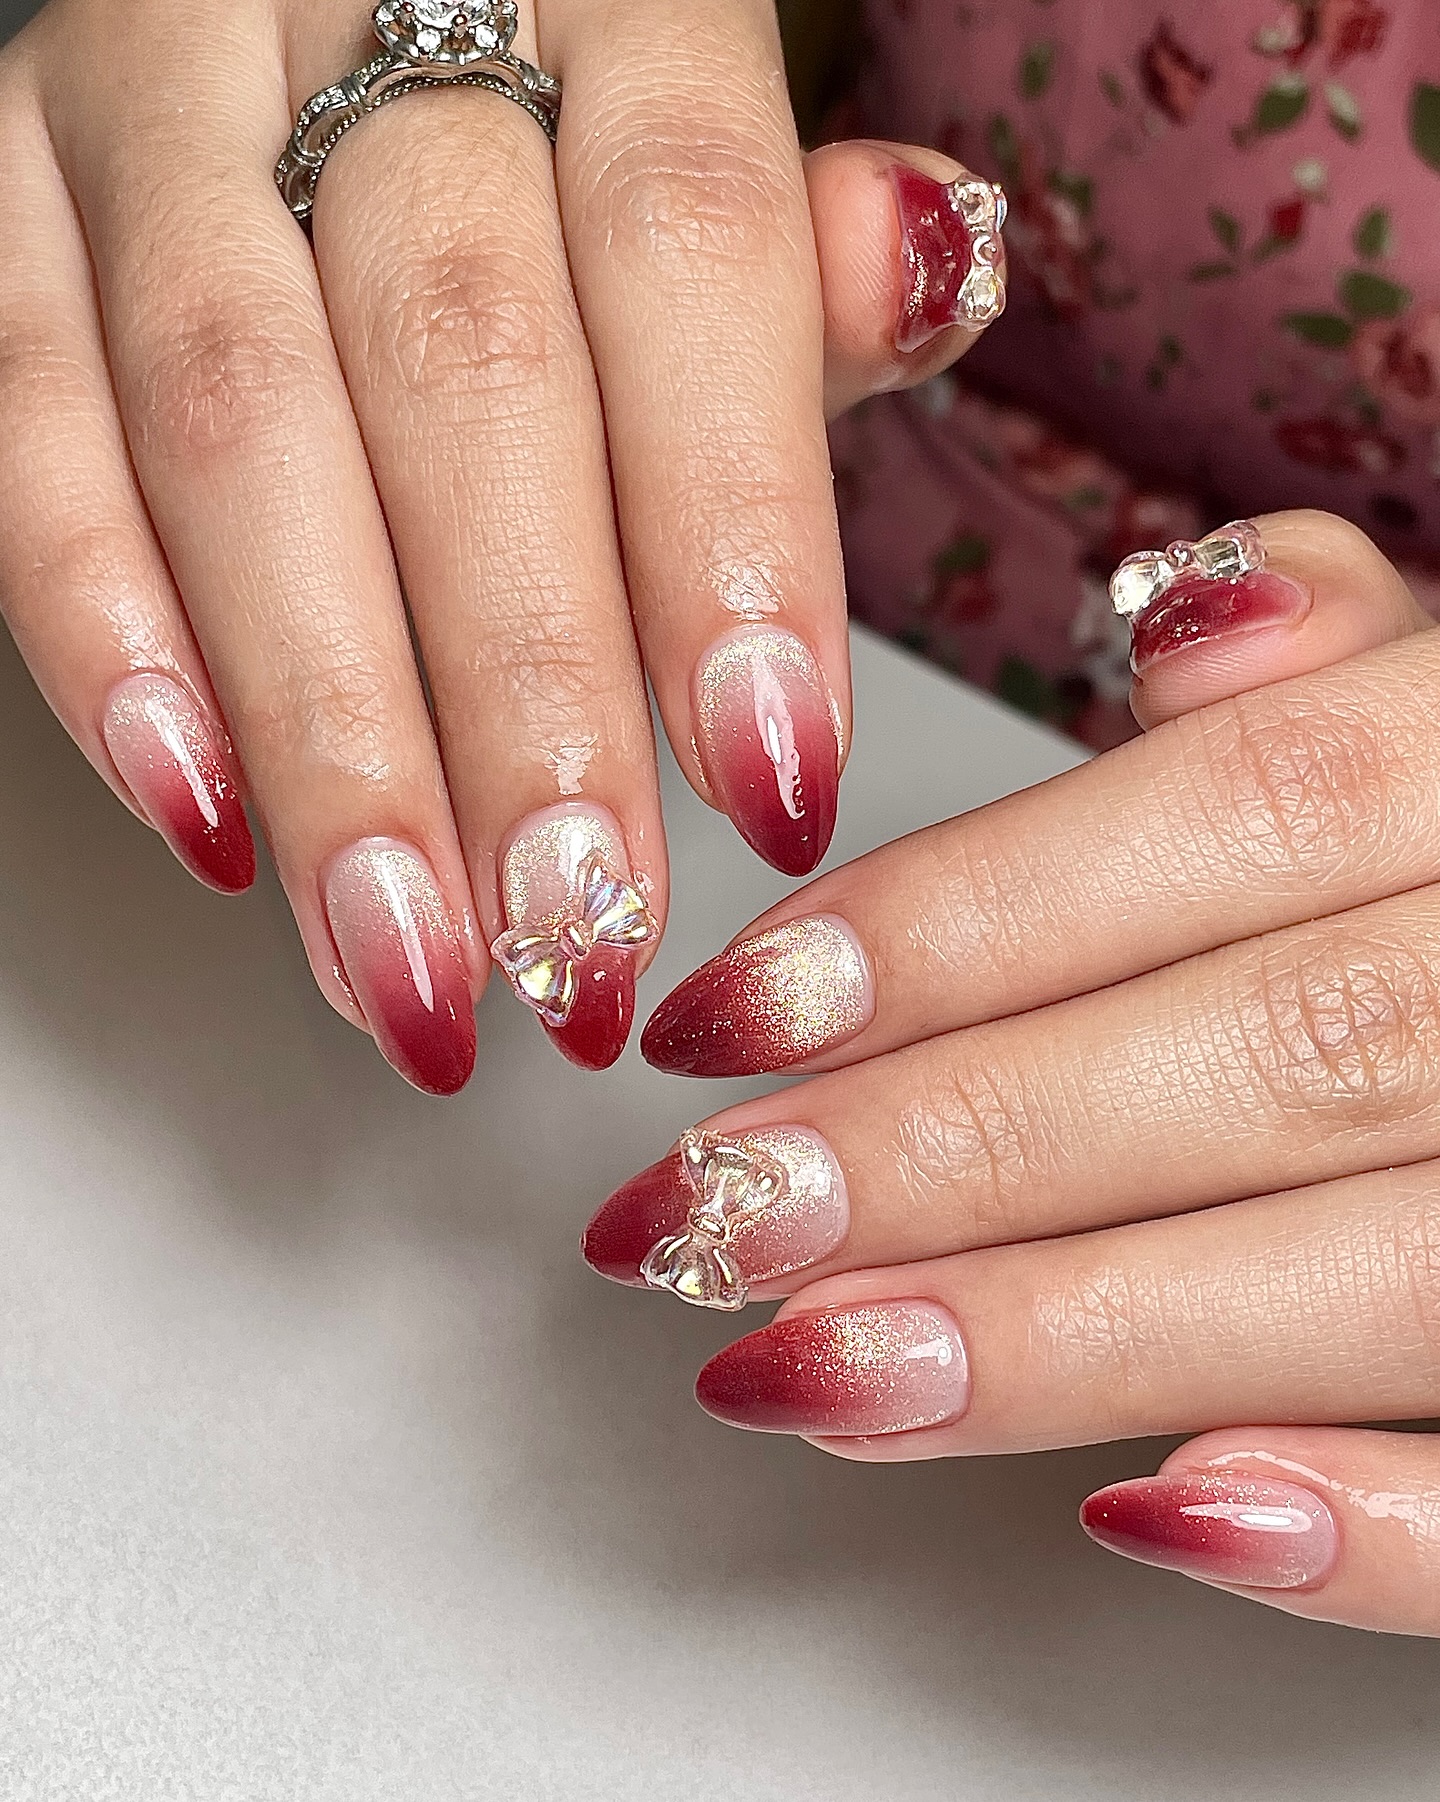
Dive into a gradient of holiday cheer with this stunning Red ombre nail Design, perfect for adding a sophisticated yet festive touch to your look. The smooth transition from a lighter tone, possibly leaning into a soft Pink at the base, to a deep, rich red at the tips creates an elegant visual flow. Each nail is then adorned with delicate rhinestone bows, adding a luxurious sparkle that elevates the entire manicure. It’s one of the most glamorous Ideas for almond-shaped nails, finished with a high-gloss sheen that catches every light.
🧹 Wear Reality
Begin by shaping your nails into a smooth almond. Apply a base coat, then use a makeup sponge to dab on your red ombre, blending from a lighter shade near the cuticle to a deeper red at the tip. For a softer transition, you can incorporate a touch of pink into the base gradient. Once dry, carefully place small rhinestone bows onto the desired nails using nail glue or a clear topcoat, securing them firmly. Finish with a thick, glossy topcoat to smooth out any texture from the rhinestones and seal the design.
19. French Tip Nails with Gold Bow Accents
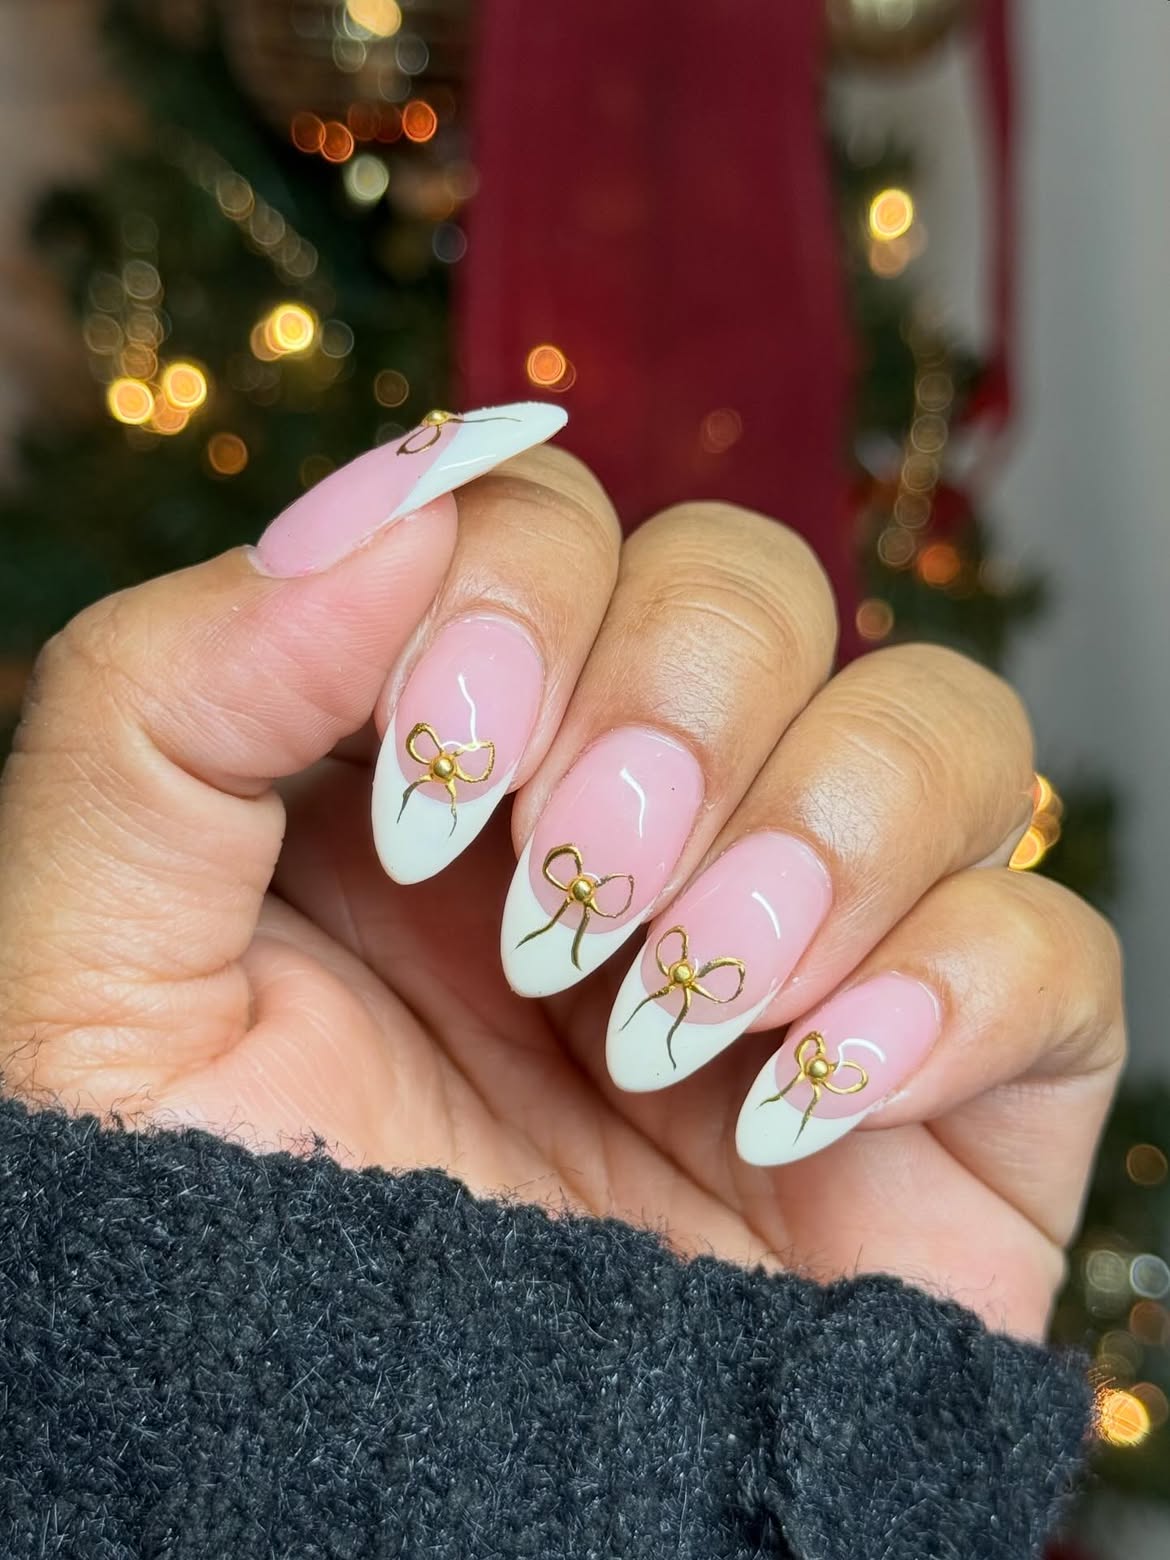
This elegant and surprisingly Simple manicure brings a touch of understated glamour to your festive season. The timeless French tip, often with a classic pink or nude base, is given a luxurious holiday update with delicate gold bow accents. While beautiful on almond shapes, this versatile look can also be adapted to flatter Square or even Short nails, providing a refined approach to Christmas bow nails. The gold elements can be subtle charms or intricately painted details, adding a sophisticated sparkle without being overly flashy.
✅ Before You Start
Start with immaculately clean and shaped nails; a classic soft square or a neat short oval works beautifully for this look. Apply a sheer pink or nude base. Carefully create your French tips using white or a soft ivory polish. Once dry, use a fine brush and metallic gold polish to paint small, delicate bows at the base of the French tip or near the cuticle. Alternatively, tiny gold bow nail charms can be applied with a dot of nail glue for an instant elegant touch. Seal everything with a high-gloss topcoat.
20. Candy Cane Bow French Tip Christmas Nails
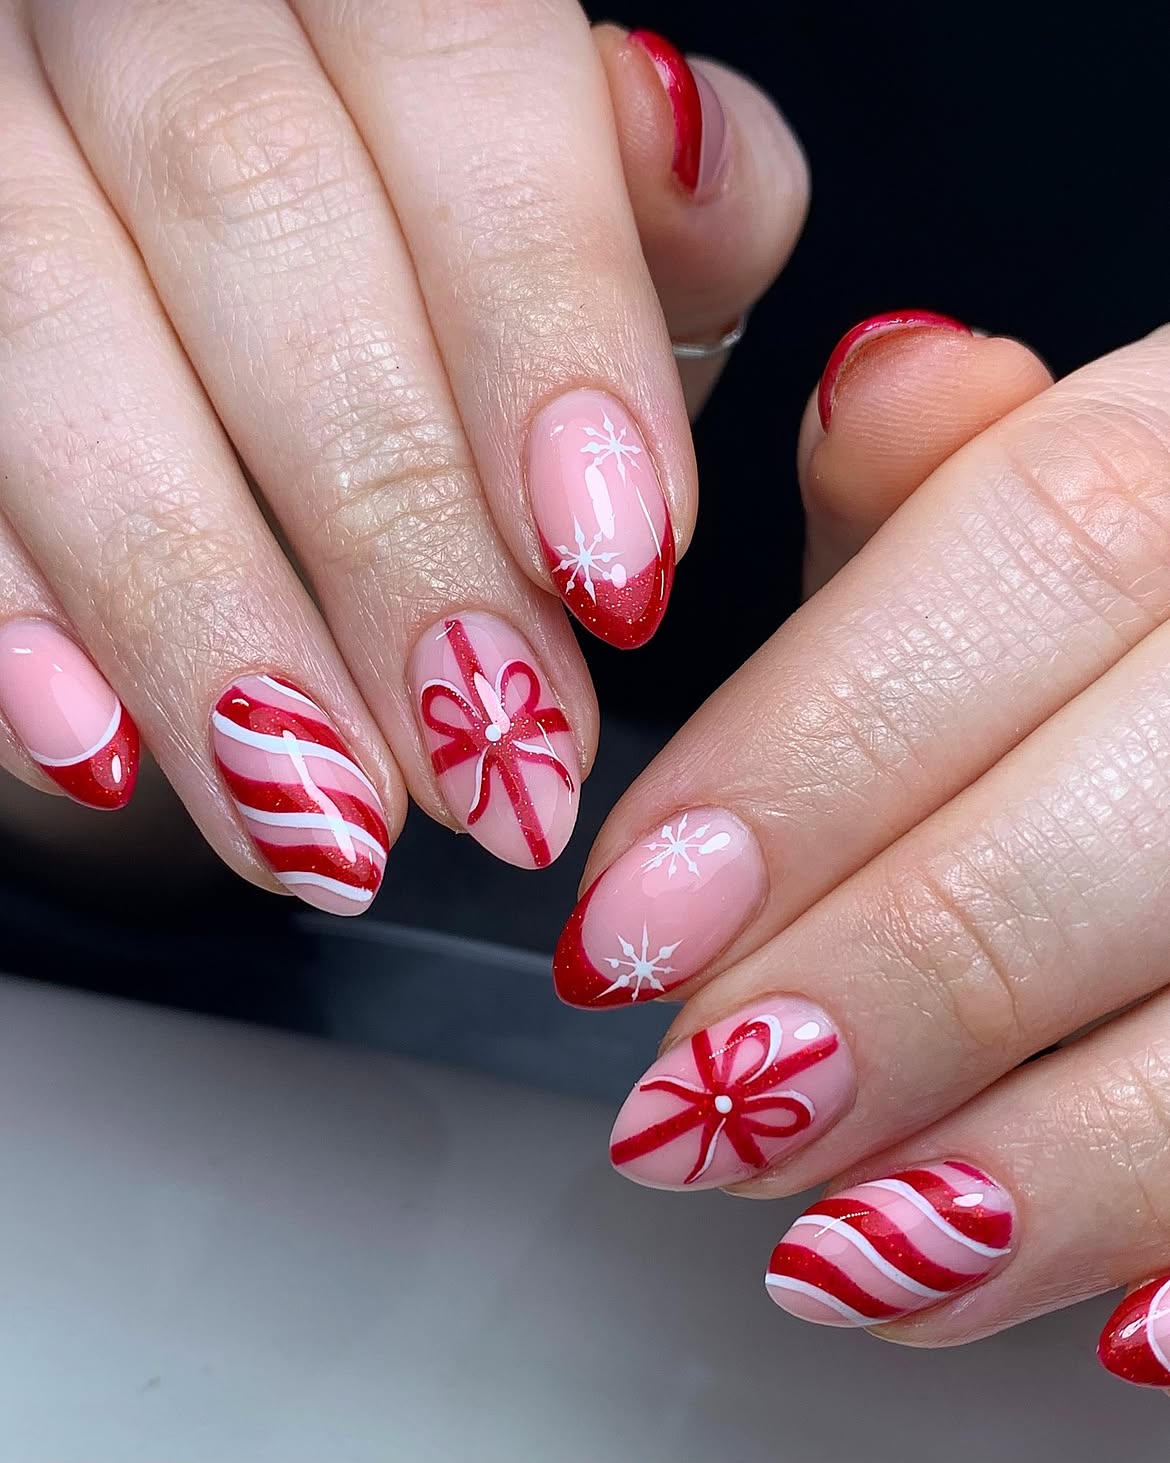
Get ready for a burst of holiday cheer with this incredibly playful and Cute nail Art, guaranteed to bring smiles! This festive Design transforms the classic French tip into a candy cane dream, featuring bold red tips adorned with delicate white stripes, mimicking the beloved holiday treat. A charming Christmas bow adds the perfect focal point, sometimes complemented by tiny snowflake details, creating a truly whimsical look. It’s one of the most joyful Ideas for oval-shaped nails, capturing the fun and magic of the season.
🔧 How-To Brief
Begin with well-prepped oval nails and a clear or sheer nude base coat. Once dry, create your vibrant red French tips, aiming for crisp, even lines. Using a very fine striper brush and opaque white polish, carefully paint thin stripes across the red tips to create the candy cane effect. Next, use a contrasting polish or a nail decal to add a small bow to the accent nail. For an extra festive touch, dot tiny white snowflakes around the bows. Seal your cheerful creation with a protective, high-shine topcoat.
21. Sparkling Gold and Red Christmas Bow Nails
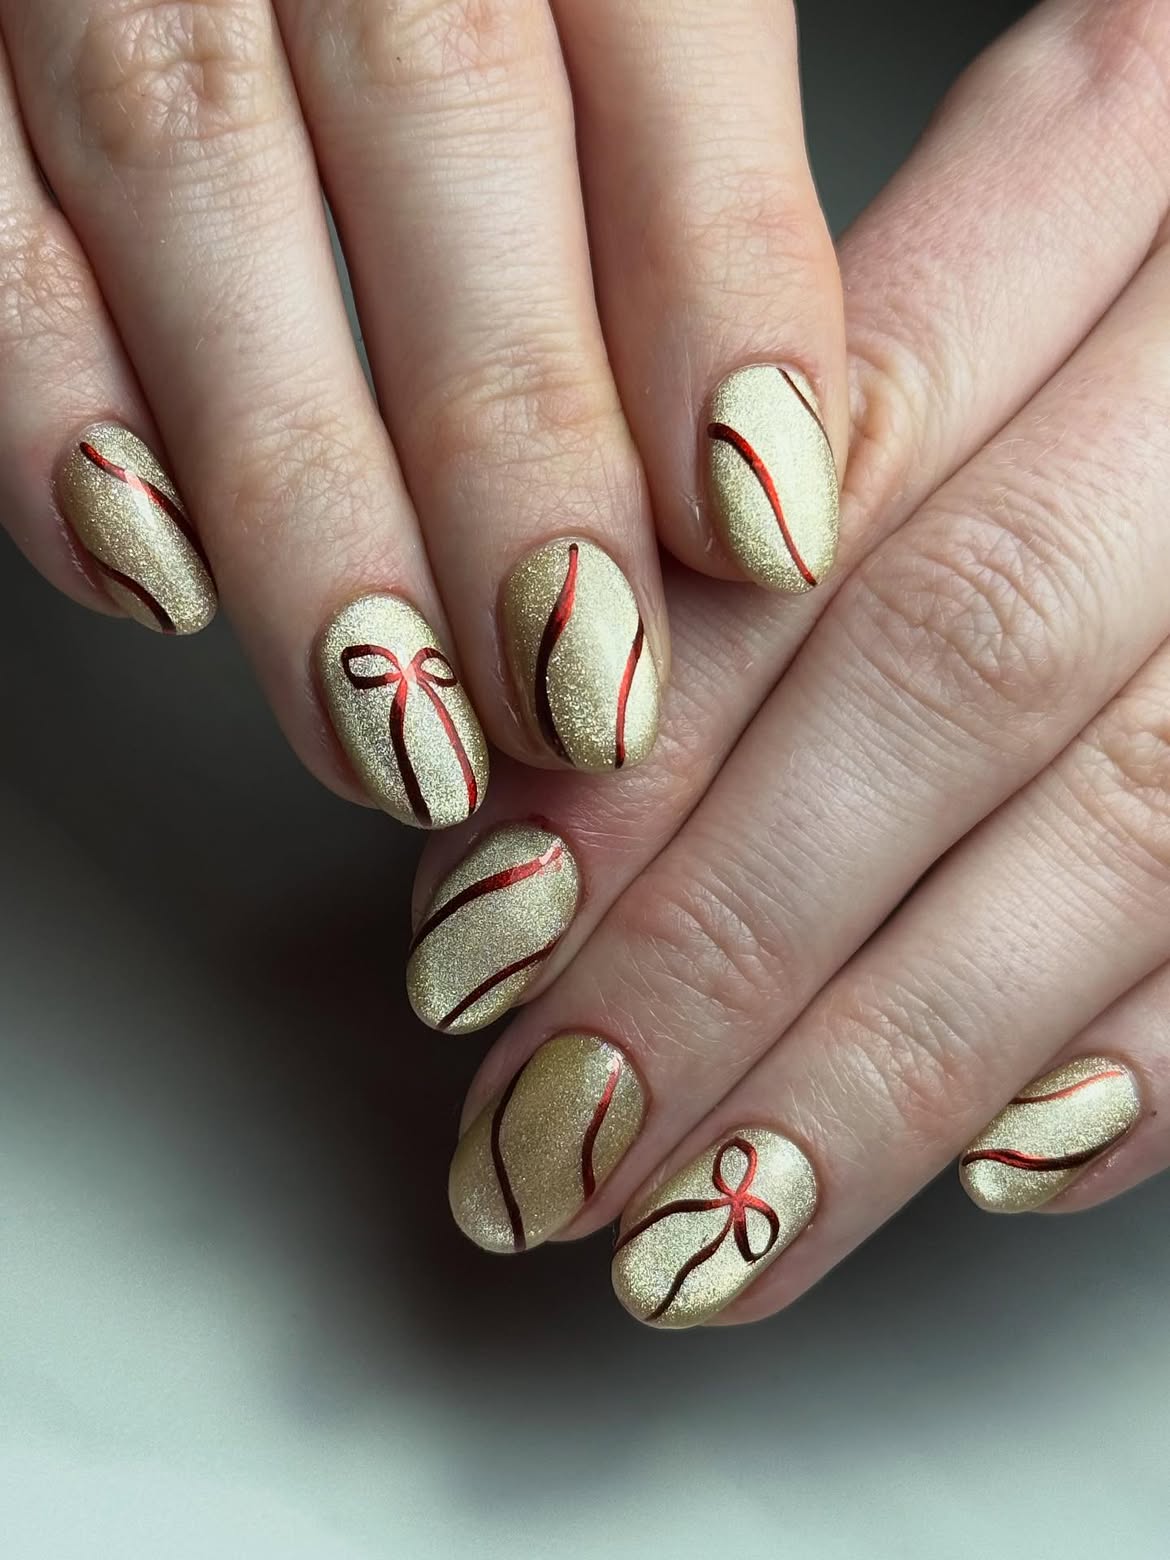
Kick off the festive season with a manicure that truly captures the magic of Christmas! These dazzling Christmas bow nails combine the opulent shimmer of gold glitter with vibrant ruby Red bow Art, creating a show-stopping look perfect for any holiday gathering. The intricate Design, often featuring tiny hand-painted bows or delicate embellishments, transforms your nails into miniature works of festive wonder. This look is all about sophisticated sparkle, bringing a luxurious touch to your fingertips that’s both playful and undeniably chic.
💸 Dupe Alternative
To achieve this glamorous style, start with a base coat, then apply a rich red polish, ensuring even coverage. Once dry, use a fine nail art brush and gold glitter polish or gel to create a sparkling French tip or a subtle gradient. For the bows, you can either paint them freehand with a contrasting red or gold, or use tiny nail decals for precision. Finish with a high-shine top coat to seal in your beautiful Art and add extra durability, making sure your festive glam lasts throughout the celebrations. Consider an oval or almond shape to enhance the elegant feel.
22. Burgundy Bow Accent Almond Nails
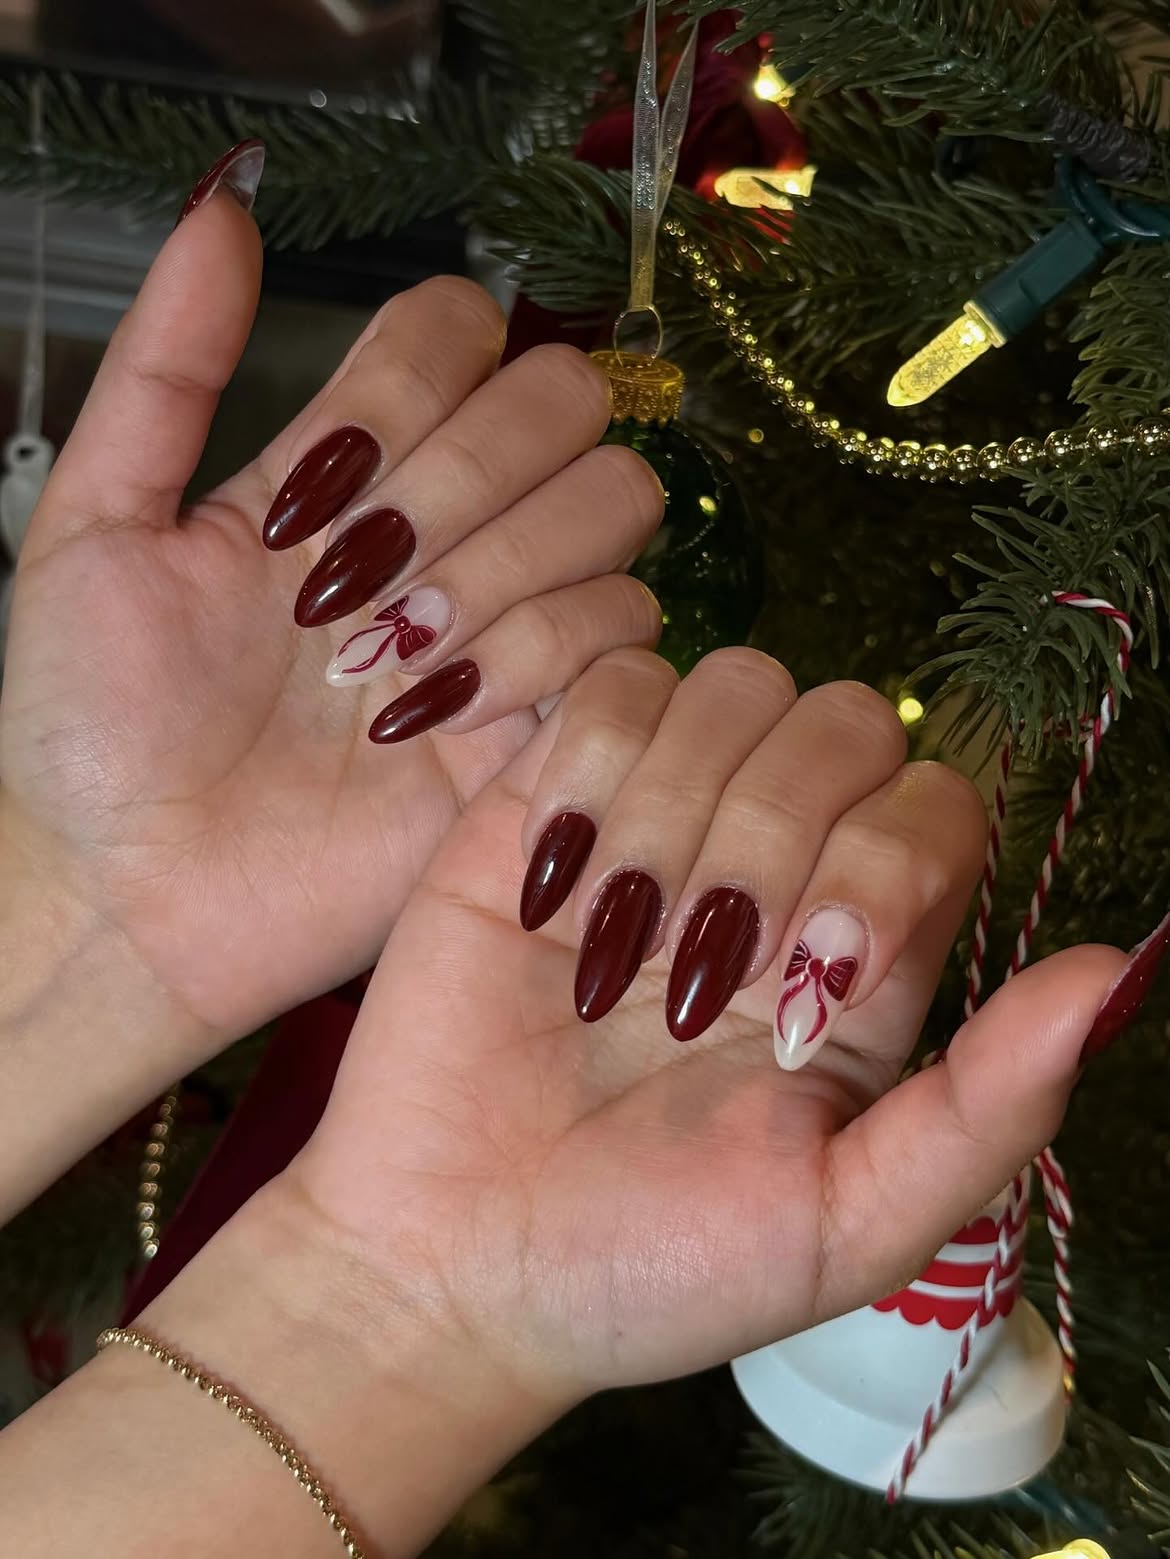
For those who prefer a more understated elegance, the deep burgundy almond nails with a subtle bow accent are an absolute dream. This sophisticated look takes the traditional holiday palette and softens it, offering a refined yet festive vibe. A single accent nail, often on the ring finger, features a meticulously placed tiny bow, adding a delicate focal point without overwhelming the rich, vampy base color. It’s a perfect blend of modern chic and timeless holiday charm, ideal for anyone seeking a more mature and polished holiday manicure. This Simple approach to Red tones provides fresh Ideas for your holiday season.
🎯 Who It Suits
Begin by shaping your nails into a graceful almond shape. Apply two coats of a luxurious burgundy polish, allowing each layer to dry completely for an opaque finish. For the bow accent, opt for a minimalist approach: either paint a tiny, perfectly formed bow with a fine brush in a contrasting metallic like gold or silver, or apply a pre-made nail charm. This style can even work beautifully on Short nails, maintaining its elegant appeal. Seal with a glossy top coat to enhance the depth of the burgundy and ensure your delicate bow stays put, offering a sleek and enduring holiday statement.
23. Elegant Silver Bow Almond Nails
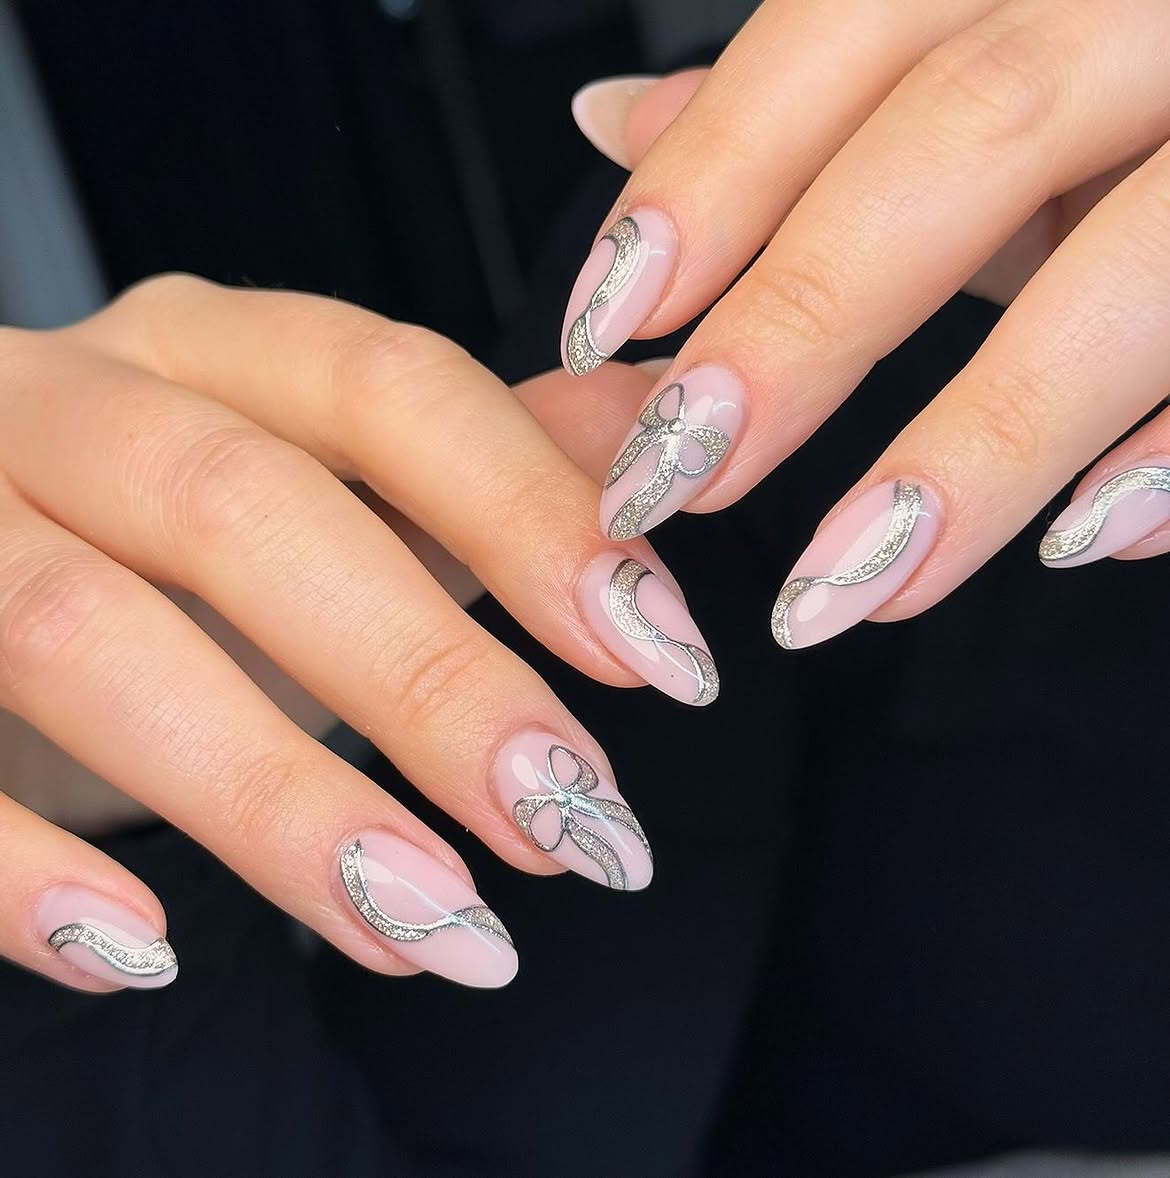
Embrace a refined holiday aesthetic with elegant nude almond nails adorned with shimmering silver bows. This look is pure sophistication, featuring a sheer or soft Pink-toned nude base that provides a delicate canvas for the sparkling silver accents. The tiny bow, often crafted with metallic polish or a small charm, adds a touch of understated glamour that feels both festive and incredibly chic. It’s a versatile Design that works beautifully for any holiday occasion, from cozy family gatherings to sophisticated New Year’s Eve parties. The subtle shimmer makes these nails feel undeniably Cute, without being overly flashy. Consider a slightly more squared-off almond or ‘squoval’ shape for a modern edge if you prefer less pointed tips.
🔥 Trending Context
Start with clean, prepped nails, then apply a natural nude or sheer pink base coat, building up thin layers for an even, flawless finish. Once dry, use a fine detail brush and silver metallic polish to carefully paint small bows on one or two accent nails. Alternatively, apply delicate silver bow decals or charms for an even easier application. You can also incorporate a delicate glitter outline around the bow for extra sparkle, as seen in some more intricate variations. A high-gloss top coat will not only protect your elegant Design but also enhance the reflective quality of the silver, ensuring your festive nails catch the light beautifully. If you loved the subtle elegance of the deep burgundy bows in our second idea, this silver variation offers a lighter, equally chic alternative for your holiday season.
- Ensure nails are clean and buffed for optimal polish adhesion.
- Always use a quality base coat to prevent staining and promote longevity.
- Apply thin, even coats of polish, allowing each layer to dry completely.
- Invest in fine detail brushes for precise bow designs or intricate patterns.
- Finish with a high-quality top coat for shine and protection, reapplying every few days if needed.
24. Gold Glitter French Bow Accent Nails
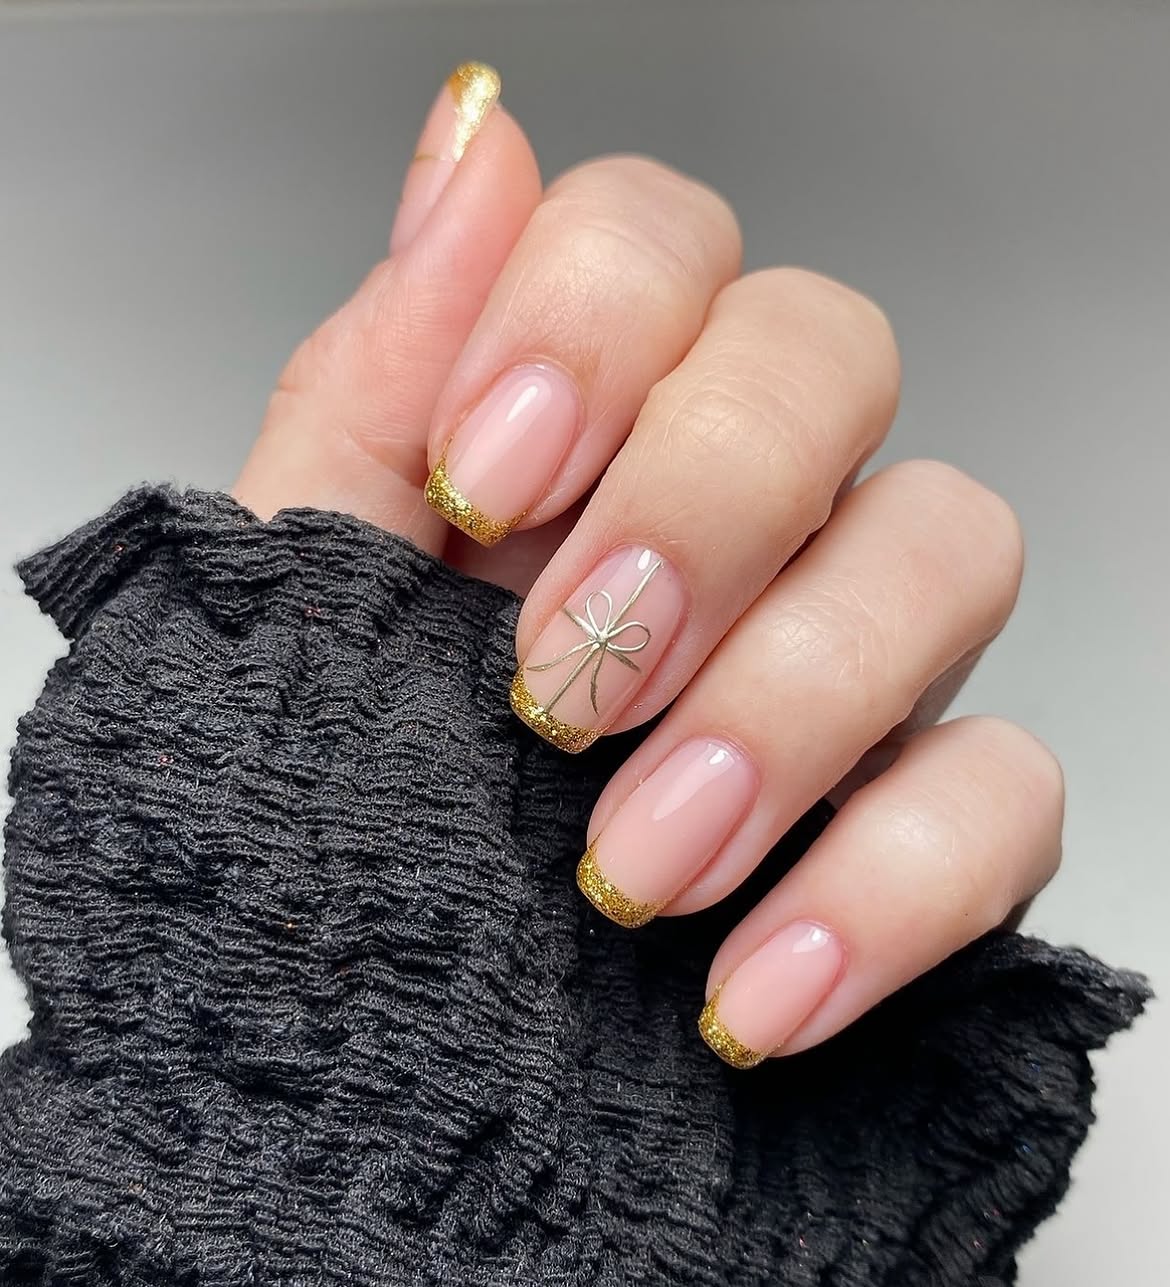
Merge classic sophistication with holiday sparkle by opting for gold glitter French tips accented with delicate bows. This stunning style reimagines the timeless French manicure with a festive twist, swapping the traditional white tip for a dazzling stripe of gold glitter. The addition of a dainty bow, often on the ring finger, elevates the look, making it perfect for celebrating the season. It’s a gorgeous way to wear Christmas bow nails that feel both refined and celebratory, offering a subtle nod to the holidays without being overtly themed. This elegant Art form is surprisingly versatile, looking chic on both longer and more Short nail lengths.
⚠️ Common Concerns
To create this chic holiday manicure, begin with a clear or nude base coat. Once dry, carefully apply a strip of gold glitter polish to the tips of your nails, mimicking the classic French tip shape. For precision, you can use nail art stencils or a steady hand. For a touch of contrast, consider incorporating a tiny hint of Green into your bow or a subtle accent. Once the glitter is dry, add your tiny bow; this can be painted freehand with a fine brush using gold, silver, or even a deep red for contrast. For a truly professional finish, seal everything with a durable, high-gloss top coat. This style pairs beautifully with the simple burgundy bow accent idea from earlier, offering another fantastic option for sophisticated holiday nail art.
- Practice French tips on a practice wheel or using nail guides for perfect lines.
- When using glitter polish, build up thin layers for maximum sparkle without bulk.
- For tiny bows, use a dotting tool or the tip of a toothpick if a fine brush isn’t available.
- Don’t rush the drying process between coats to avoid smudges.
- Consider a matte top coat over the base color and glossy over the tips for a unique texture contrast.
25. Festive Red and Green Bow Almond Nails
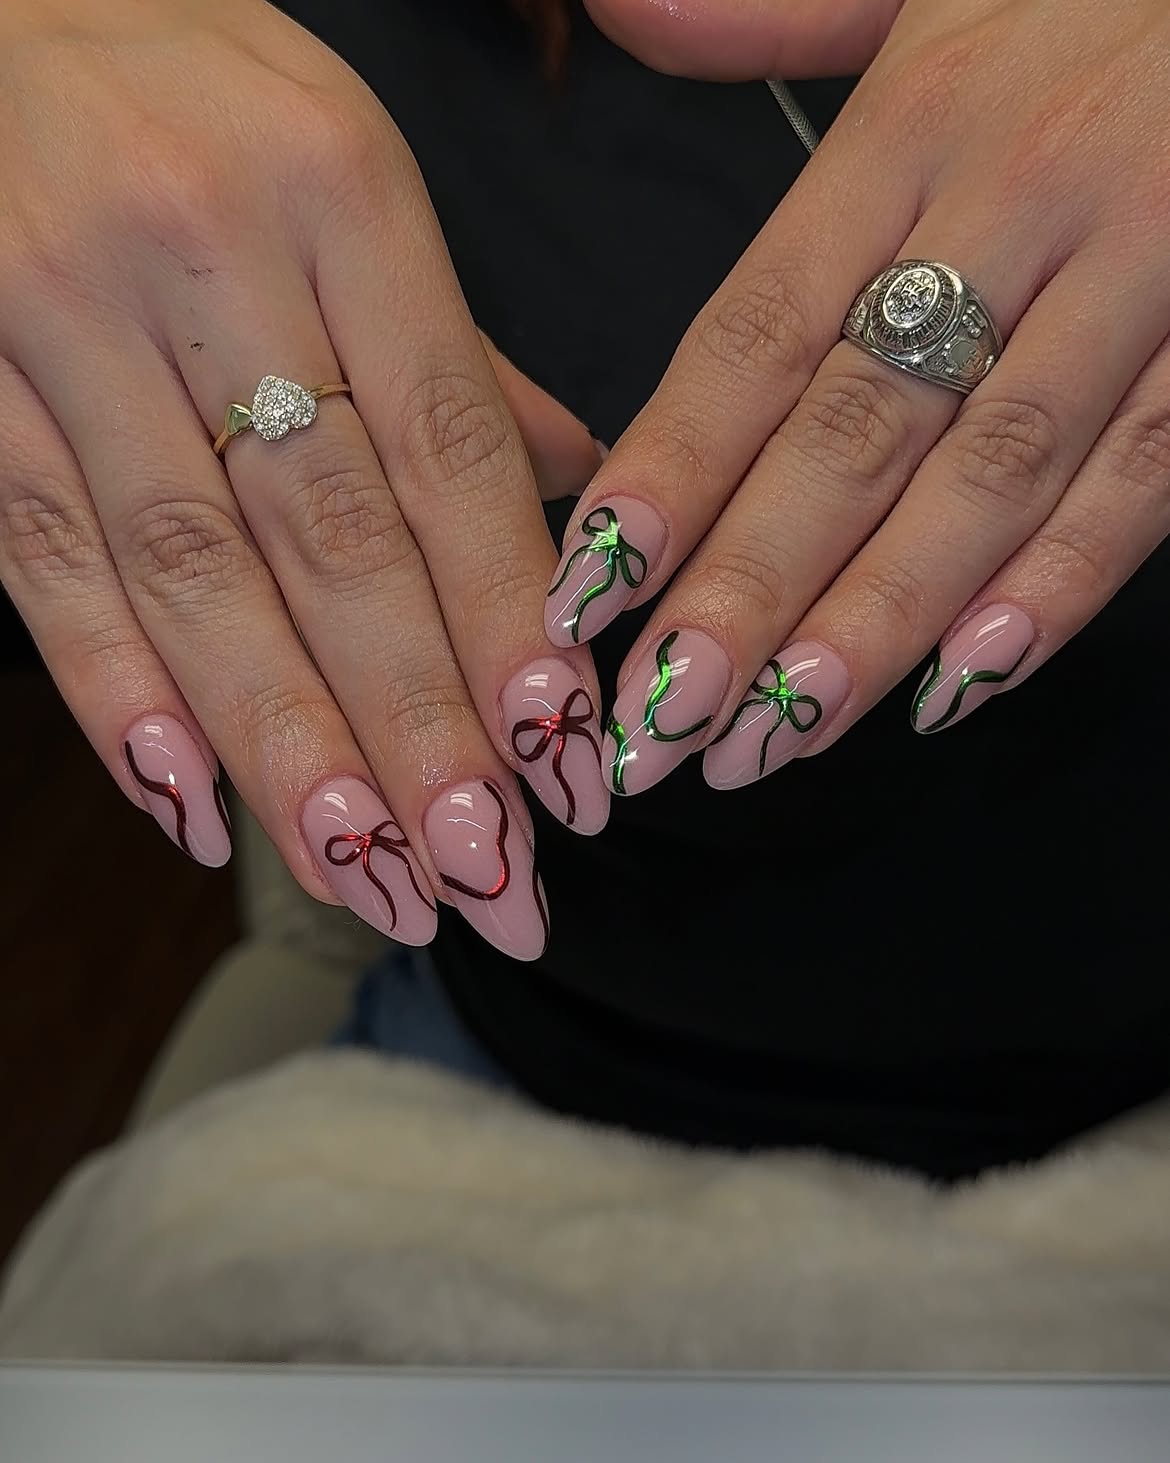
Embrace the quintessential spirit of the holidays with festive Red and Green bow almond nails. This classic color combination instantly evokes warmth and cheer, making it a beloved choice for holiday manicures. Imagine vibrant red nails adorned with tiny green bows, or vice versa, creating a playful yet polished look that’s perfect for any Christmas celebration. These Christmas bow nails are incredibly versatile, offering countless Ideas for placement and style, from scattered bows to a single statement accent. It’s a joyful and traditional way to show off your holiday spirit on your fingertips!
💰 Product Breakdown
Achieving this cheerful look starts with shaping your nails into a soft almond. Apply two even coats of your chosen base color, either a vibrant red or a deep forest green. Once completely dry, use a fine nail art brush and the contrasting color (red for green nails, or green for red nails) to paint delicate bows. You can choose to place a single bow on each nail, or create a pattern with multiple tiny bows. For an extra festive touch, consider adding a sprinkle of gold or silver glitter to the bow centers. Finish with a high-shine top coat to protect your design and enhance the vibrancy of the colors. If you loved the elegant red and gold bows in our first idea, this red and green version offers a more classic, equally stunning take for your holiday nails!
- Select high-quality, opaque polishes for vibrant red and green colors.
- Experiment with different shades of red (cherry, cranberry, deep berry) and green (emerald, forest, mint) to find your perfect combo.
- Consider alternating red and green as base colors on different nails for a bolder look.
- Outline bows with a metallic shade for added definition and sparkle.
- Pair with a classic holiday outfit for a cohesive and festive ensemble.
26. French Tip Bows with Polka Dots and Stripes
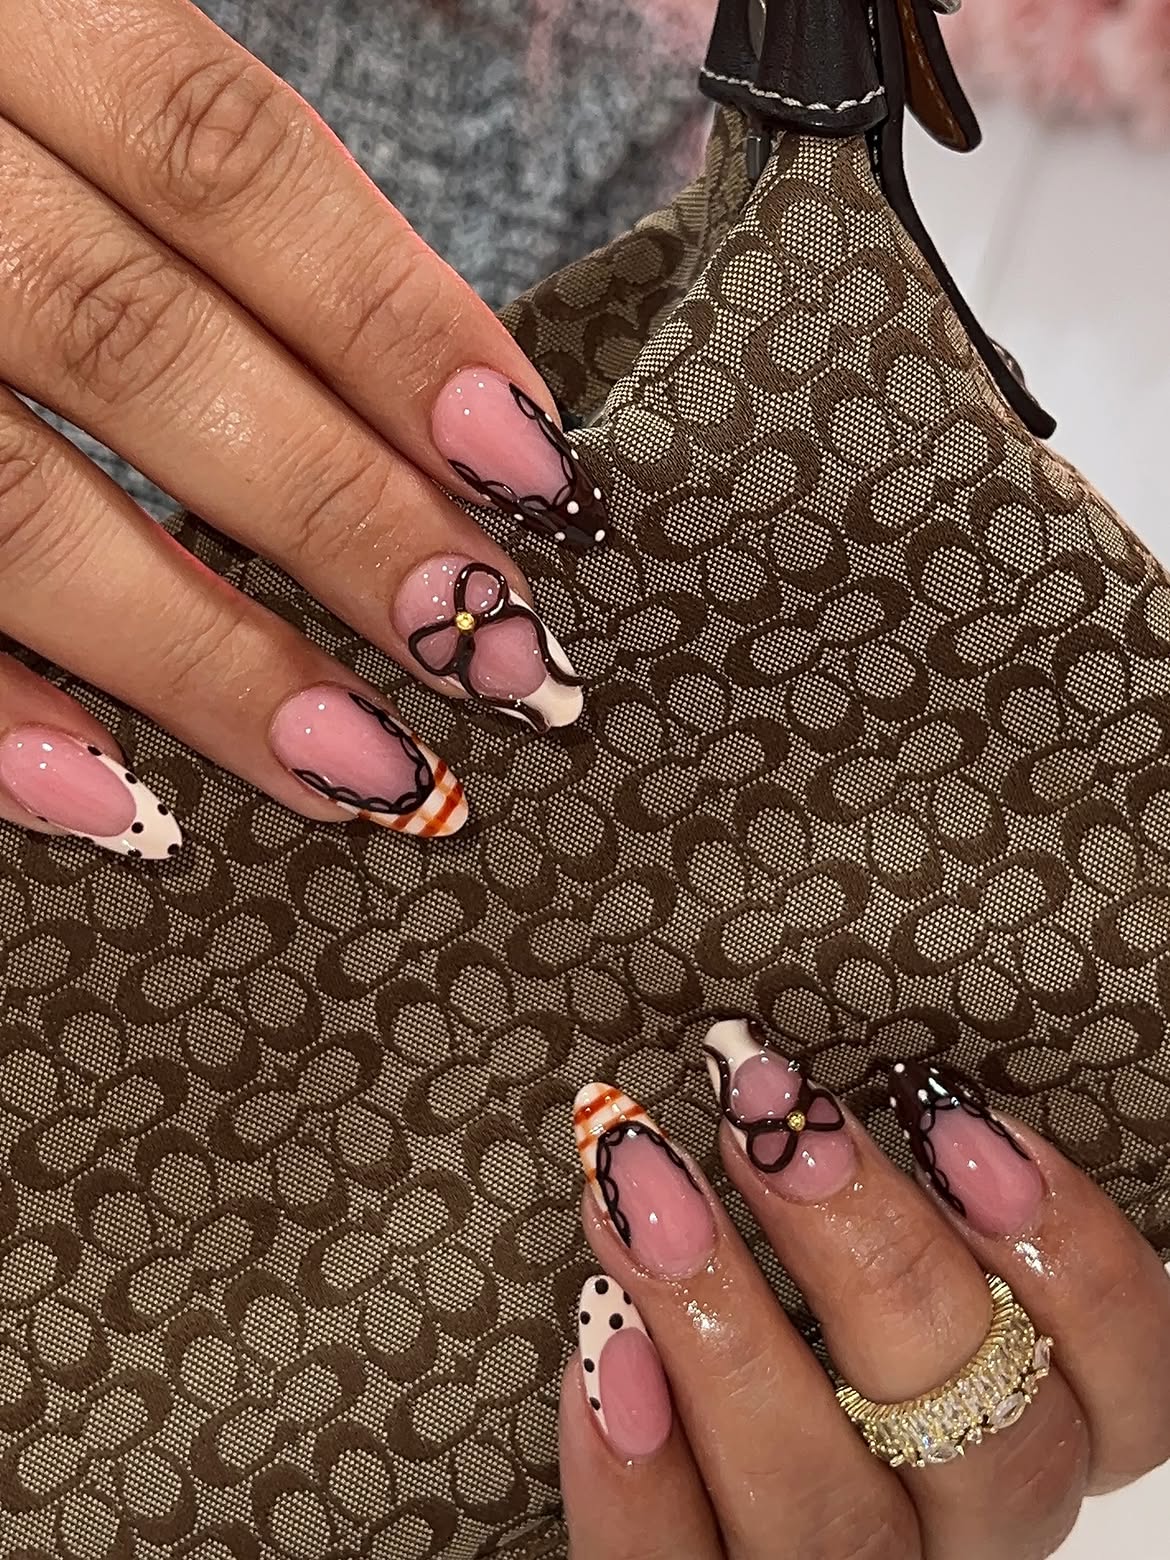
Step into the coquette aesthetic with playful French tips adorned with delicate bows, polka dots, and subtle stripes. This whimsical style takes the classic French manicure and infuses it with a trendy, youthful vibe, making it a fantastic option for those who love a bit of quirky charm. Tiny bows, sometimes 3D, are placed strategically, complemented by miniature polka dots and fine stripes, creating a captivating and unique Design. The inclusion of an unexpected color like a soft orange stripe adds an extra layer of visual interest, making this look both fashionable and incredibly Cute. Even with multiple elements, this can still be a surprisingly Simple yet impactful manicure, especially when paired with a subtle base color like a sheer Pink.
💡 Technique Tip
To achieve this intricate yet charming look, start with a natural or sheer pink base on almond-shaped nails. For the French tip, you can use a classic white, a soft pastel, or even a subtle glitter, as seen in our gold glitter French idea. Once the tip is dry, use a fine nail art brush and contrasting colors to add small polka dots and delicate stripes. For the bows, you can paint them freehand in a complementary shade, or apply tiny 3D bow charms for an elevated texture. The key is balance – don’t overdo any one element. A clear, glossy top coat will bring all these playful elements together beautifully, sealing your intricate design and giving it a polished finish. This fun, multi-faceted design truly stands out from more traditional Christmas nail ideas.
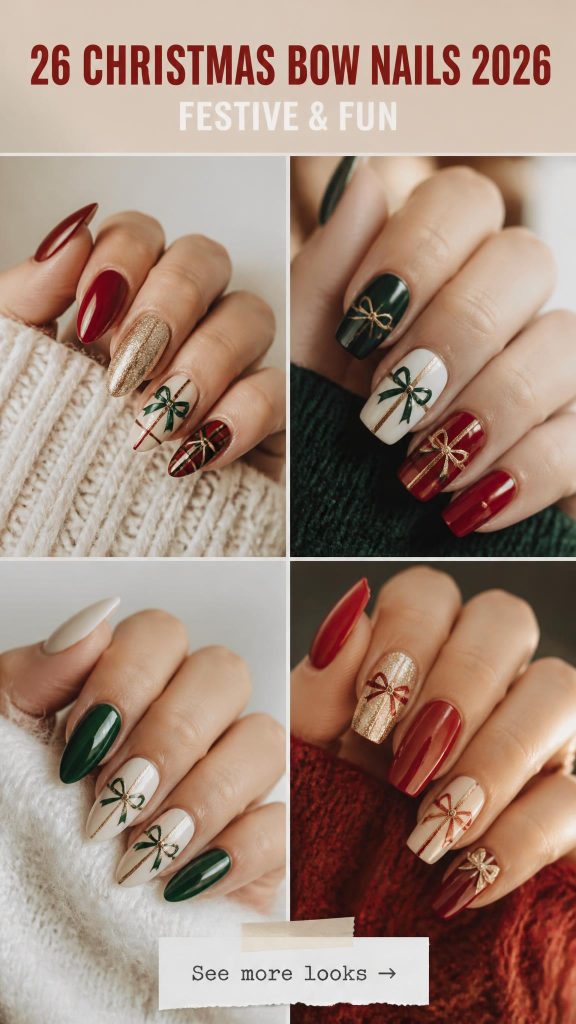
Tying Up Your Festive Look: Which Bow Will You Choose?
There you have it—26 gorgeous ways to incorporate the sweet charm of bows into your Christmas manicure this season. Whether you’re drawn to understated elegance or a vibrant, playful look, these designs are sure to add that perfect festive touch to your fingertips. Don’t forget to save your favorite ideas to Pinterest and share your stunning holiday manis with us!